Disclosure: This post may contain affiliate links. I may earn a small commission for my endorsement, recommendation, testimonial, and/or link to any products or services from this website.
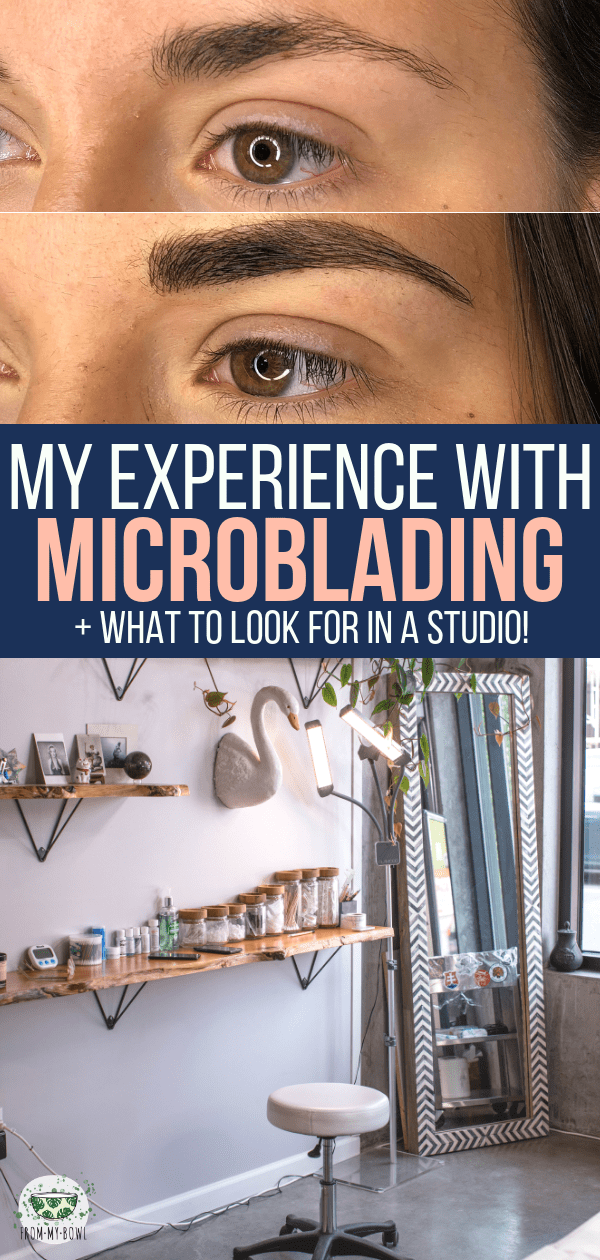
Interested in Microblading? From initial consult to procedure, healing, and after-care, here’s my experience with the semi-permanent makeup trend.
Hey there, friends! Today I’m going to take a break from the food posts to tell you a little about my experience with Microblading. Microblading is a form of semi-permanent makeup where an artists hand-draws “hair” strokes onto your brow to help re-shape and/or thicken the appearance of your brows. It’s become pretty popular over the last couple of years, so you may have heard of it before.
I’ve actually been interested in Microblading for quite some time. However, I will admit that I was a little scared about the process. When I think of Microblading and permanent makeup, I first think of poorly drawn eyebrow tattoos and horror stories. (Let’s be clear right now: this does NOT have to be the case, nor the norm!) Still, I had also seen so many positive Microblading stories. I had few friends get it done themselves and thought their brows looked fan-TAS-tic afterward. I also am very low maintenance when it comes to makeup, and like my morning routine to be as simple as possible. The only makeup I apply on a daily basis is brow filler and a little highlighter, and the thought of not having to fill in my brows every morning seemed very, very appealing 😉
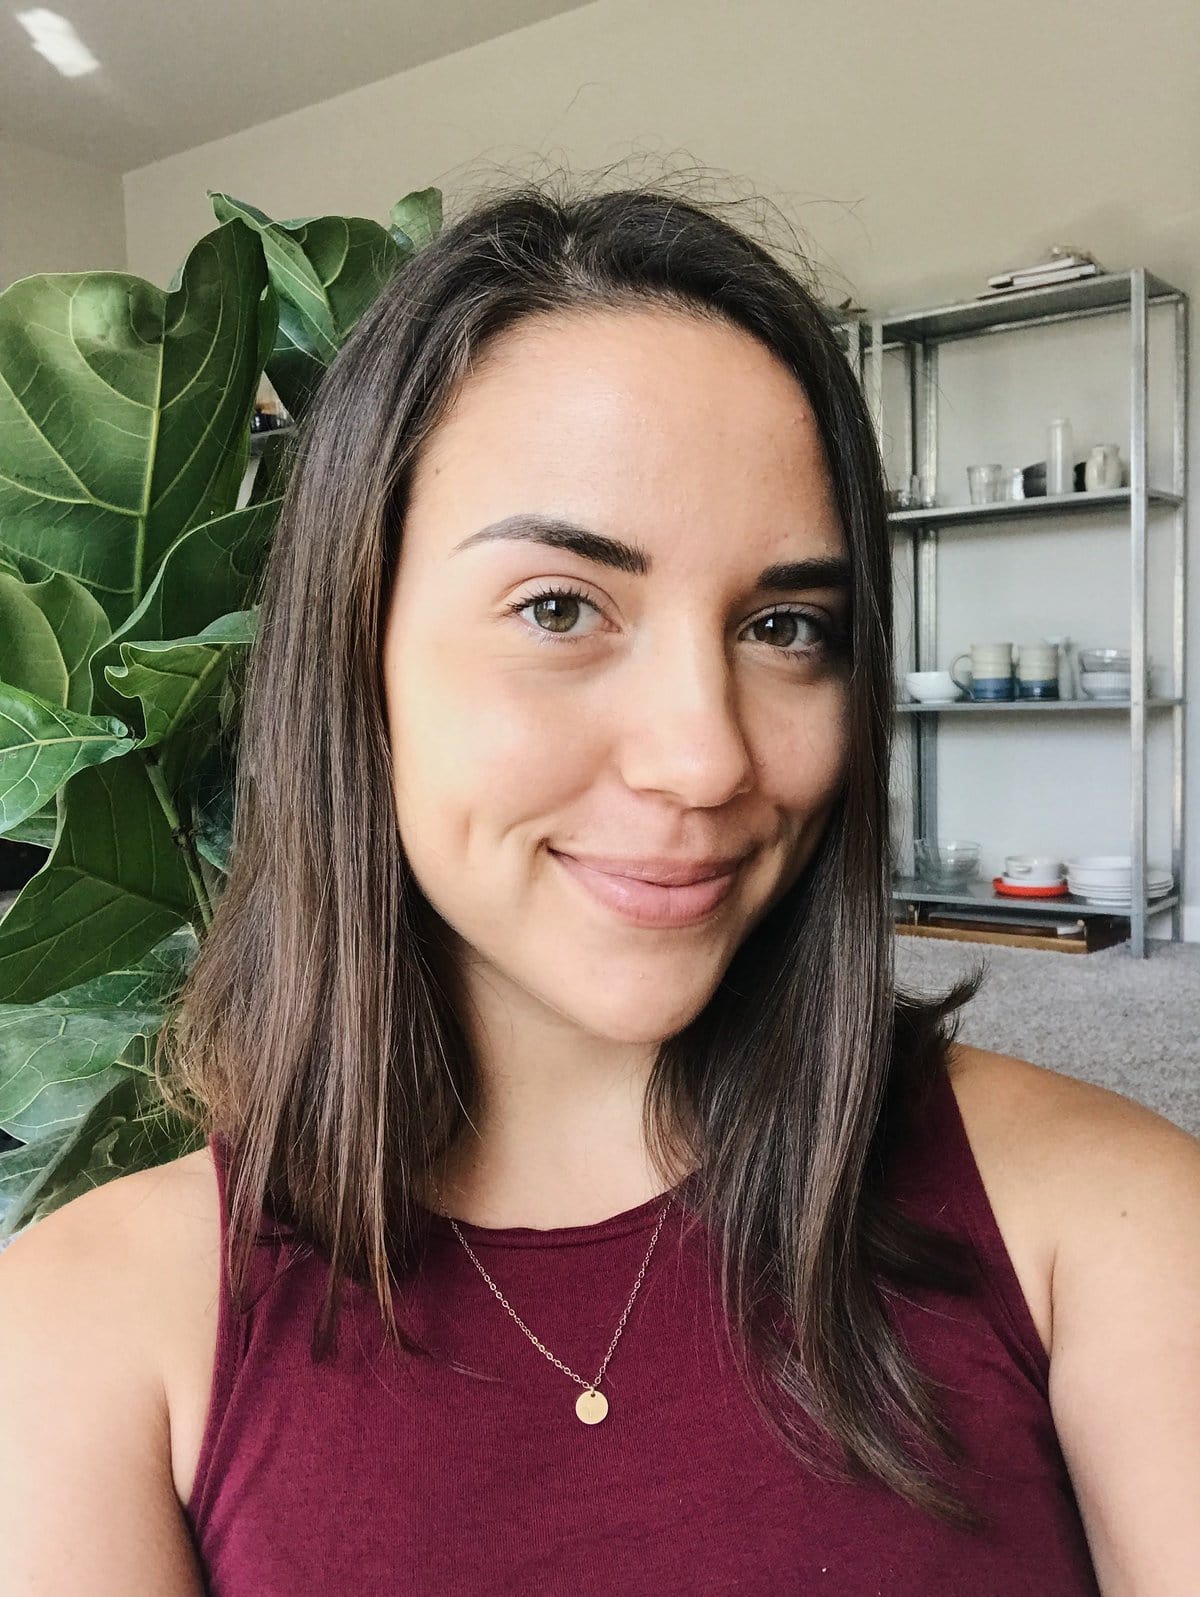
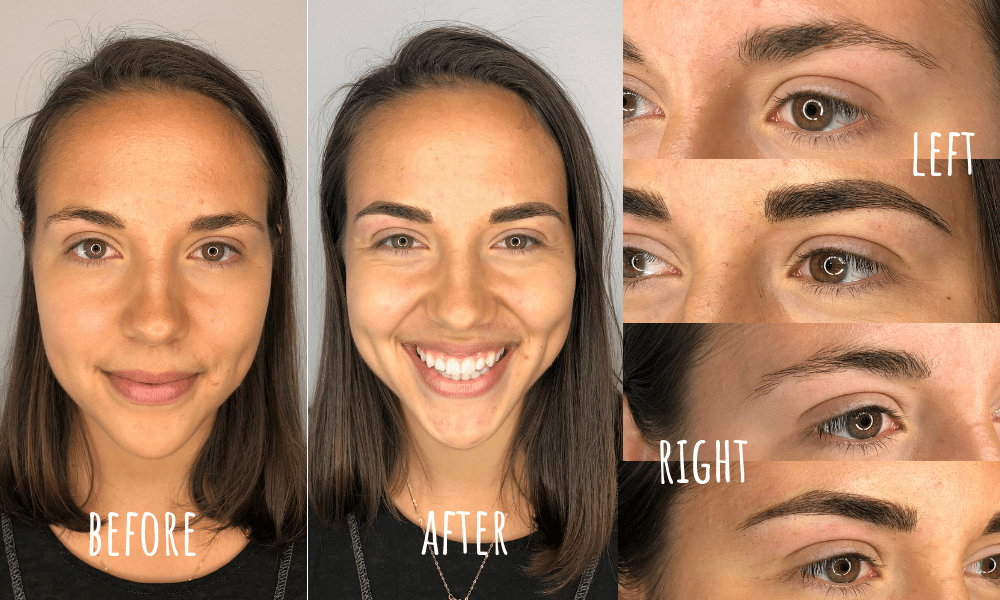
Photo of me with my completely healed brows post-Microblading. I am not wearing ANY makeup on my brows in the photo.
After doing a little research, I decided to “take the plunge” and get some brows semi-permanently tattooed on my face. Eeep! I pored over all of the Microblading clinics in the Portland Area — I wanted to go to a place that not only seemed professional, but also produced high-quality work. I saw some clinics that I liked, some that I absolutely hated, and some that I thought were just okay. I finally decided to reach out to Emily at Empress Brow and Beauty, and am SO glad that I did.
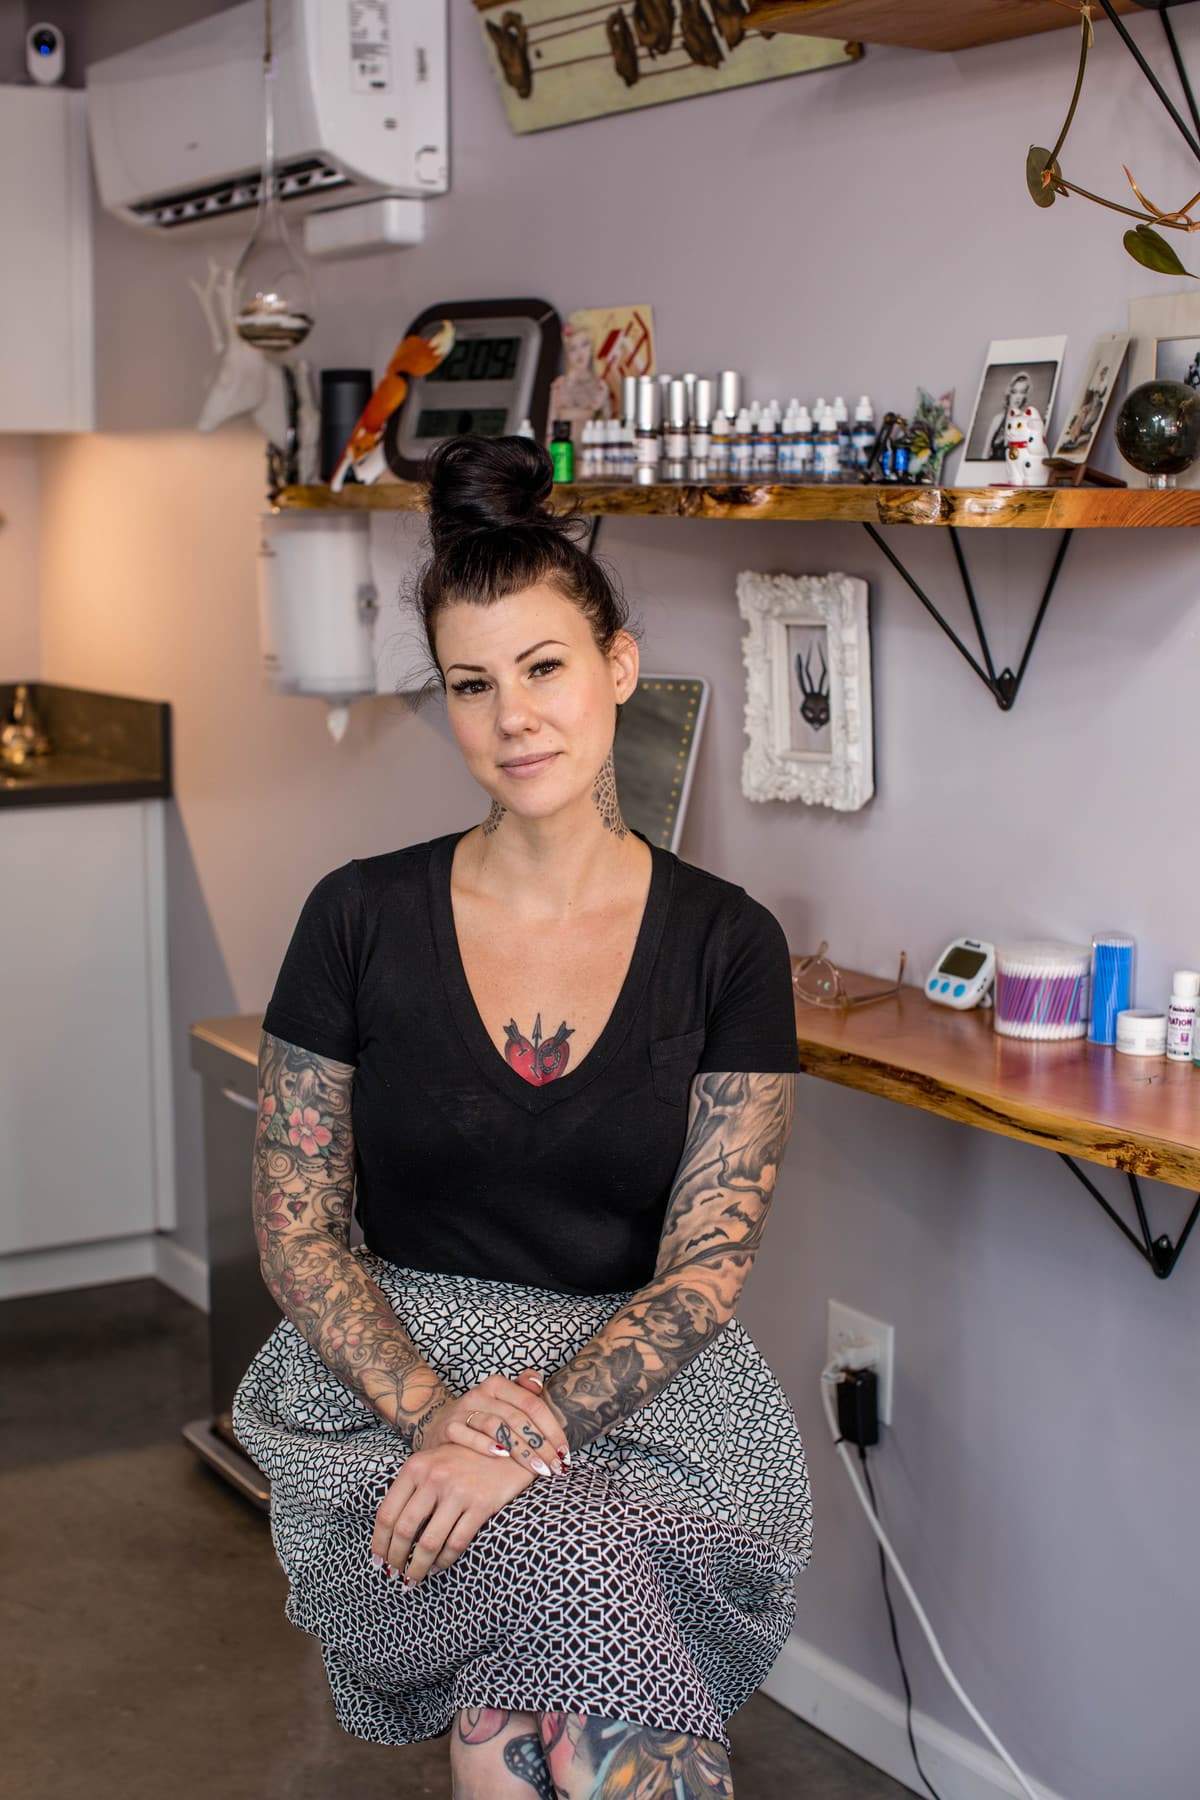
Emily has been a makeup artist for over 20 years and had been working in the tattoo industry for over a decade before she decided to become a Cosmetic Tattooer and open her own clinic here in Portland, OR in 2017. She has also received extensive continuing education with world-renowned Daria Chupry in Beverly Hills. She is incredibly knowledgeable about her craft and truly takes the time to educate each of her clients, give them advice on what procedure is best for them, and listen to her client’s desires to create a brow that they will love.
I had a lot of questions about Microblading when I first met with Emily, and she went out of her way to answer all of them — plus give me additional information that I didn’t even know about! Microblading should be a serious decision, as it is a semi-permanent tattoo that you are putting on your face. This is why I am so happy that I’m able to collaborate with Emily to bring you this blog post. She’s the exact resource that I was looking for, and I hope this blog post will be able to answer some of the questions you all have about Microblading, even if you don’t live in the PNW!
So, let’s get into it! I can already tell now that this is going to be a long one, so I’ll try to break it down into a few easier-to-digest sections. I’ll also try to be as thorough as possible, while still being concise. If you have any additional questions, please check out Emily’s website and Instagram first. If you don’t find the answer there, you can comment it below and I’ll try to get back to you!
1. Is Microblading Right for You?
As I mentioned earlier, Microblading is essentially like getting hair-like tattoo strokes across your brow. BUT! Tattoos are permanent, Microblading is only semi-permanent. This is because the Microblading, when done right, should penetrate where your skin’s epidermis and dermis meet; this is more superficial than a tattoo, which goes down into the dermis. Because of this, you will need to come back to your clinic and get touch-ups to keep your brows looking as fresh as possible.
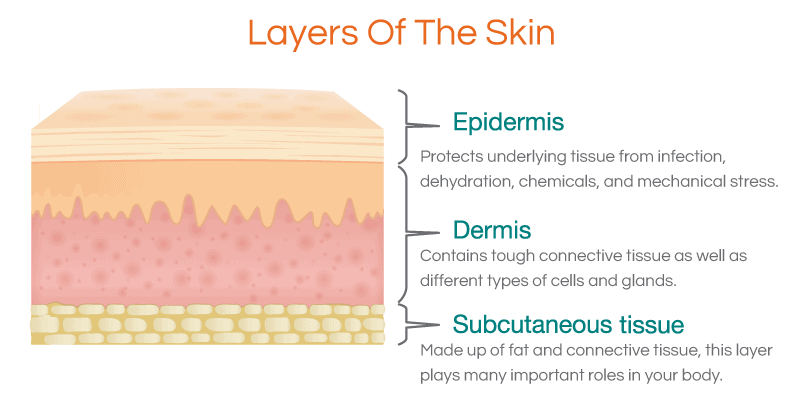
Image Souce: NewGel+
Your skin type can also determine if Microblading is right for you. Emily told me that it’s much harder for acne-prone and oily skin to retain pigment and keep the crispness of the strokes. It’s not impossible, but it is harder. Personally, I do get acne from time to time, and my skin is slightly oily in my T-zone. However, I do not have either of these problems in my brow area, so I was in the clear!
It is also important to realize that Microblading produces feathery, natural-looking eyebrows. This sounded great to me because I tend to go for a natural makeup look anyways. It will NOT look like a powdered brow filled with makeup – that technique is known as Ombre/Powder Brow, and is done by a machine (not by hand). If you normally powder your brows, you may want to look into Ombre/Powder Brow instead! Microblading will also look the most natural on brows that still have some hair in the area (aka, increasing hair density and/or adding some shape). It is totally possible to thicken overplucked (or nonexistent) brows as well, but this is something to keep in mind.
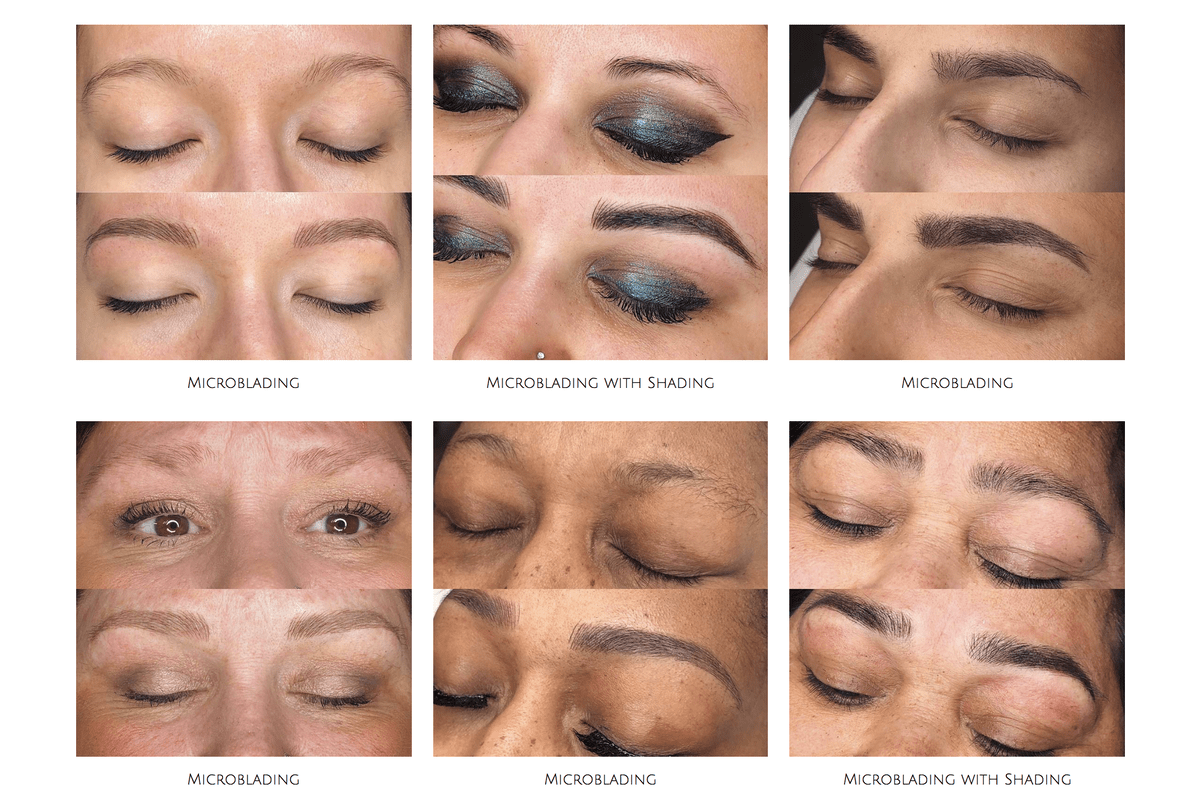
Examples of Emily’s Work
SUMMARY: just because you like the idea of Microblading, it may or may not be the best choice for you, depending on what you want. I loved working with Emily because she is honest (!) with her clients and will simply tell them if Microblading is a good choice for them; if not, she will recommend adding Shading or Ombre/Powder Brow. It’s important to go to a professional who knows when to say yes, and when to say no — keep this in mind when you are looking for a clinic!
2. The Procedure
The Procedure itself took a little over an hour. I captured most of the process via my Instagram Stories, so check those out if you haven’t seen them already! Here is a brief summary of everything that goes down, though keep in mind that this will vary slightly from clinic to clinic:
- Consult = Emily asked me what I was looking for in my brows, and we worked together to draft a brow shape that was both “appropriate” (based on beauty rules) and that I personally liked. This was not a one-brow-fits-all situation, and I really appreciated that. We didn’t move on to Step #2 until I was comfortable!
- Numbing = Emily lightly pierced the skin around my brows and applied a numbing cream to the area.
- The First Pass = After the cream absorbed, Emily began to make hair-like incisions over each of my brows. After she completed each brow, she rubbed the brow pigment (which we also agreed upon earlier) into each brow and let it sit for around 10 minutes. My brows were pretty numb so I didn’t feel much – at it’s absolute worst, it felt like a slight scratch from a needle. (Note: the First and Second Pass ma vary based on each artist, so keep this in mind)
- The Second Pass = the first round of pigment is wiped off of each brow, and Emily goes in for a second round of strokes. The First Pass is mostly to get the outline of the brow, while the Second Pass is more of the detail work! Again, pigment is applied to each brow and allowed to set for 10-15 minutes before wiping off. I wouldn’t say that the Second Pass was painful, but my brows were more tender the second time. When she wiped the pigment off it sort of felt like my skin was “bruised” there, but it was honestly *very* tolerable.
…and that’s it! I also want to mention that Emily was very considerate and aware of my “pain” levels throughout the entire process. She continually asked me if I was doing okay, and always offered to add more numbing cream to an area if I was feeling a little tender.
3. Healing and After-Care

Emily gave me a very detailed After-Care pamphlet, which described all of the “steps” of brow healing. There are two general schools of thought when it comes to Microblading: Dry-Healing and Wet-Healing. It really depends on the artist, but Emily prefers to “Dry Heal” her client’s brows. This allows the scabs that form on the Microblading incisions to fully heal without being disturbed and prematurely falling off.
This means that you CANNOT get your brows wet aka sweat or work out for the first 5 or so days after you get your brows done. If that’s a deal breaker for you, don’t get Microblading. What’s the point of spending hundreds of dollars on a procedure if you’re going to ruin it by going to a workout class?! Light sweating is ok after the first 5 days, but you still need to avoid getting your brows wet (aka shower, etc) until the scabs have sealed, healed, and completely fallen off. It’s also a good idea to wear a hat and keep your brows out of the sun during this process.
The healing process was kind of a rollercoaster for me, but I did feel semi-prepared — only because Emily explained everything that was going to happen. The entire process takes 7-10 days, depending on the person:
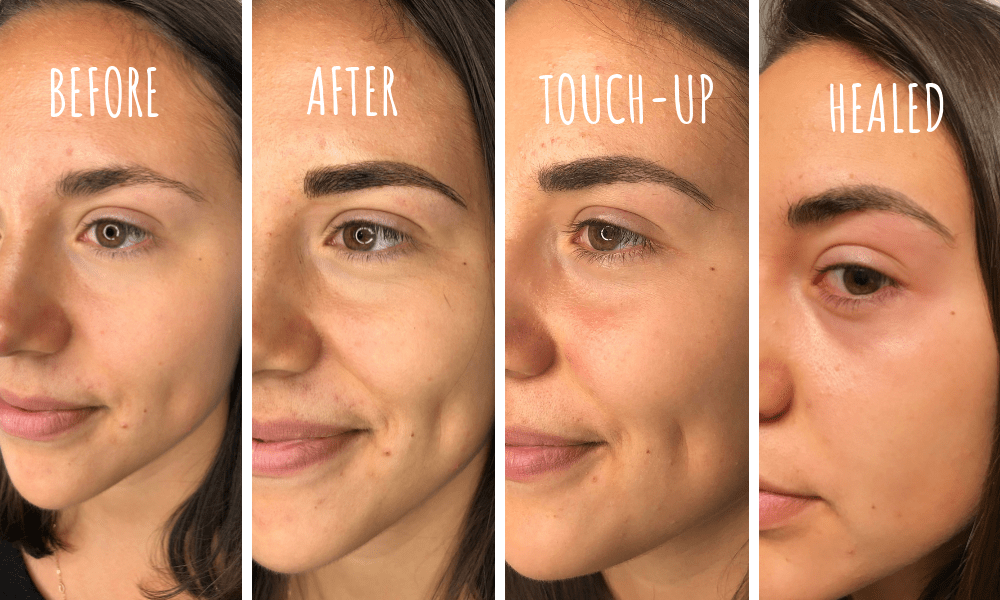
- Immediately After = your brows will look slightly darker, but pretty much like the final result.
- 1-3 Days After = the brow strokes themselves will get larger and extremely dark. This is because (1) larger scabs are forming over the strokes, and (2) the brow pigment oxidizes (darkens) as it comes in contact with the air. To be honest, I got a little scared during this part, because my brows looked SO dark and very different than what I was used to. I trusted Emily though, and knew that this phase was temporary.
- 4-6 Days After = your brows will still look pretty dark, but begin to lighten a little as the scabs mature.
- 7-10 Days After = the scabs will begin to flake and fall off your brows naturally, so your skin may look a little, well, flaky. When the scab falls off, the skin underneath will look really light and pink – this is because it’s baby skin! The pigment will “bloom” back into the skin over the next 7-14 days as the skin matures. It’s very important to use sun protection during this time, as the skin is so new.
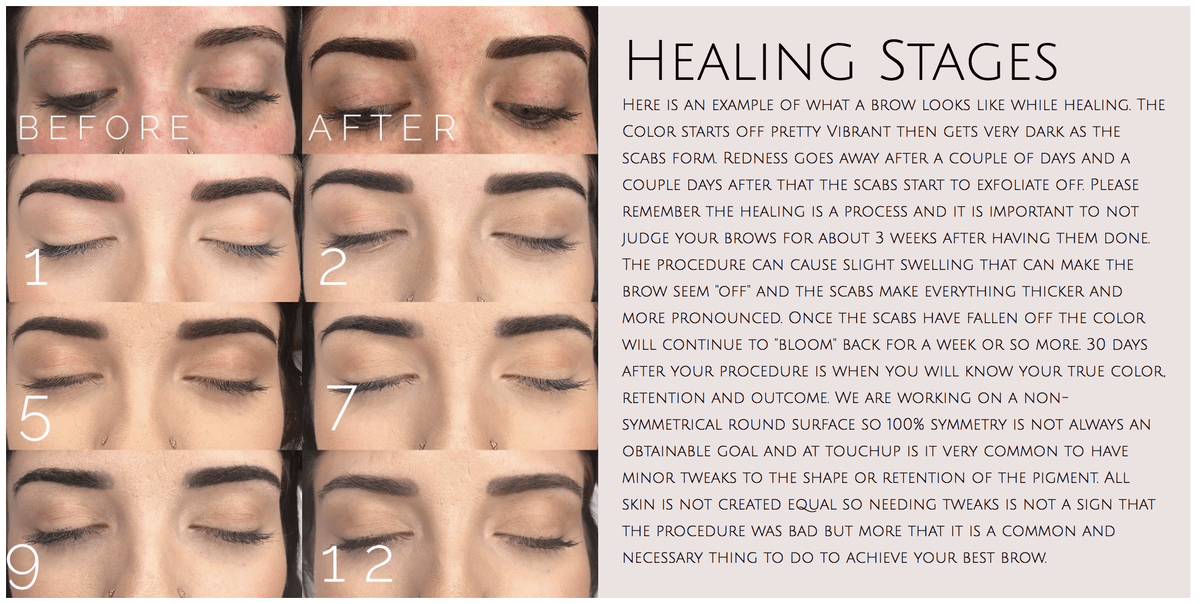
The Healing Stages of Microblading, from Emily’s Website
Once all of the scabs have fallen off your brows, it’s okay to get them wet again. However, (just like any tattoo) you do want to be mindful of what you are putting on your brows afterward! Certain products contain chemicals and compounds that may damage, lighten, or change the color of your brows. I use natural skincare and makeup, so this was not a problem for me. You also want to be careful about protecting your brows from the sun (so they do not prematurely fade) with either a hat or sunscreen, if you are going to be outside for long periods of time. It’s also a good idea to avoid intense exfoliation or chemical peels/facials directly over the brow area.
4. It’s time for a Touch-Up…
You need to go back to your Microblading clinic 30-60 days after your first appointment for a touch-up. This is because everyone’s skin absorbs pigment differently, and your brow strokes will need some perfecting! However, this is where a lot of Microblading can go wrong. Emily informed me that many Microblading artists will go over the entire brow again at the follow-up appointment. This doesn’t make sense in two major ways:
- If you are already retaining pigment well in an area, why do you need to go over it again?
- Repeatedly going over strokes increases the likelihood of actual pigment loss and scar tissue formation. You will be fine if you are only going over the areas with loss, but there is no point in going over a perfectly pigmented area.
I actually had very good pigment retention from my first appointment with Emily, so we did not have to re-touch much. She did go over a few strokes (and even half-strokes), and we also added in a few extra strokes around my eyebrow arch where my hair naturally thins out a little.
The healing process for the Touch Up appointment is the exact same as the initial appointment. Your eyebrows will darken, get lighter, and then eventually darken again. Your eyebrows may look a little more “patchy” this time around, because not every part of your brow has been re-touched. To be honest, my touch-ups were so minor that I didn’t really notice any darkening or scabbing on my brows at all, but I know that this is not the case for everyone!
In terms of long-term Touch-Ups, most people retain pigment well for 8-12 months. If you want to keep your brows in tip-top shape, it’s important to book annual appointments with your brow artist. Again, you should only be re-touching the areas that have pigment loss at these appointments. There is no need to go back every 3 months to darken your brows either – again, this is overworking the area and can lead to scar tissue formation.
5. Some Final Thoughts
To be honest….I LOVE MY BROWS!!! SO. MUCH.
I think Emily did an amazing job and would recommend her to anyone and everyone! She really is so knowledgeable and I really felt like I got the best Microblading experience possible. I love how I don’t have to wake up in the mornings and think about my brows at all, and I do feel more confident with them. That being said, I do NOT think you have to get Microblading done or have perfect eyebrows in order to be or feel beautiful. I am simply sharing my experience!
I realize that not everyone can come to Portland and have Emily do their brows (though that would be pretty freakin’ awesome). However, I do think there are a few major takeaways that everyone can apply to their Microblading experience:
- Find a studio who does work that you ACTUALLY like
- Ask your Microblading artist about their technique. Do you have the correct skin type? How do they approach healing and the re-touch? All of these factors will play a role in how your brows are going to look long-term, so it is important to consider
- Microblading is essentially a tattoo. If you want your brows to last, you need to take care of them. This includes following the healing protocol and protecting your brows afterward. Don’t use funky chemicals on your face, wear a hat, and use a natural sunscreen! Your entire face will thank you anyways 🙂
And I think that is finally it! If you made it this far, thank you for reading. I hope this post helped to clarify any questions you have about Microblading, and made the process seem more approachable and understandable. A big thank you again to Emily at Empress Brow & Beauty for working with me on this — I (literally) could not have done it without you!
I did ask you guys on Instagram if you had any additional questions, so I will include those below.
Other FAQs:
How much does Microblading cost?
This will vary based on both state requirements* and clinic, but generally ranges from $350-800. I don’t think you’d want to go with the cheapest option in your area, but I also don’t think you have to go with the most expensive either. What’s most important is that you find a clinic that (1) uses the correct technique, and (2) produces brows that you actually like. Touch-up appointments also vary in cost, but are much less expensive than the initial appointment. Each clinic should have their prices listed on their website – if not, give them a call!
*Oregon requires extra schooling for Microblading artists, so is generally more expensive than say, Washington state.
Is Microblading Vegan?
Yes and no. Emily uses a brow pigment that is certified Vegan, but this is not the case everywhere. I would recommend asking each clinic to double check! We also Dry Healed my brows, which means I did not put any cream or products on them. The “Wet Healing” school of thought often suggests the use of Aquaphor to help moisturize and heal the brows, but Aquaphor is not Vegan. In short: my brow process was Vegan, but it may not always be.
Did it Hurt?
Everyone has a different pain tolerance, so this is kind of hard to answer. I think I have a moderate-to-high pain tolerance, and thought the whole process was totally fine. There were some “uncomfortable” moments, but it was all very tolerable and thinking back on it, I cannot really remember the pain at all! Emily also told me that getting a “real” tattoo hurts a lot more than Microblading. I don’t have any tattoos so I cannot compare personally, but I thought this might be helpful to share!


Such a thorough and honest account of your microblading journey! The insights on aftercare and results are invaluable.
Nice read. They look great. It would be interesting to update the blog on how well they are lasting.
Hi Caitlin! Your eyebrows turned out so beautiful! Thanks for sharing:) And what you wrote about the skin type is so right about microblading. I can see why many girls get ombre or mix between the two
Thank you!
Hi Caitlin, your brows look amazing. I got my eyebrows microbladed recently and I regret it because I saw pictures online where over the years, the hair strokes did not hold up and it never fully faded, but instead faded into a blob, not a hair stroke. I’m curious to know how yours look like now. Like you I still have brow hair and I am wondering if the pigment will completely disappear if don’t even touch it again or if it will fade and be easily covered with my brow hair.
Thank you 🙂 love your recipes too btw 🙂
Hi Carla! I have gone in for one touch up since this post. I did not take a picture before but my brows faded pretty evenly, there were no “blobs” like you mention. I think the pigment should fade eventually though!
Just wondered what your thoughts are on your microblading a few years out? How has it held up?
It has held up well! I went in for a standard touch-up 1 year after, and will continue to do so as necessary