Disclosure: This post may contain affiliate links. I may earn a small commission for my endorsement, recommendation, testimonial, and/or link to any products or services from this website.
Learn how to make the best Crispy Tofu with this easy and yummy recipe! Made with only 3 ingredients, this Tofu is Vegan, Gluten-Free, and Oil-Free.
Tofu: some people love it, some people hate it. I, however, believe that the people who hate it just haven’t had it prepared in the right way.
But no worries, friends – what if I told you that you could have the best, easiest, and crispiest Tofu EVER…with only 3 ingredients total and super simple steps?! Well, I’m tellin’ ya. This crisp-on-the-outside, soft-on-the-inside Tofu is about to change. your. life. And become a regular staple in your recipe rotation. 😉
Tofu can be bland, and it can be mushy – but it all comes down to the way you prepare it. As a vegetarian since birth, I’ve had more than my fair share of this soy-based protein. I’ve experimented with countless different ways to prepare it, and this method is by far my favorite.
I’ve included my basic recipe for Crispy Tofu in a few other recipes on this blog, but wanted to make a complete run-down of the steps + method for you all, including my tips and tricks. So, shall we?
Step One: Press and Cube your Tofu
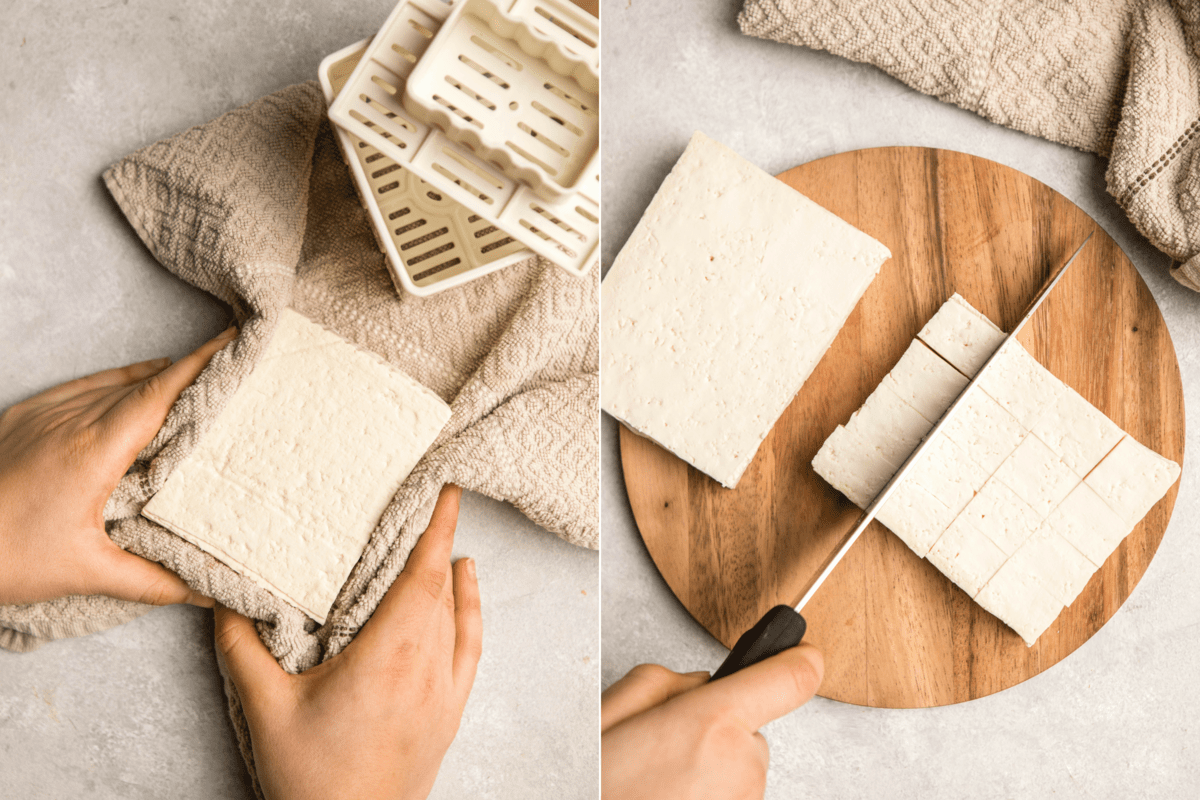
You’ll need one 14 oz. block of Extra Firm Tofu for this recipe. Firm will work too, in a pinch. Remove the Tofu from it’s package and drain any extra liquid off, then gently press as much liquid out of it as possible. I like to use a Tofu Press, but you can also use a couple of towels and a heavy object if you don’t have one.
Then, cube your Tofu – I like to cut the thickness of the block in half, then cut each half into 16 “cubes.” These are the perfect bite-sized pieces for your Crispy Tofu!
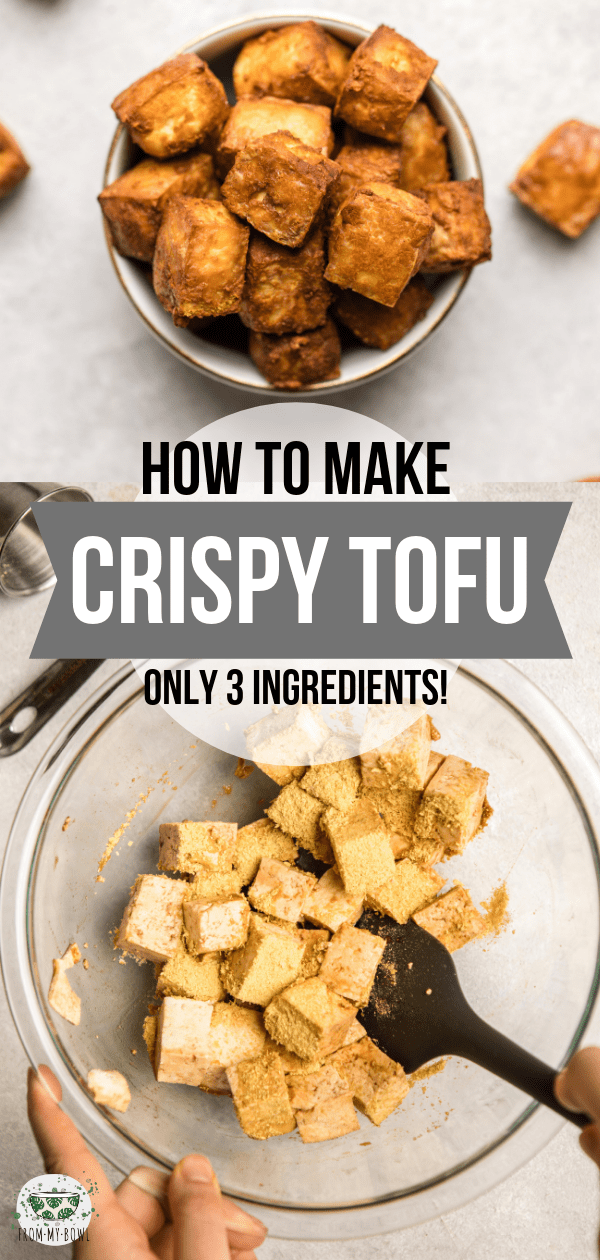
Step Two: Toss with Tamari, then Nutritional Yeast
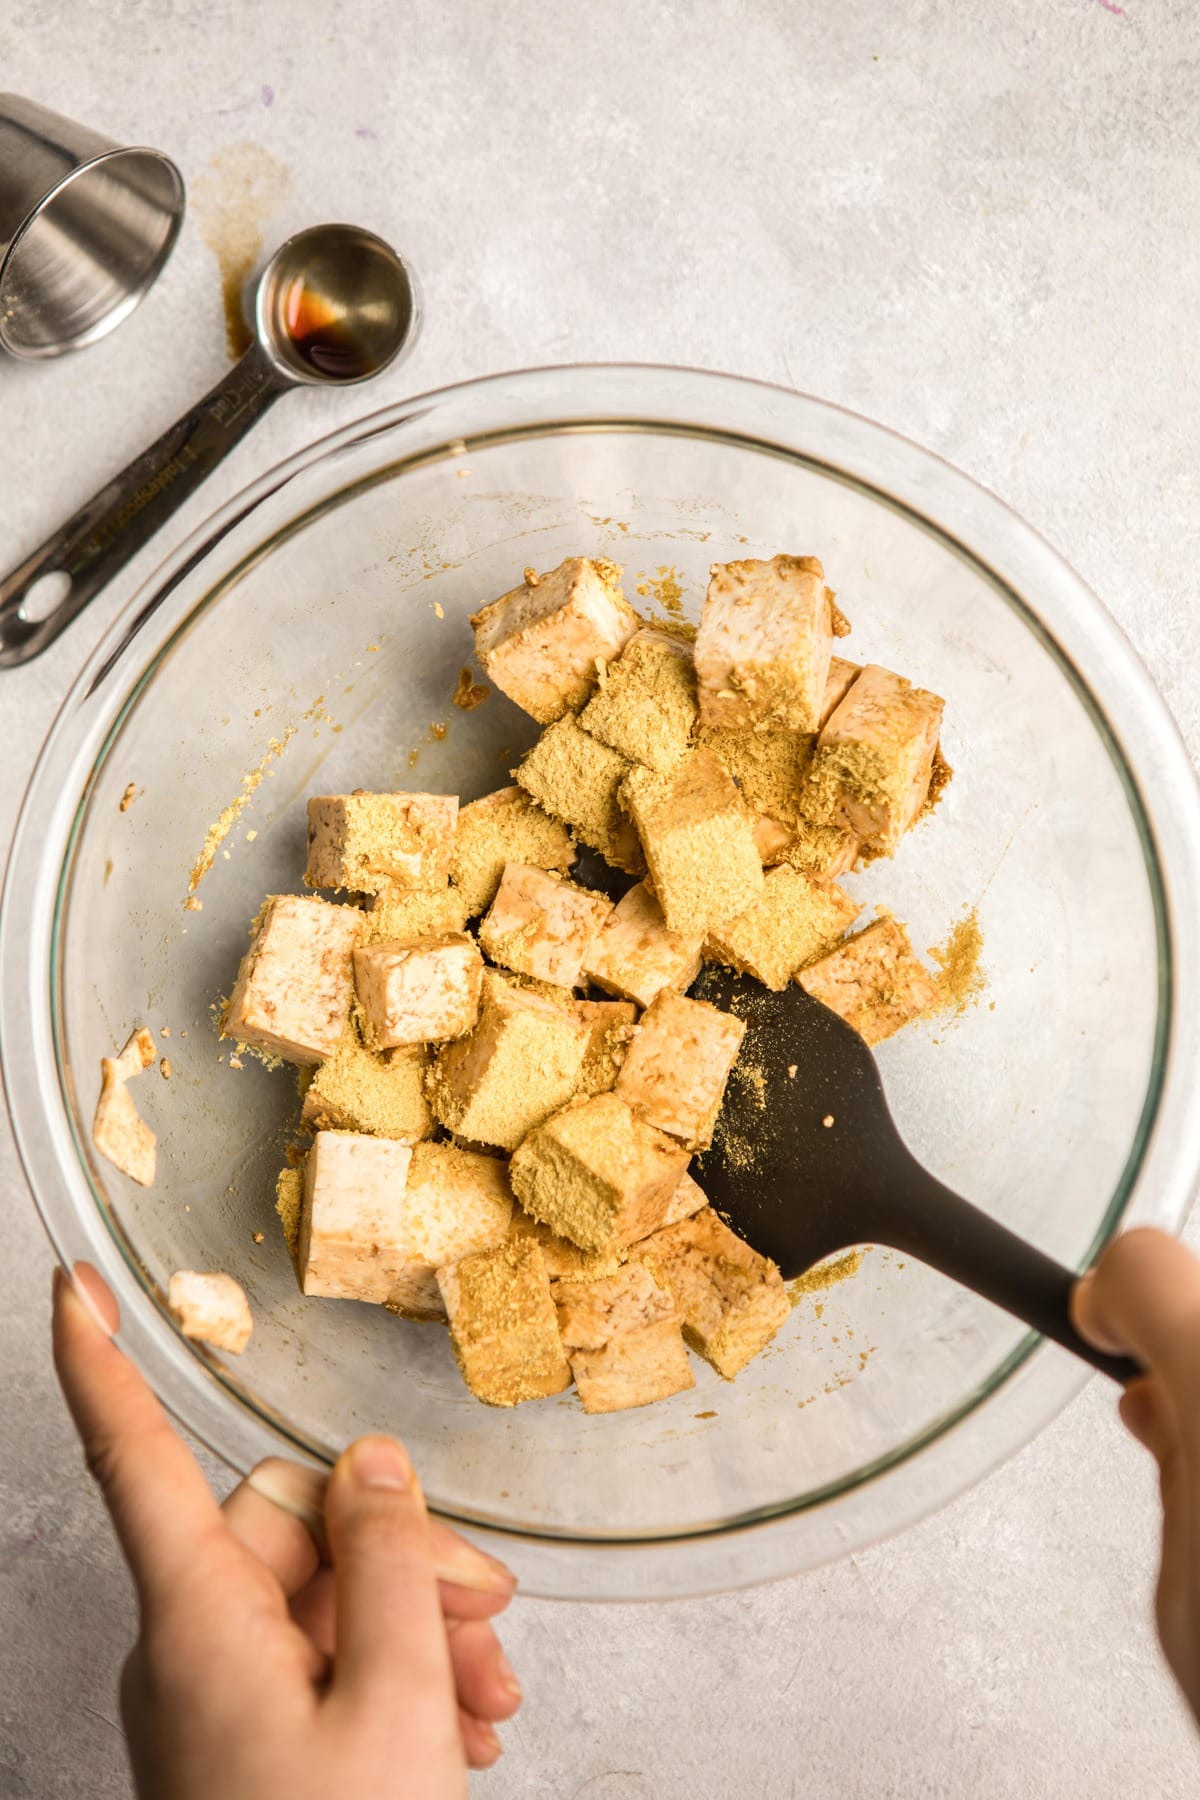
Place the Tofu cubes in a large glass bowl, then drizzle 1 tbsp of Tamari over them. Now that the Tofu has been pressed, it’s much more likely to absorb the Tamari flavor (and taste less bland). I like to use a large spatula to gently toss the Tofu, so the cubes don’t break. I prefer the flavor of Tamari in this recipe, but you can also use Liquid Aminos or Soy Sauce.
Finally, we can’t forget about our third and final ingredient – Nutritional Yeast! Coating those cubes in at least 2 tbsp of those golden flakes helps to (1) absorb any extra liquid and give a nice, crispy crust, and (2) adds a ton of Umami + depth of flavor to the recipe. Honestly, the more “Nooch” you toss in there, the merrier!
Step Three: Bake Until Crispy!
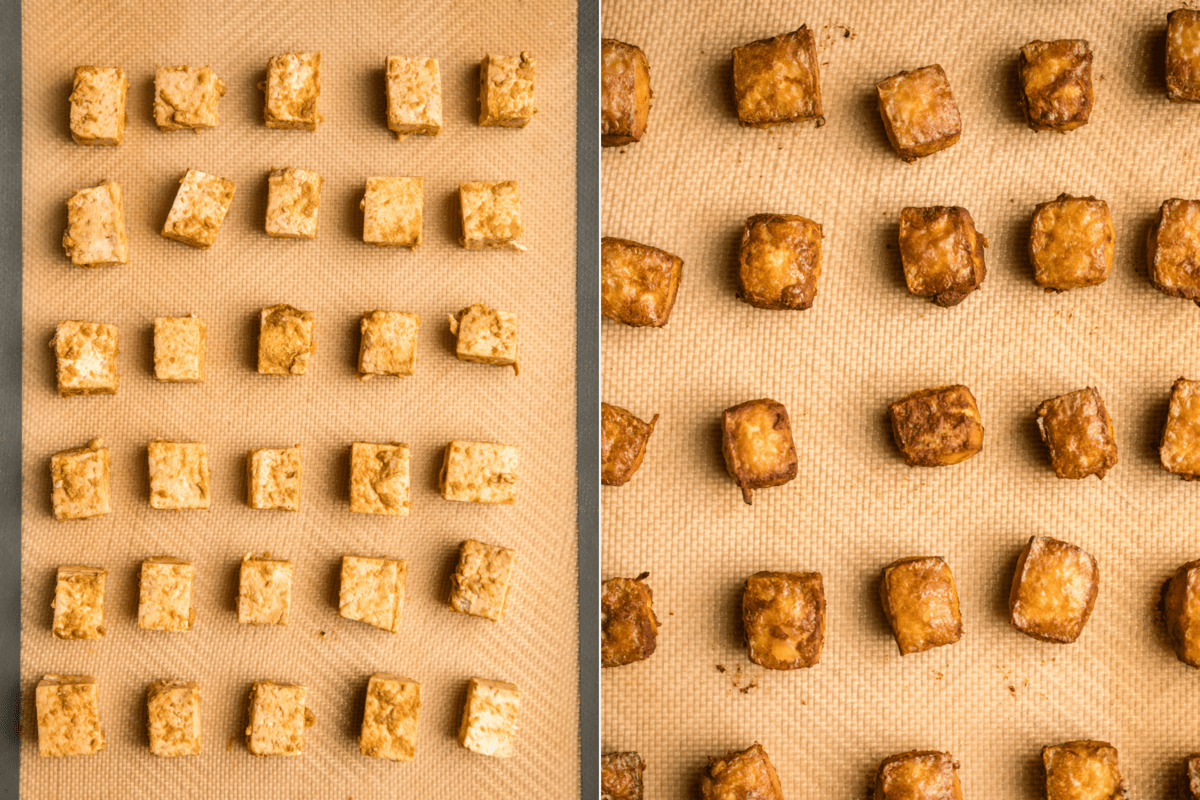
Spread your Tofu on a Silicone Baking Mat, leaving enough space between each cube. Bake at 425F for 20 minutes, then carefully flip the Tofu and bake for an additional 20-30 minutes, depending on how crispy you like it. I strongly recommend using the Silicone Mat here – it adds an extra layer of caramelization that you just can’t get with parchment paper!
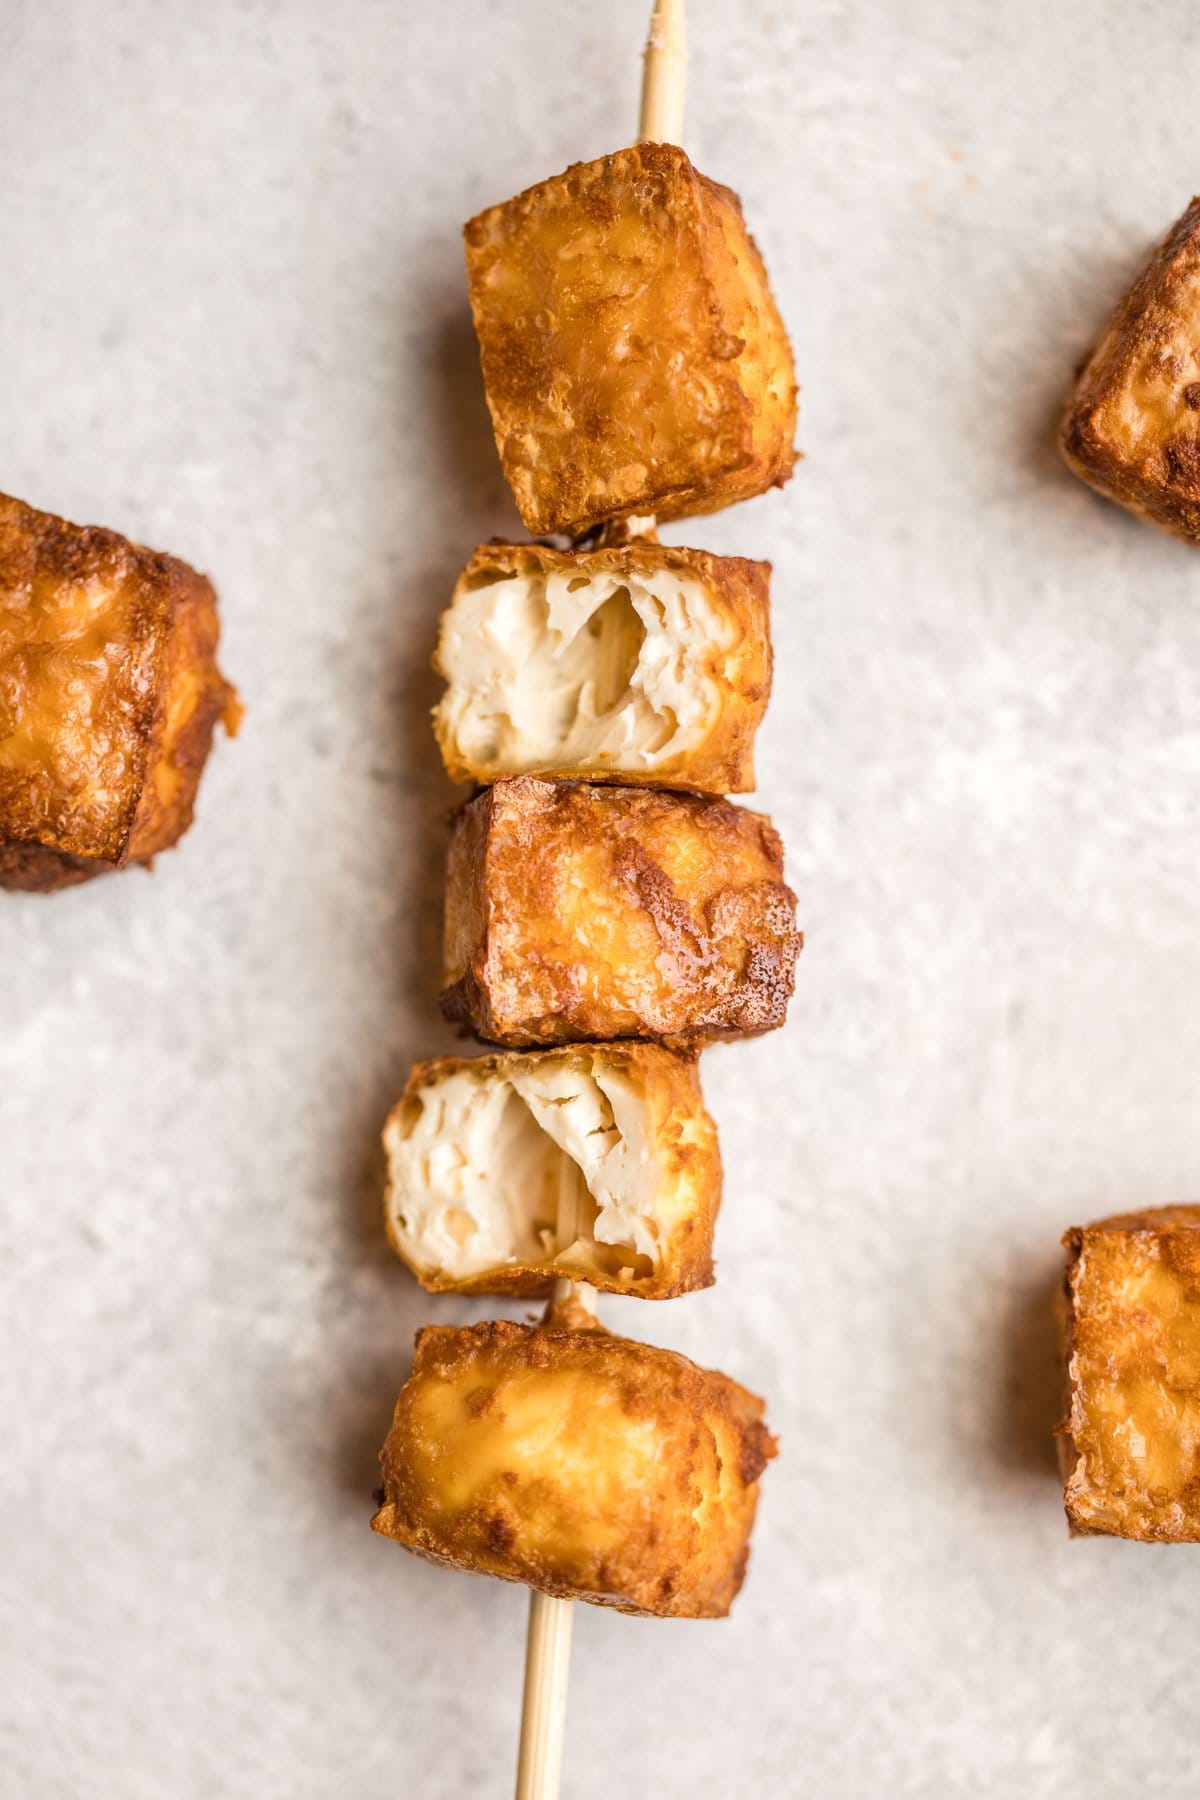
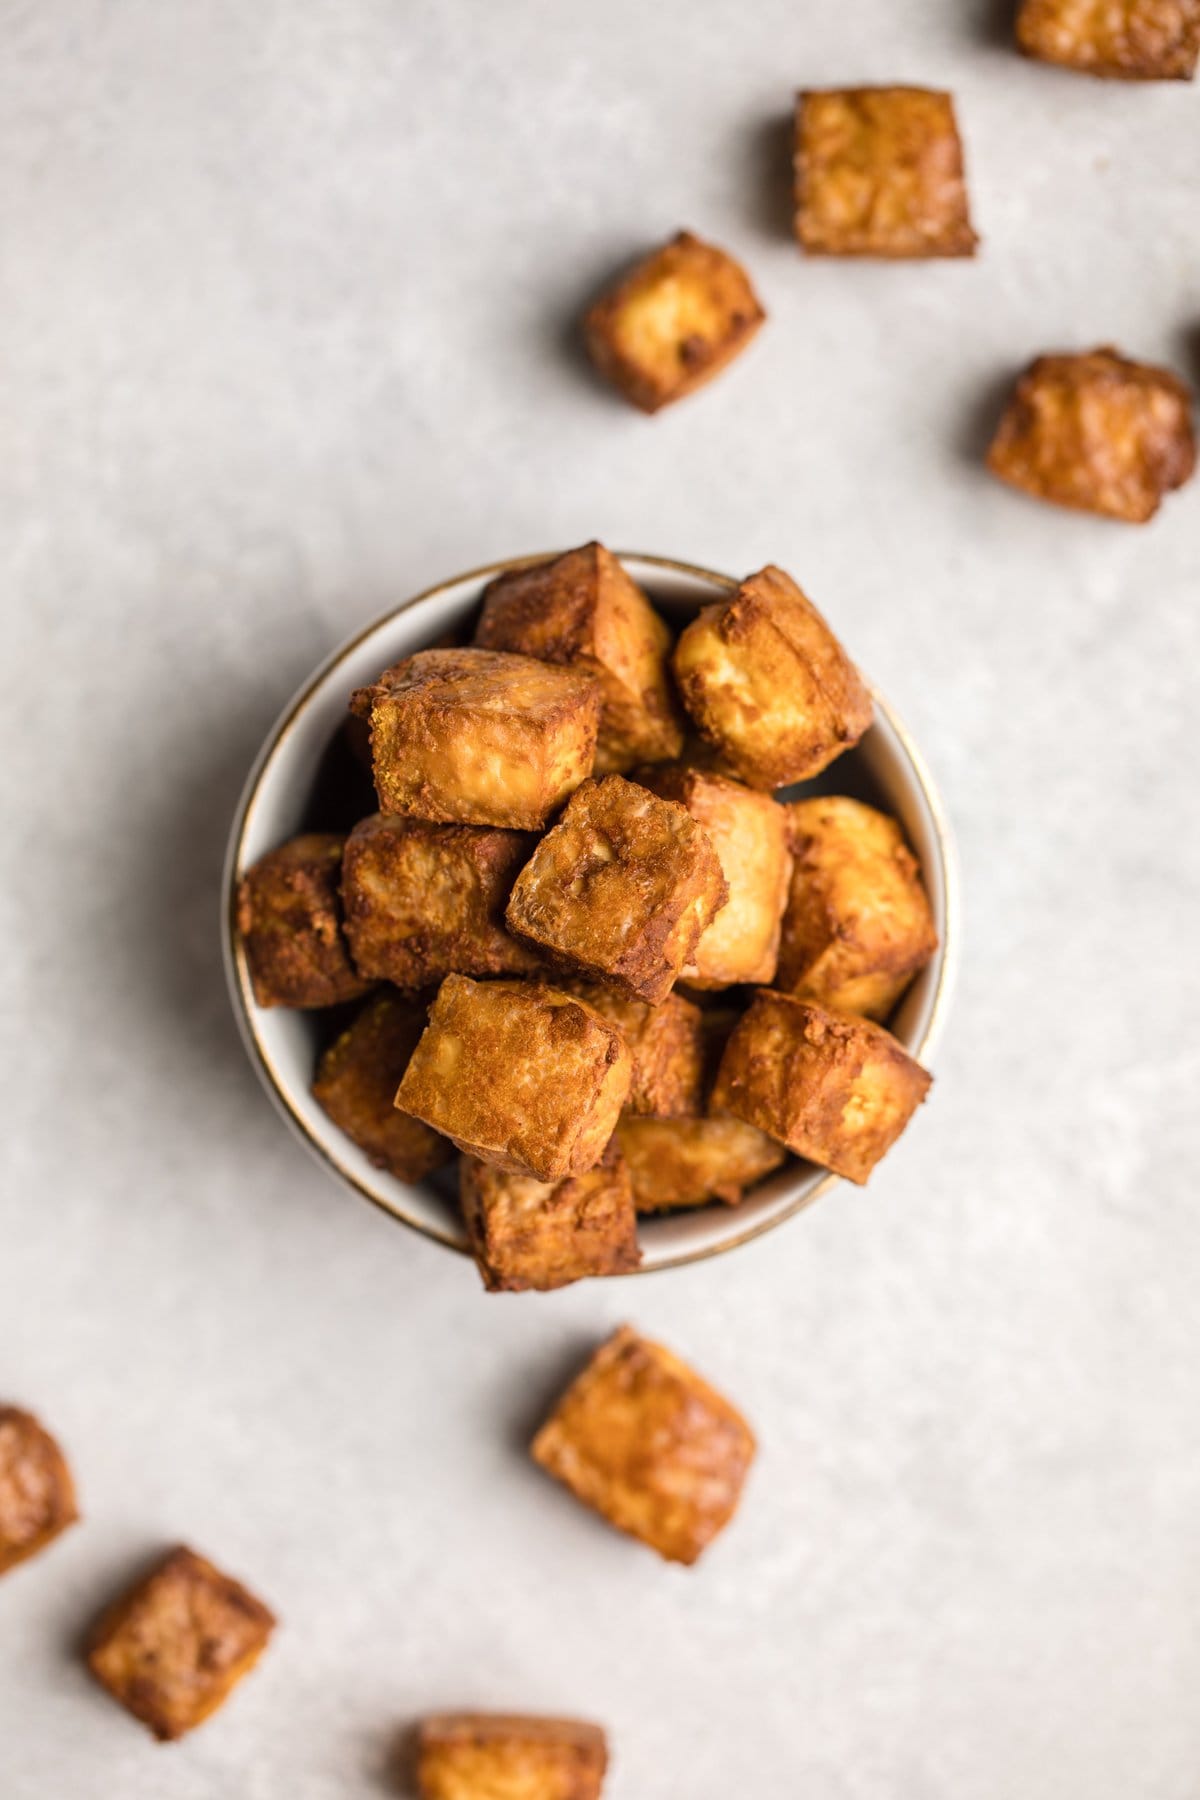
After your Tofu comes out of the oven, it’s all nice, crispy, and ready to devour. I mean….can we look at those golden cubes?
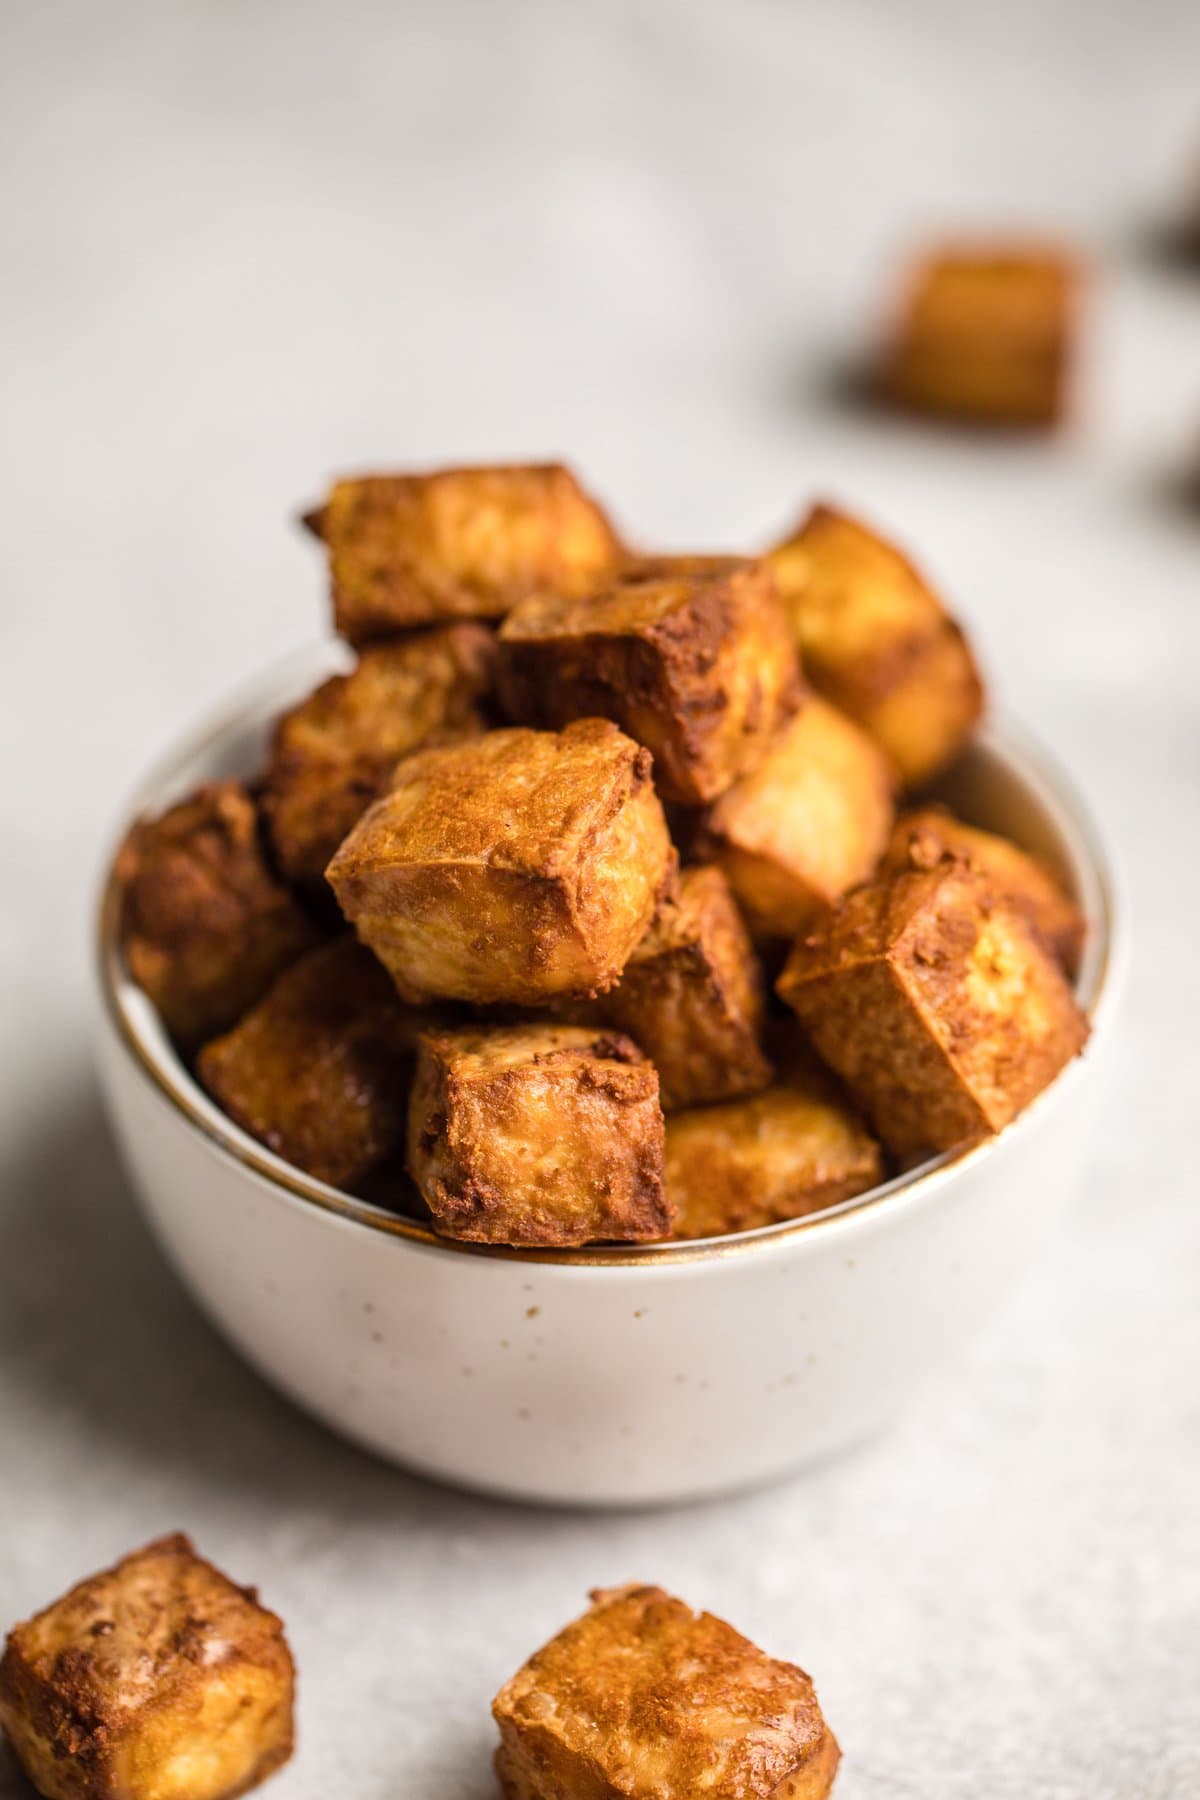
This Crispy Tofu tastes so delicious that I can (have, and will) eat it plain, but it’s also great dipped in to sauce or used as a bowl-topper! If you’re looking for more ways to use it, you’ll also love these Orange Tofu Buddha Bowls, these Banh Mi Bowls, and this Thai Red Curry Soup!
A Few Final Thoughts:
- I strongly recommend using a Silicone Mat for this recipe; otherwise, your Tofu will not become as crispy.
- Prefer extra-firm Tofu? Freezing (and then thawing) your Tofu will provide a spongier, chewier texture.
- Feel free to add in extra seasonings with the Nutritional Yeast! Some of my favorites include Smoked Paprika, Garlic Powder, Black Pepper, or Toasted Sesame Seeds.
Finally, if you make this recipe and decide to share it on Facebook or Instagram, don’t forget to tag me @FromMyBowl + #FromMyBowl! I love seeing your delicious recreations 🙂
The EASIEST Crispy Tofu Recipe

Learn how to make the best Crispy Tofu with this easy and yummy recipe! Made with only 3 ingredients, this Tofu is Vegan, Gluten-Free, and Oil-Free.
- Prep Time: 10 Minutes
- Cook Time: 40 Minutes
- Total Time: 50 minutes
- Yield: 2-4 Servings 1x
- Category: Main
- Method: Oven
- Cuisine: American
Ingredients
- 1 14 oz. block Extra Firm Tofu
- 1 tbsp Reduced-Sodium Tamari
- 2 tbsp Nutritional Yeast, plus more to taste
Instructions
- First, preheat the oven to 425F. Drain the liquid from the Tofu and “press” the extra liquid out by wrapping it in a clean dish towel, or by using a Tofu press. Try to get it as dry as possible!
- Cut the Tofu into even cubes. I like to cut the block in half lengthwise, then cut each rectangle into 16 even cubes. (Note: I like to lightly press the cubes with the dish towel if I have extra time/patience)
- Add the cubed Tofu to a large bowl, then use a spatula to gently toss it with the Tamari, until evenly coated. Add the Nutritional Yeast, then gently mix until coated. Add more Nutritional Yeast or extra seasonings to taste, if desired.
- Transfer the cubes to a baking sheet lined with a silicone mat, leaving space between the cubes. Bake on the top rack of the oven for 20 minutes, then carefully flip the cubes. Bake for another 20-30 minutes, depending on how crispy you like your tofu. The Tofu will also get slightly crispier as it cools.
- Serve as desired; leftovers will last in the fridge for up to one week.
Notes
- Tamari may be substituted for Liquid Aminos or Soy Sauce (not GF). I do not recommend Coconut Aminos as I find it to be too sweet.
- I strongly recommend using a Silicone Baking Mat for this recipe; otherwise, your Tofu will not become as crispy.
- Prefer extra-firm Tofu? Freezing (and then thawing) your Tofu will provide a spongier, chewier texture.
- Feel free to add in extra seasonings with the Nutritional Yeast! Some of my favorites include Smoked Paprika, Garlic Powder, Black Pepper, or Toasted Sesame Seeds.
Want to save this Crispy Tofu recipe for later? Pin the recipe to your Pinterest boards:


Thank you! I’m going to add this to curry tonight that I’m making for dinner. Plus, I’m B12 deficient right now and the nutritional yeast will just help me boost those levels. I’m glad someone shared this link in my FB group.
Glad you found it!
My husband is highly reactive to yeast (brewers and bakers) so I assume nutritional yeast as well. What would you recommend as replacement for coating the tofu?
There isn’t really a direct swap for nutritional yeast in the context of this sort of recipe – BUT you could use some cornstarch to get a crispy element. I would guess maybe a tablespoon – might take some testing as we haven’t tried it that way!
I had always pan fried tofu before, so I was somewhat skeptical about just baking it. I, however, suggested to my girlfriend that we try this technique last weekend & we were both amazed at how nice and crispy the tofu got. Plus it was a lot easier, and there was no messy grease splatter on top of the oven. We were both really impressed. This is a game changer for both of us! Thanks for such a great tip!
Definitely way less messy! Glad you guys gave it a shot and enjoyed it!
These are seriously amazing!!! I made your nugget recipe after learning about them on shine with plants YouTube video. So glad I did! They are sooooo good!! I myself can’t stop eating them and they were made for my kids lunch. Making extra of them right now. Thank you for a great easy recipe!
Aw that’s so cool! Glad you’re enjoying them and I hope your kids do too!
AMAZING!!!! SO easy and tasty! I made this several times already and will keep making it. We just end up eating it as a snack…. we can’t resist 🙂
Love to hear that! Thanks so much!
After I pressed the tofu and proceeded to cube it, it crumbled apart. I’m not sure what I did wrong? I’m a novice! Any tips would be appreciated!
How did you press the tofu? Ideally you would use a tofu press which is designed to apply a certain amount of force until you release it. It sounds like maybe your tofu had too much pressure. You don’t need to press the tofu with a lot of pressure.
I just took this tofu out of the oven. My two year old granddaughter LOVES tofu so I wanted to try a good recipe for her. This is the BEST tofu I’ve ever had! It came out crispy and delicious. I was going to add garlic powder but forgot. It honestly doesn’t need anything else. I used Bragg Liquid Aminos and nutritional yeast. Perfect! I will make this again and again.
Thank you for this simple and lyummy recipe Caitlin????
Sounds awesome! And so happy to hear your grand daughter is such a fan of tofu, that’s adorable!
Best tofu recipe out there! Used this for a protein for pad Thai. Delicious. Thanks for sharing!
That’s awesome! Thanks for making!
This is so delicious! I’ll be making this every week! Thanks for the recipe 🙂
Yay! Every week? That’s so kind!
This was my first time making tofu. I had yet to find any I liked until this recipe. I did add Trader Joe’s chili lime seasoning prior to baking. I also baked it in my air fryer. 10 minutes and I had beautifully crisp tofu. I used this in the orange buddha bowl (your recipe). Wonderful!????
That’s awesome! Thanks so much – glad you enjoyed it!
Confession time… I did not follow directions on this one! I don’t have a silicone mat so I baked mine on foil. They stuck to the foil so I couldn’t flip them halfway over but by the end of the total baking time I was able to carefully peel them off lol. Luckily for me, they still turned out awesome and very crispy! Love!
Foil does tend to stick to tofu. If you invest in some silicone mats you won’t regret it!
making this now but I don’t own a silicone mat. I lightly oiled a baking pan and I hope that works!
The oil may help, but if you can invest in a silicone mat you won’t regret it! We use it all the time!
No silicone mat might have also been the problem…they’re just so expensive!
One day, one day…
If you do get one, you won’t regret it. They’ll last a long time and pay off when you’re not having to constantly use wax paper or foil to line baking trays (or oil to cover baking pans if you’re trying to be oil free).
I just bought my silicone mat at Target for $8.99
I think I might have pressed my tofu too much? It made them a tad dry which wasn’t the most pleasant to eat.
But, the nooch coating was actually really good! I’m not a big fan of nutritional yeast usually, but it was great in this recipe! I also through on ike half tsp of cornstarch to my cubes to make them crisp up. I think they went more crunchy than crispy though. They were just very hard. I’ll keep on trying! 🙂
If you’re using a tofu press, you can use that to customize the amount of moisture you’re squeezing out! Glad to hear the nutritional yeast was working for you!
When I saw this recipe and saw nutritional yeast as an ingredient I was interested. Bought nutritional yeast flakes for some recipe and has been sitting in the cupboard unused since. Always have Tamari on hand. I didn’t add any extras. I was a bit nervous at leaving them in longer than 20 minutes as they were cooked and yum then but leaving them in a bit longer didn’t hurt. YUM!!! So EASY.
Thanks so much! Glad you liked it!
Had to come back and find this recipe just because I felt like I owed it to Caitlin to leave a review because this tofu is AMAZING and soooo easy. Literally just try it because it’s so easy, what do you have to lose? (Ps you won’t lose because it’s fricken bomb
Thanks so much!
Seriously, the BEST tofu I’ve ever made! Game changer! I made a cashew ranch style dip — omg, I had to stop myself from eating all it! I use a tofu press as well, which makes a world of difference too. I’m going to try the leftover tossed in buffalo sauce. Delish! I’ll for sure be trying some more of your recipes. Thanks for sharing!!
Thank you! Buffalo sauce sounds awesome!
What is the best way to reheat the tofu once it’s cooked? Would a toaster oven work?
How to recommend reheating the tofu if it isn’t eaten all in one sitting? Would a toaster oven work?
Toaster oven would work! The goal is just to reheat so a lower temperature would be best.
Thank you so much for sharing your oil free crispy tofu recipe. I’ve tried many recipes and have yet to find one I’d make again…. until now. This will forever be my go to Crispy Tofu recipe. ????
So happy to hear it! Thank you!