Disclosure: This post may contain affiliate links. I may earn a small commission for my endorsement, recommendation, testimonial, and/or link to any products or services from this website.
Learn how to make hummus from scratch with just 5-ingredients and a few simple steps. Instant Pot and stove top instructions included! Gluten-free, Oil-free, Vegan, Grain-free.
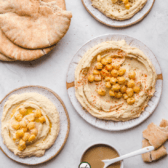
Plant-based or not, learning how to make hummus is a skill every home-chef should master. After you try this ultra easy method you’ll never go back to store-bought again. It’s light, fluffy and so smooth you won’t be able to stop dipping. It really is the best hummus recipe ever.
Table of Contents
3 Secrets to Making “Real” Hummus
I grew up on store-bought hummus, and always thought it was just okay, but not great. That all changed once I tried freshly made, silky smooth hummus from a local Middle Eastern restaurant — my mind was blown! I could easily eat this yummy, magical dip every day for the rest of my life…
I immediately went to my kitchen to figure out how I could make my own dip that was just as delicious. I’ve done some pretty extensive research and have concluded that there are 3 absolute Must-Dos for making the best hummus:
- You really, really, really need to use dried chickpeas (not canned).
- Peeling the chickpeas is a must (seriously, just do it).
- ICE COLD WATER is essential to making the hummus light and fluffy.
What You Need for the Best Homemade Hummus
Hummus is made with 5 simple ingredients, but quality matters. Here are a few key notes:
- Chickpeas: Also known as garbanzo beans, chickpeas are the base of hummus. Most chickpeas sold in the United States are the Kabuli-type – light-colored, larger, round chickpeas. In the Middle East, however, Desi-type chickpeas (smaller, irregularly shaped, and darker in color) are much more common. When making the best hummus, the smaller the chickpeas, the better. Opt for the desi-type chickpeas when possible!
- Tahini: Hummus is not Hummus if there’s no Tahini. And the Tahini quality matters greatly – it should be smooth and runny. Generally speaking, the less English on the bottle, the better 😉
- Garlic: Fresh garlic cloves are always superior to garlic powder, and it’s especially true in homemade hummus!
- Baking soda: Adding baking soda to the chickpeas helps make the legume easier to digest, softer, and makes them easy to peel. Don’t skip this ingredient!
- Lemon juice: I never suggest using pre-bottled lemon juice, but I especially urge you not to in homemade hummus. The flavor or freshly squeezed lemon juice simply cannot be replicated.
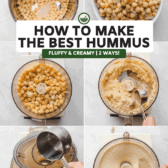
How to Make Hummus
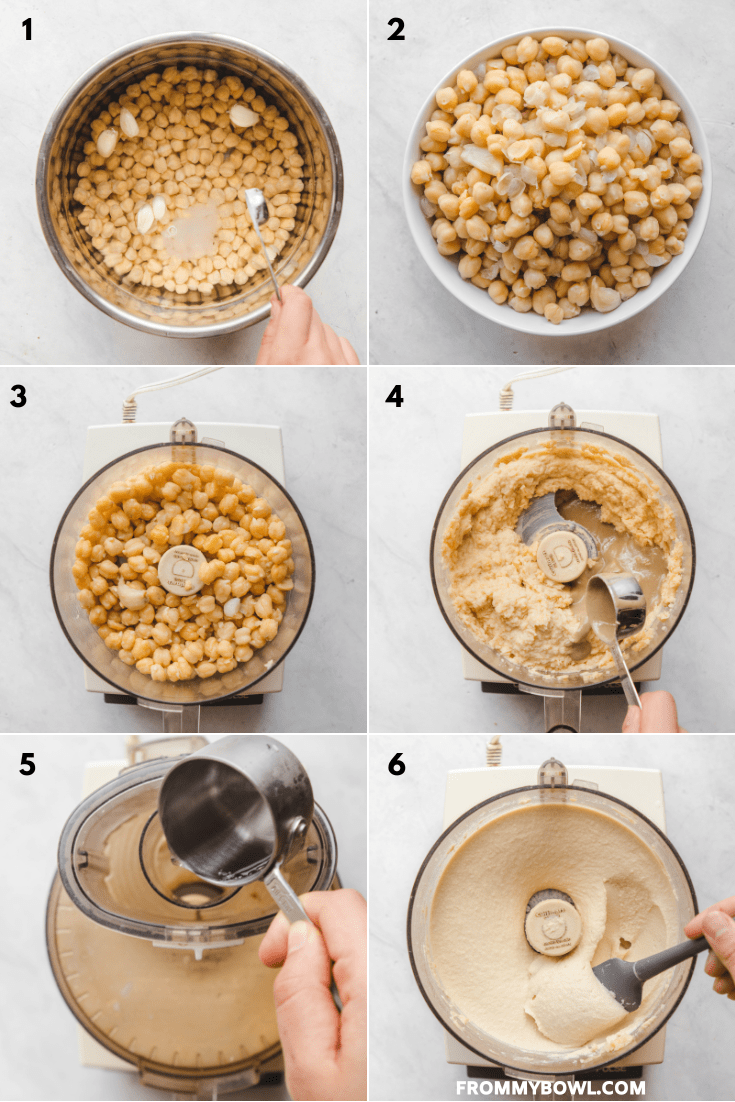
- Sort, then soak the dried chickpeas for 12 to 24 hours.
- Drain and rinse well, then add the chickpeas, garlic, and baking soda to a large pot or pressure cooker.
- Cover with water and cook the chickpeas until tender.
- Peel the chickpeas then discard the outer skin.
- Process the garlic, chickpeas, lemon juice and salt in a food processor until relatively smooth.
- Add tahini then slowly pour in ice water as the food processor is running. Process for 4 to 5 minutes, or until the hummus is fluffy and smooth.
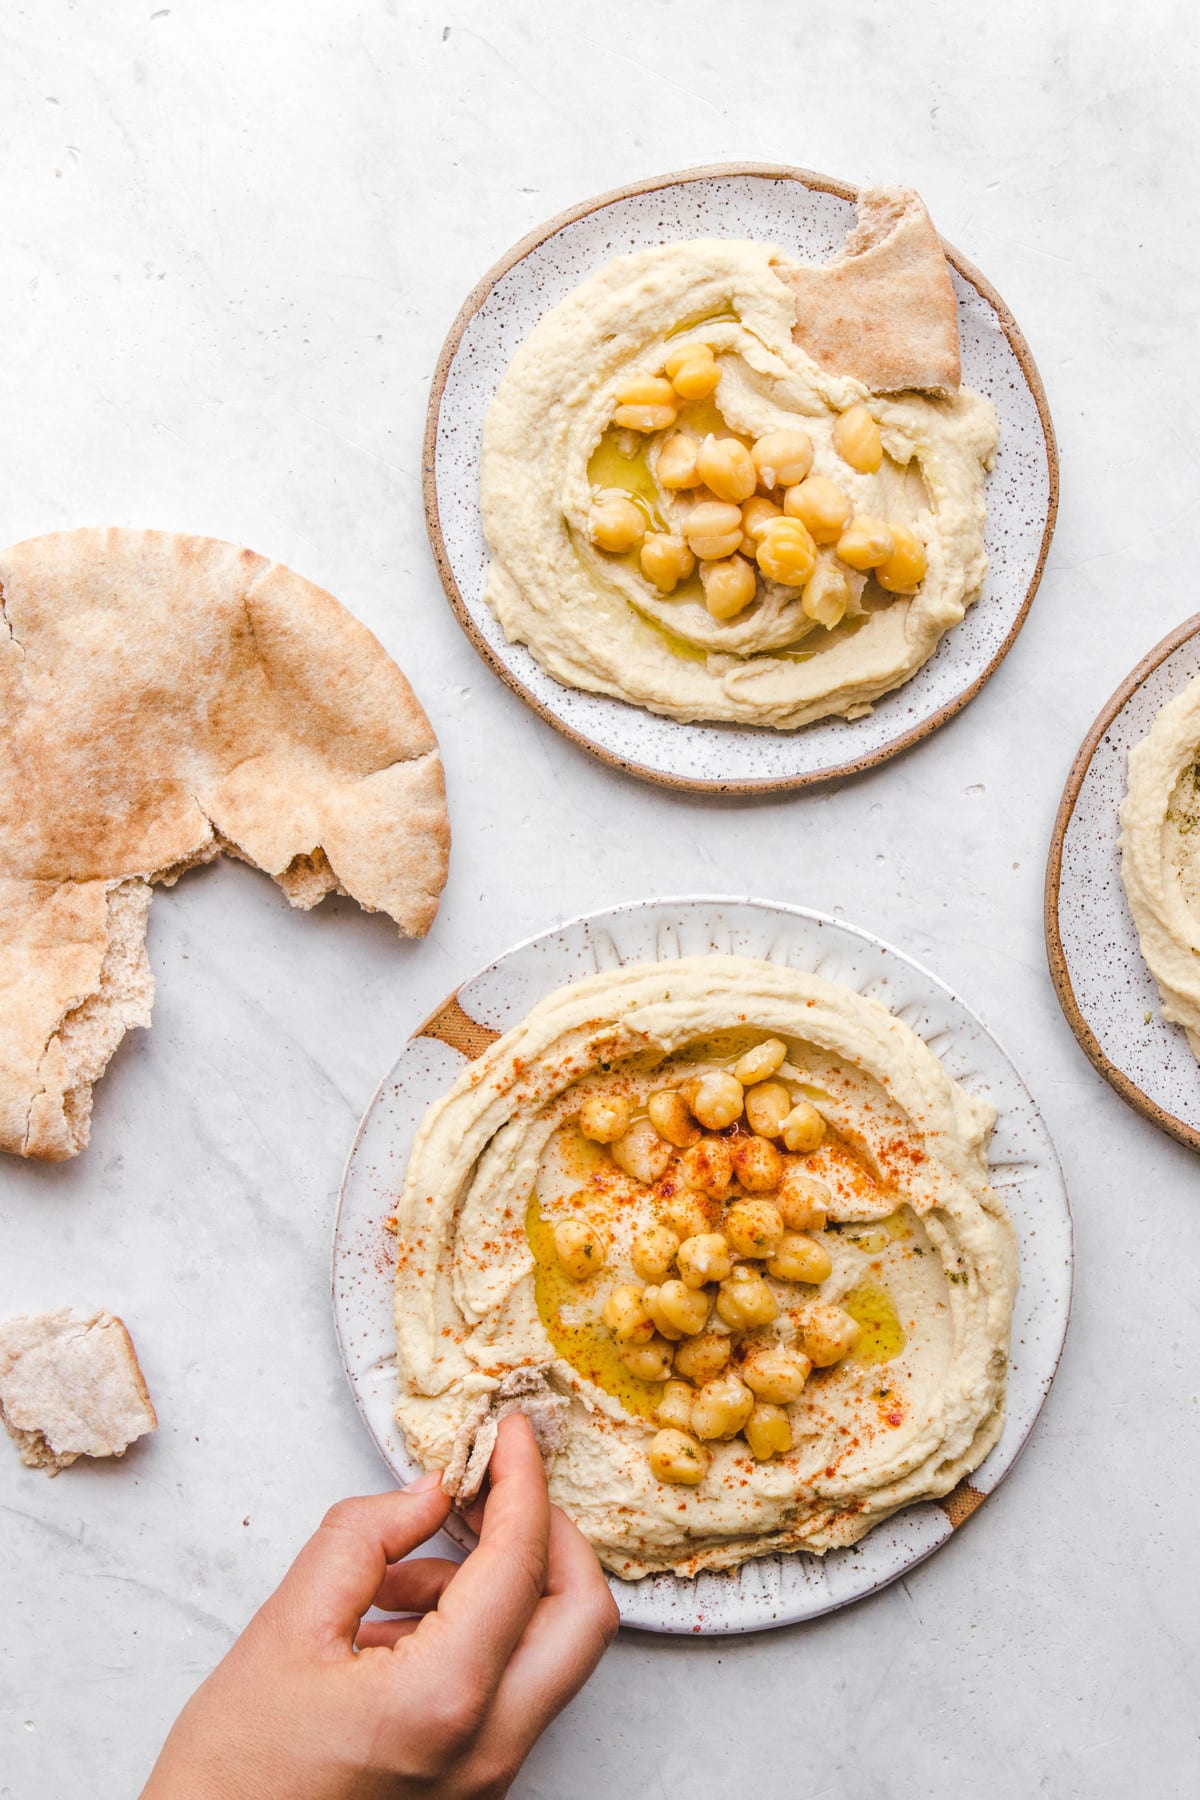
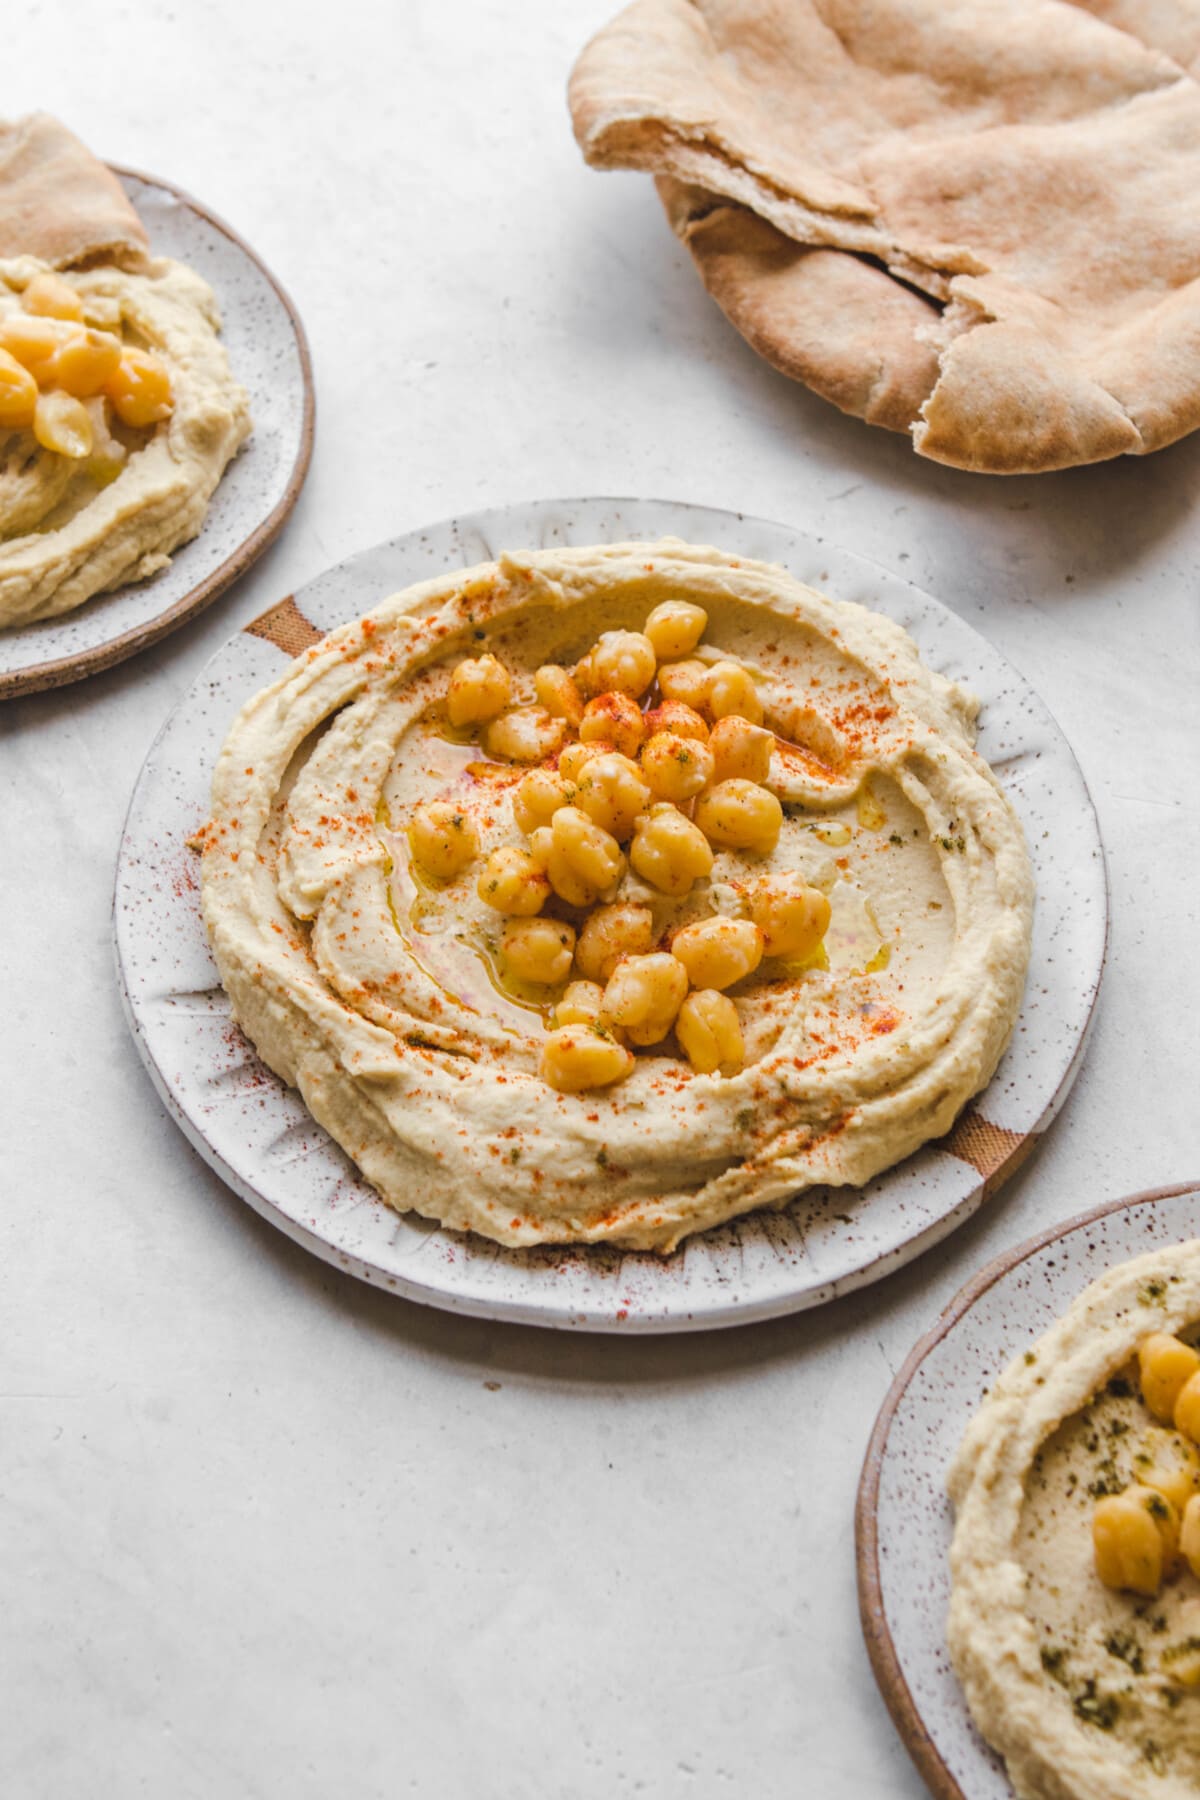
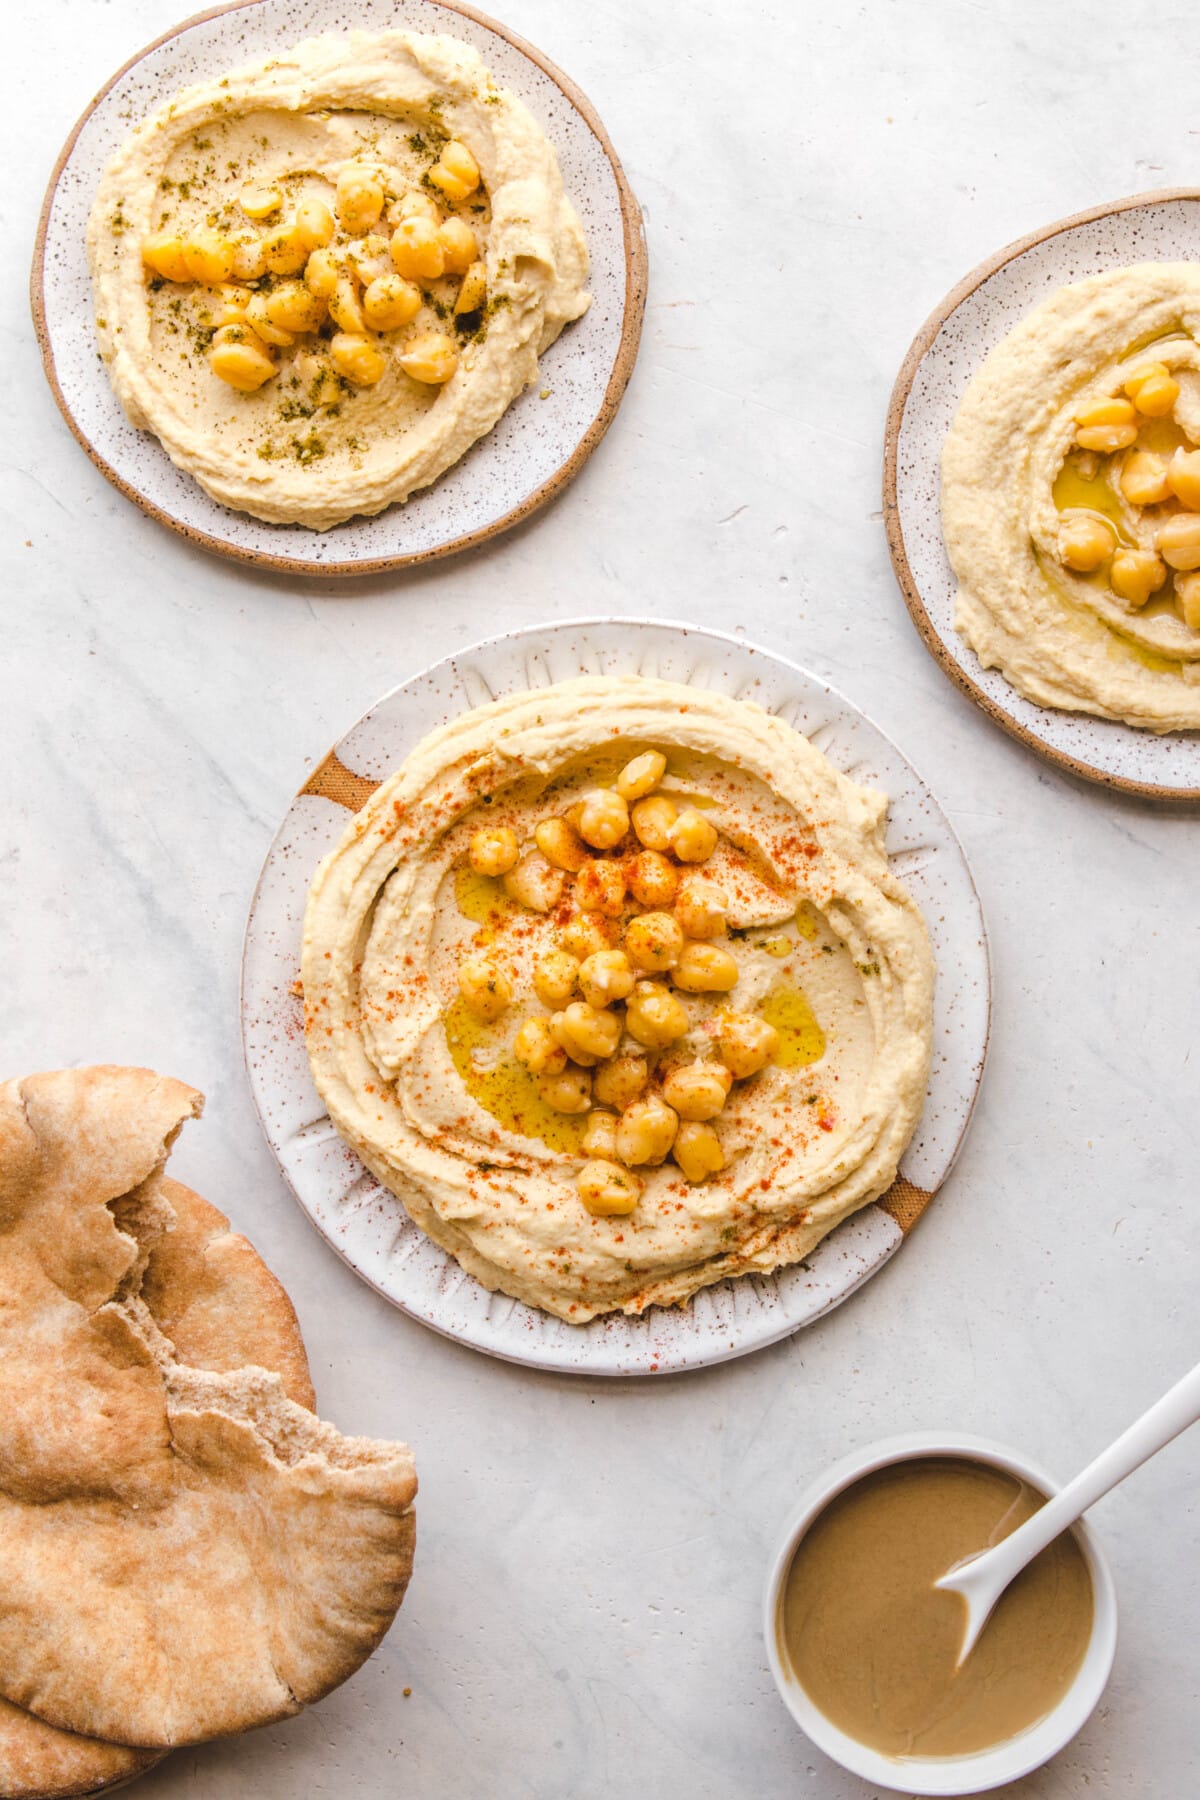
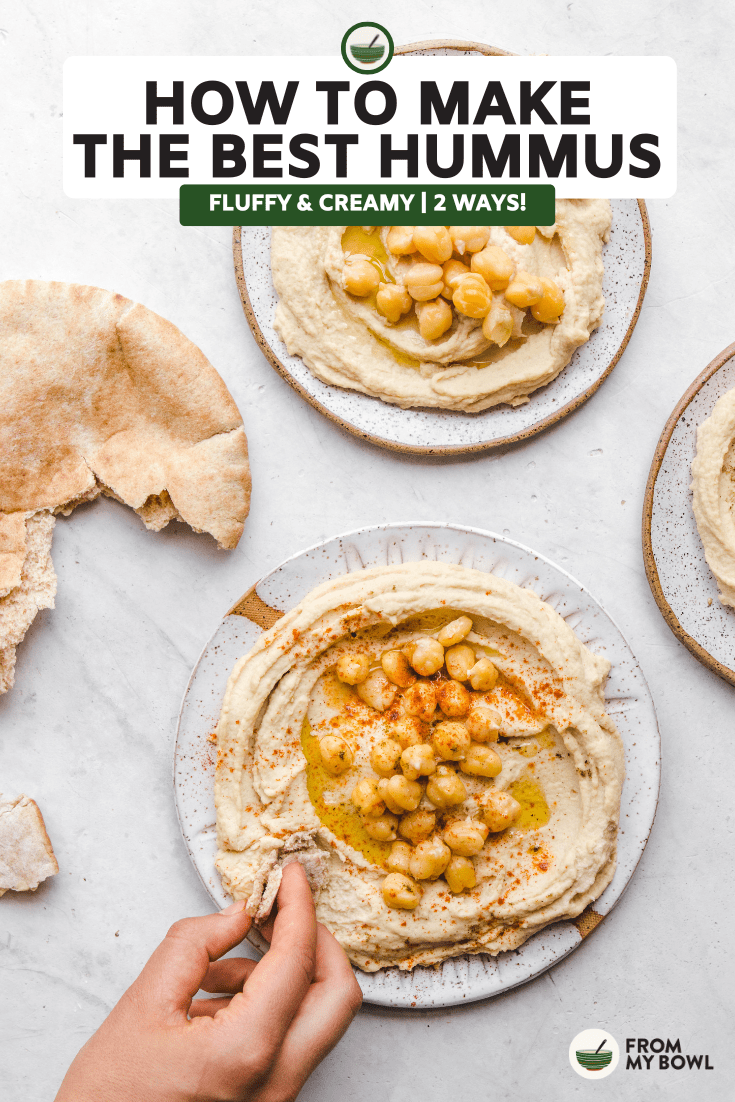
- Serve hummus with toppings of choice.
Caitlin’s Cooking Tips
- Use this process as an opportunity to listen to a good soundtrack or podcast. I’ll admit peeling the chickpeas can be a long, tedious step. But if you’re determined and got something to listen to, you can easily get this step done in ~20 minutes. To try and speed up the process, you can try rubbing the chickpeas between a clean kitchen towel, but I didn’t find that it made a huge difference.
- Process the hummus for the full 5 minutes. Authentic, “real” hummus should not be thick and chunky. Good hummus is fluffy, creamy, and silky smooth. To achieve this, I definitely recommend “processing” your hummus for the full 5 minutes. However, I’ve been told if you blend it for too long, it spoils faster. I’m not sure how true that is because it never lasts over 5 days here, but you’ve been warned 😉
Serving Suggestions
Hummus is a delicious dip or spread to enjoy for breakfast, lunch or dinner. In the Middle East, hummus is often served warm as the center of a meal and topped with a drizzle of olive oil, and spices such as cumin, smoked paprika, sumac, za’atar, etc.
Try it spread on a Rainbow Veggie Sandwich, Vegan Pinwheels, used as a 3-Ingredient Hummus Salad dressing, drizzled on Sheet Pan Za’atar Chickpeas with Sweet Potatoes or turned into a Hummus Pasta.
If you’re looking for more homemade dip recipes, you’ll also love this Creamy White Bean Dip, Roasted Butternut Squash Hummus and this Healthy Buffalo “Chicken” Dip!
How to Store Homemade Hummus
Homemade hummus will keep best in a sealed container in the fridge for up to 5 days or in the freezer for up to 3 months.
Defrost frozen hummus in the refrigerator for 24-48 hours until softened. If desired, run the hummus through a food processor for 1-2 minutes to make it nice and fluffy again.
Recipe FAQs
It is absolutely cheaper to make your own homemade hummus. Dried chickpeas are extremely affordable and will last for months in the pantry.
Although this recipe calls for dried chickpeas, it is imperative that they are cooked until tender before processing until smooth. Processing dried chickpeas will result in chickpea flour, which is very, very different.
Nope! Although many store-bought hummus brands are made with oils, authentic hummus does not need to be made with oil. A quality tahini will make it fluffy and creamy enough without!
Enjoy! If you make this recipe and decide to share it onFacebook or Instagram, don’t forget to tag me@FromMyBowl+ #FromMyBowl! I would also love it if you could leave a comment below with a recipe rating! Thank you for the support 😊
How to Make (The Best) Hummus
Ingredients
- 12 ounces dried Chickpeas about 2 cups, soaked in water overnight
- 1 teaspoon Baking Soda
- 3-5 cloves of Garlic
- Juice of 1 Lemon
- 1 1/2 teaspoon Kosher Salt
- 1/4 -3/4 cup Tahini based on preference
- 1 cup Ice Cold Water* divided
- Optional Toppings: Olive Oil, Cumin, Smoked Paprika, Za'atar, etc.
Instructions
- Soak the Chickpeas: Sort through the dried chickpeas, then place in a large bowl. Cover with water and soak at room temperature (or in the fridge) for 12 to 24 hours. Drain and rinse well.
- Cook The Chickpeas: Add the chickpeas, garlic, and baking soda to a large pot or instant pot. – Instant Pot (recommended): Fill the pot with water until it is 2 to 3″ above the beans. Stir, seal, and cook on Manual HIGH pressure for 10 to 12 minutes; let the pressure naturally release for 10 minutes before breaking the seal. (Note: if you soaked your chickpeas for closer to 24 hours, cook for 8 to 10 minutes instead). – Stovetop: Cover the beans with water and bring to a boil over high heat. Reduce the heat to medium and simmer for 40 to 120 minutes, stirring occasionally, until the beans are tender.
- Peel the Chickpeas: Drain and rinse the cooked beans until no bubbles remain. Pick out the cooked garlic cloves and set aside. To peel the chickpeas, gently “pinch” each bean; the skin should slide off quite easily. Repeat with the remaining beans and discard the outer skin once finished.
- Chickpea Puree: Add the garlic and 3 cups of the peeled chickpeas to a food processor with an S-blade attachment. Mix the lemon juice and salt together in a small bowl until the salt dissolves. Turn the food processor on and slowly pour the lemon mixture into the processor while it is running; process until the chickpeas are relatively smooth.
- Make the Hummus: Add 1/4 cup of tahini to the food processor and seal it shut. Turn the food processor on and slowly pour in 1/3 cup of the ice cold water. Let the food processor run for 4 to 5 minutes, to help make the hummus fluffy and smooth (don’t skip this step!). Add in extra tahini and water in 1/4 cup increments, if you would like your spread to be thicker and creamier.
- Serve: Top the hummus with the remaining peeled chickpeas and any other toppings of choice. Leftovers will keep well in a sealed container in the fridge for up to 5 days.
Recipe Notes
- “Ice Cold” Water: place a few ice cubes in a glass of water for ~ 5 minutes, or stick a glass of water in the freezer for ~ 10 minutes.
- Baking soda: cooking the chickpeas in baking soda helps to soften them and make them easier to peel. You cannot taste any baking soda in the final recipe!


Hello! I am sadly allergic to sesame, is there any substitute for the tahini I can use?
It’s a pretty essential component to hummus, though you could use Sunflower Seed butter instead for a different taste!
Perfect.
We like to think that too! 😉
can you tell me how many calories in this recipe. great recipe i added extra lemon and used organic canned chickpeas and world well
Hi Dina! I do not calculate the nutrition information for my recipes, but there are plenty of free online calculators to help you do so 🙂
Hi Caitlin,
this is by far really the best hummus recipe I’ve ever tried.
I had a bit of a hard time peeling the chickpeas (I think, I overcooked them slightly) but the taste was really exeptional.
Thanks for sharing this and best greetings from Austria!
Thank you Regina! I’m glad you thought it was worth the extra effort 🙂
I’ve tried this today and it is INSANELY good! It’s unreal how delicious this hummus turned out. Thank you so much for sharing this AMAZING recipe with us!
Thanks, Evie!
I’m so confused… the ingredients say 12 oz of chickpeas and then it says put 3 cups into the blender!?
Lol I don’t have another can of chick peas????
It’s 12 oz of dried Chickpeas, Josey!
I’ve tried making hummus on multiple occasions but your recipe is the best. I will definitely be sticking with it and it gets extra points for being olive oil free.
Thank you, Iva! I agree 😉
Extremely simple recipe. I ended up making the Tahini sauce too (recipe from another site).
Came out tasty and fluffy. Thank u so much
You’re very welcome!
delicious!!!
It really is the best hummus ever! I have tried to make hummus form canned chickpeas but the texture wasn’t so creamy. This was my first time when I boiled chickpeas and they are way more delicious than canned ones! And the hummus was creamy and after refrigerating, it has almost mousse like consistency! Thank you very much for this recipe!
You’re very welcome, Agnese!
I don’t know what happened, but the Instant Pot totally decimated my chickpeas. I soaked them for 18 hours, drained, rinsed them, put them in IP, covered with 3 inches of water, added garlic, baking soda, stired, then pressure cooked for 11 minutes, wait 10 minutes on natural release, tried to move to venting and chickpea guts were shooting every where! It took me 10 minutes to even get the lid off. Did anyone else have this problem because honesty I’m so upset. Not only did they explode out, but they were total mush and unusable. It took me another 20 minutes to just clean up the mess.
Hi Haley! I have noticed that Instant Pots can vary in power. In the future I would recommend soaking your beans for only 10 or so hours, cooking for the minimum time, and releasing the pressure immediately after cooking. That should solve the problem!
Hi Caitlin,
I live in the Midwest and have access to all kinds of dry beans, peas and lentil this time of year but have had trouble locating chicpeas. What other legumes would you suggest trying just for fun? Or perhaps a good question also would be which ones would likely NOT be a good choice to try? I love experimenting with recipes. I think I might try a Foley food mill to remove the skins. What do you think?
Hi Pamela! I honestly think any bean could work here, but Cannellini, Navy, and Pinto would probably be the best options! If you are using another bean you can just cook until soft – no need to peel 🙂
WOW!! I have been making hummus from scratch for years, but never tried it with dried beans because, well, it didn’t seem worth the extra work. I tried this recipe and now may never go back to canned. This is honestly the BEST hummus I have ever made. Thank you for sharing!
Thanks, Lue!
I made this hummus recipe tonight and it is the best hummus I have ever eaten. I cooked a whole bag of chick peas so that I can freeze then in baggies of 3 cups eat so that I can make it whenever I have company or just feel like having hummus. The only thing is that it took me several hours to remove the skins, but worth it. Thanks for sharing this recipe.
Followed your steps. Prepared it from scratch with sesame seeds and chickpeas. First time ever. My kids loved it. Thank you!
Wow – that’s impressive, Rodney! I’m glad the whole family enjoyed it 🙂
Holy moly I am now peeling chickpeas regardless of how tedious it is! Smoothest hummus I have ever had! My previous homemade hummus was always grainy, this is heavenly. I tweaked the amount of lemon and garlic for personal preference and it turned out delicious. Thanks for all your research and finding the perfect tip.
-Lisa
So glad you enjoyed it, Lisa!
Thank u so much for sharing Real Recipe..Very easy & very well explained…will make it Today ????
Really, really good hummus! I’ve made it twice already. But that peeling…oh my! That was really bad, I peeled about half the first time before I gave up. It was tedious and messy. It was still delicious and as smooth as could be! Today I just took out some of the skins that came off on their own and it was still delicious and super creamy!
Thank you so much! I love hummus and have always wanted the perfect recipe to make it at home.
I’m giving this 4/5 because it broke the ice on getting me to start “hummus-ing” and not because it specs enough lemon juice. It definitely needed more lemon juice. This is another recipe that’s a start, but not the “one.”
What is the point of putting in garlic if we’re going to cook out all the flavor? I’ll never do that again. If I didn’t want garlic flavor, I wouldn’t have bought it. Or maybe I just don’t get it the way you do.
I didn’t peel all the chick peas. I just scooped up 3 cups of the drained chick peas. Who really cares about degrees of smoothness? It’s smooth enough!
I didn’t read through the recipe as I should have. I noticed only near the end that not all the chickpeas were to be used in the hummus. I’d rather eat my hummus with fresh pita than with more chickpeas. No big deal–I got over it. 🙂