Disclosure: This post may contain affiliate links. I may earn a small commission for my endorsement, recommendation, testimonial, and/or link to any products or services from this website.
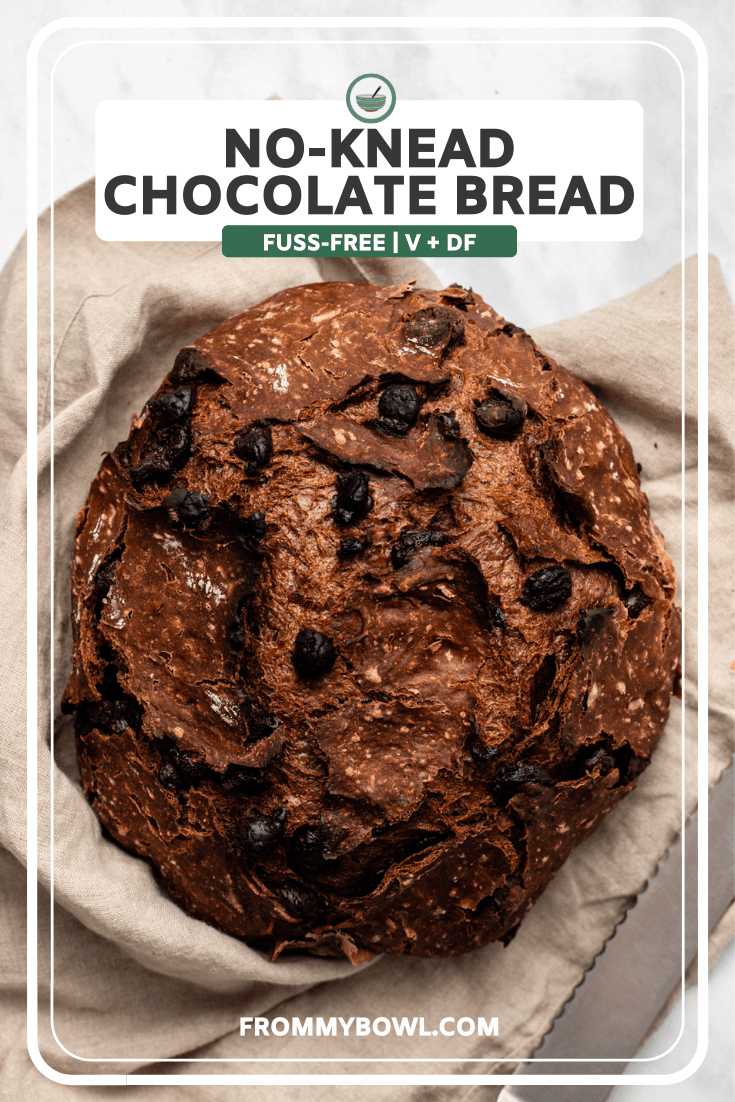
Looking for a fuss-free and easy bread recipe? Try this Double Chocolate No-Knead Bread! It’s a foolproof homemade bread that’s loaded with melty chunks of chocolate. A perfect easy-to-make loaf for sweet morning toast or tasty afternoon snack. It’s even delicious as dessert 😉
INGREDIENTS + INSPIRATION
If you’ve never had a slice of decadent chocolate bread, you’re in for a treat! The good news is that while this bread may taste fancy, it’s made with only 5 simple ingredients you probably already have in your pantry. 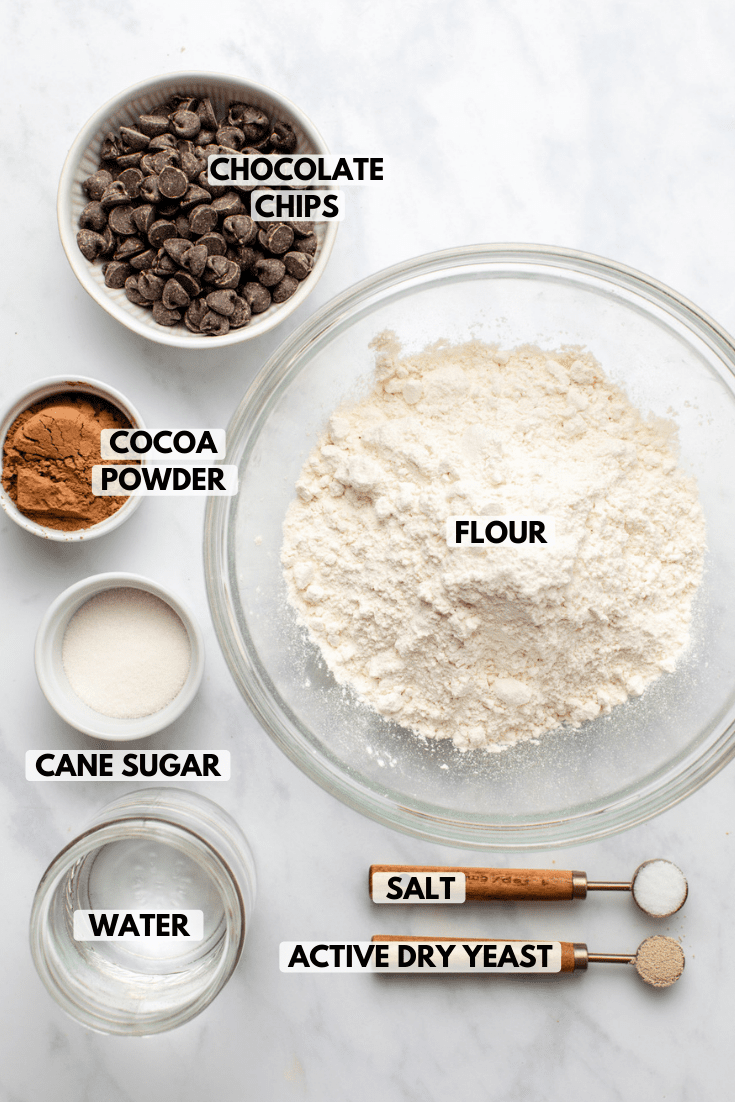
This No-Knead bread was originally inspired by Pinch of Yum – this version is just as simple, but has a lovely chocolate twist! One more equipment note – this double chocolate bread gets baked in a dutch oven with the lid on so that the inside is perfectly fluffy, then the lid gets removed for the last bit of baking so that the edges come out nice and crispy!
HOW TO MAKE DOUBLE CHOCOLATE NO-KNEAD BREAD
Making your own artisan bread may sound intimidating, but this Double Chocolate No-Knead Bread couldn’t be easier to make! Just like the name says, there’s no kneading involved—you simply mix all of your ingredients together the night before, let your dough sit, then pop it in a pre-heated cast iron pot the next day! Viola, you have yourself a warm, melty slice of chocolate toast for breakfast 🙂
-
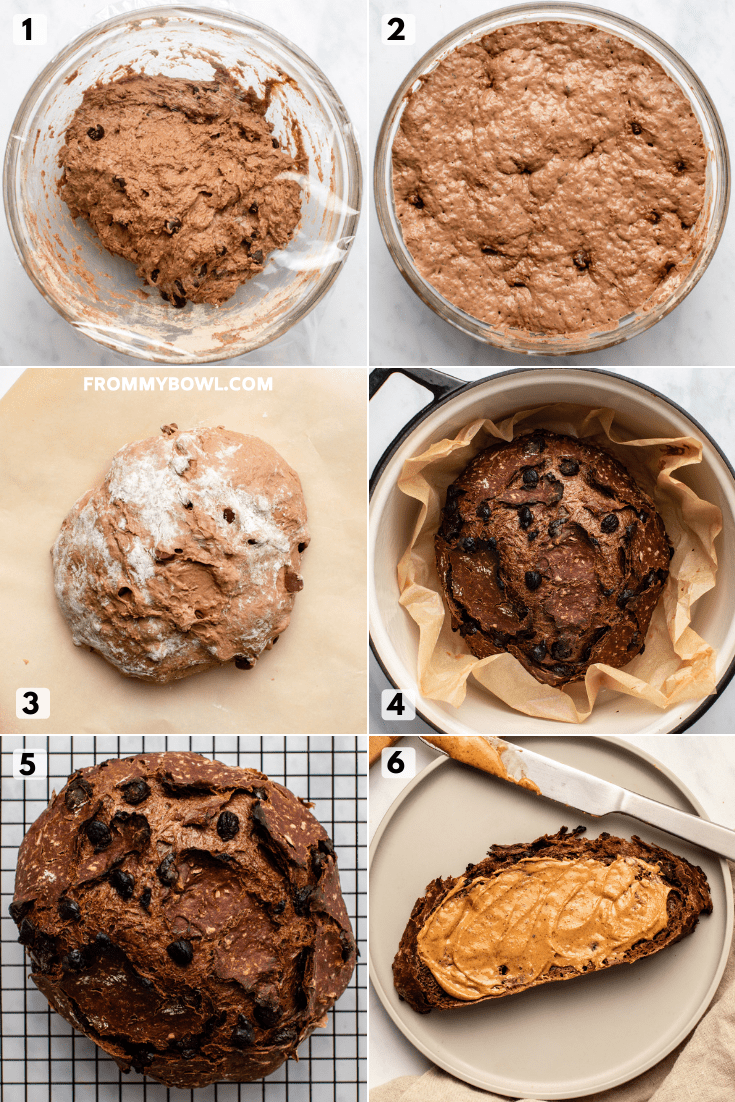
Whisk together flour, cocoa powder, sugar, salt, and yeast in a large bowl and form a well in the center. Mix in water, then the chocolate chips. Cover bowl with plastic wrap and let sit out overnight.
-
Once dough has doubled in size, transfer to a floured work surface and pinch the edges towards the top to shape it. Repeat until a tight ball forms, then flip onto a piece of parchment paper.
-
Place dough and parchment paper into a preheated dutch oven and bake. Let cool before slicing (if you can wait 😉).
Store the loaf at room temperature in a tight-fitting container for up to 5 days. You can also pre-slice the bread and freeze it for up to 2 months—simply take out a slice or two and pop them in the toaster whenever a craving strikes!

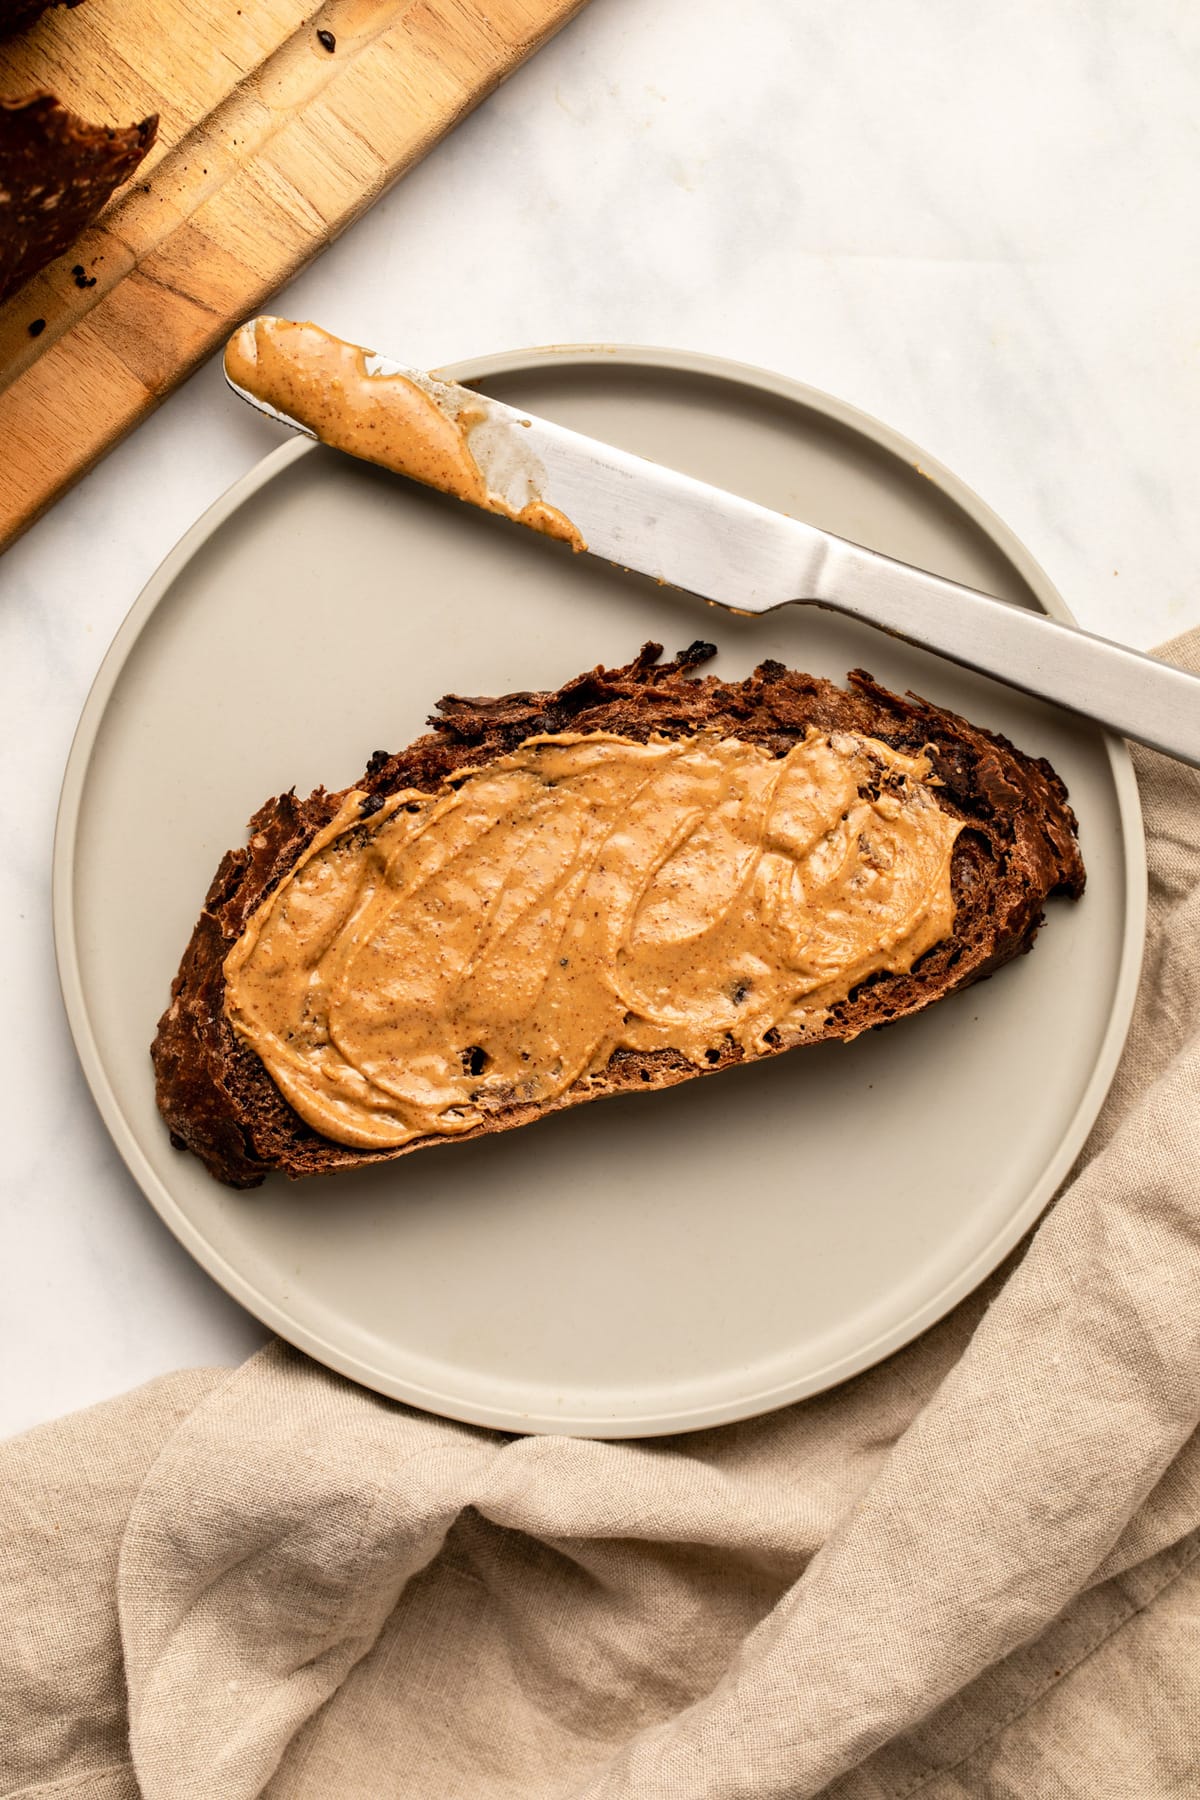
This Double Chocolate No-Knead Bread is so yummy you can enjoy it on its own (I recommend toasting it so the chocolate gets melty 😉). If you’d like to make things even more decadent, you can top your slice with jam or your favorite nut butter (I love peanut butter with mine!). This would also make a very cute date night dessert by adding some fresh fruit on top like sliced strawberries—if you’re a serious chocolate lover like I am, you could even drizzle some melted dark chocolate over top!
COOKING TIPS + FAQ:
- Should I use instant yeast or dry active yeast? Either will work!
- Do I have to use all-purpose flour?Yes, the consistency will come out much better with AP flour rather than whole wheat flour or even bread flour.
- Can I add in extra ingredients? Absolutely! You can add up to 1 cup of chopped nuts or seeds such as walnuts, pecans, pumpkin seeds, etc. for an extra crunch.
- Can I cut into this warm? *Technically* you should let your bread sit until cool to allow the gluten structure to set up. But if you do decide to cut into it while it’s nice and steamy and the chips are still melty? Well, I certainly wouldn’t judge you 😉
If you’re looking for more delicious homemade bread recipes, you’ll also love this Fluffy Vegan Banana Bread, this Gluten-Free Sweet Potato Bread, and The BEST EVER Vegan Zucchini Bread!
Finally, if you make this recipe and decide to share it on Facebook or Instagram, don’t forget to tag me @FromMyBowl + #FromMyBowl! I love seeing your delicious recreations 🙂
Double Chocolate No-Knead Bread

This super rich Double Chocolate No-Knead Bread is a fluffy, chocolate-filled loaf with the perfect crispy edges! A melty chunk of chocolate in every bite!
- Prep Time: 15 Minutes
- Cook Time: 50 Minutes
- Total Time: 13 Hours
- Yield: Serves 4 to 8 1x
- Category: Side
- Method: Oven
- Cuisine: American
- Diet: Vegan
Ingredients
- 3 cups (405 g) all-purpose flour
- 1/4 cup (18 g) cocoa or cacao powder
- 2 tablespoons cane sugar
- 1 teaspoon kosher salt
- 1/2 teaspoon active dry yeast or instant yeast (I used reg)
- 1 1/2 cups (355 ml) + 2 tablespoons room temperature water, divided
- 3/4 cup (134 g) dairy-free chocolate chips or chocolate chunks
Instructions
- Prep: Add the flour to a large mixing bowl, then sift in the cacao powder. Add the sugar, salt, and yeast, then whisk well until combined. Form a well in the center of the dough, then pour in 1 1/2 cups water and mix with a wooden spoon. Once the dough starts to thicken (there will still be some flour left), add in the chocolate chips and mix well, until all of the flour is absorbed. The dough will be thick and lumpy, but if it is too dry, add in the extra 2 tablespoons of water. Cover the bowl with plastic wrap (I like to use a rubber band to seal it tight) then set aside and let rest for 12 to 18 hours.
- Preheat: Preheat the oven to 450F; once it’s pre-heated, add a 6 quart (or similar sized) coated dutch oven or cast iron pot to the oven and allow it to preheat for 30 minutes. Set a sheet of parchment paper aside.
- Shape the Dough: After the dough has rested overnight it should have at least doubled in size and appear very loose and bubbly. Right before baking, use a spatula to transfer the dough onto a well-floured surface. Dust your hands with flour as well and pull the bottom edges of the dough ball towards the center of the top, pinching well to “shape” it – remember, no kneading! Repeat several times to get a tight ball, then flip the ball onto the sheet of parchment paper. I like to do this right before taking the cast iron out of the oven.
- Bake: Carefully remove the preheated dutch oven, place the parchment paper (and dough) in it, then cover and return to the oven. Bake for 30 minutes covered, then remove the lid and bake for an extra 18 to 20 minutes to get a nice and crispy crust.
- Serve: Remove from the oven and transfer to a cooling rack. Let cool before slicing…or slice it while it’s warm and the chocolate chips melty, I won’t judge 😉


So amazing! Do you think I could add peanut butter?
Hi Shann! I would not recommend adding it to the recipe, but you can certainly use it as a topping post-bake!
Hi – this recipe looks very interesting and might work for us- I was hoping to have something to serve in individual servings (not slices), however. Any thoughts about making it more of a pull-apart style or dividing the dough into smaller portions and baking them in silicone baking cups? Thanks for any ideas – I understand you may have never tried any of these options, but I was just looking for an opinion. Thank you!
Hi, Heather! We have not tried the options you mentioned. While the recipe is designed for a loaf, you can certainly experiment with making individual servings or a pull-apart style version.
For pull-apart: Shape the dough into smaller dough balls and place them close together in a baking dish. As they rise and bake, they will become interconnected, making it easy to pull them apart once they’re done baking.
Remember that when you modify the size and shape of the bread, the baking time and temperature may vary, so it’s a good idea to keep an eye on the bread as it bakes and adjust as needed. You can use the same temperature mentioned in the recipe but may need to reduce the baking time for smaller portions.
Hi, my dough sat for 12 hours but did not rise or double in size. I followed the recipe and used 1/2 teaspoon of instant yeast per recipe directions.
It might be that your yeast is dead! Check the expiry date or mix it in some water and see if it blooms!
Can I add dried cherries to this recipe? If so, how much?
Yes! To incorporate them, you can add about 1/2 to 3/4 cup of dried cherries to the dough mixture along with the chocolate chips. Adjust the amount based on your preference for the intensity of cherry flavor in the bread. Mix the dried cherries along with the other ingredients and proceed with the recipe as directed. Enjoy!
Made this exactly as directed and it is perfect. OMG. It was all I could do to not eat the whole load. No need to butter. We had Lavender Blueberry spread in the refrigerator and used that on my second slice. Wow. Delicious. Will be making this on repeat. Gotta remember bikini season though.:) Thank you!!!
Hi there! I am a huge fan of your recipes. This recipe sounds amazing!
I’m GF and wondering if this bread could be made with GF flour and still have the same results as regular? If so, what type of GF flour and what amount do you recommend?
Thank you!
Yes, you can make the Double Chocolate No-Knead Bread with gluten-free flour and still achieve delicious results. Here’s a recommendation for substituting the all-purpose flour with gluten-free flour:
Use a gluten-free all-purpose flour blend that is suitable for baking. Look for a blend that is specifically formulated for bread or has a similar texture to regular all-purpose flour. There are many brands available in stores or online.
For the amount, you can generally substitute gluten-free flour in a 1:1 ratio with all-purpose flour. Since the recipe calls for 3 cups of all-purpose flour, you would use 3 cups of gluten-free all-purpose flour.
Could I use bread flour instead of AP flour?
I believe you should be able too, it just has a higher gluten content so may be a bit chewier.
OMG, I have NEVER made a bread with such a high taste/difficulty level!
I made it exactly as the recipe described except I added 3/4C nuts and, after the bread had risen four hours at room temperature, I was worried it was rising too fast, so I did the rest of the rise in the fridge.
This bread was SOOO easy to make and the taste was incredible. Also, and this is always the most important thing for me, the crust was perfect – very crisp, but not tough. As the recipe suggested, I used a Dutch oven, and I imagine that was necessary to get the crust just right.
This is the perfect recipe for your first time making yeast bread because, if it came out this great for me, ANYONE can do it! 🙂
We’re happy to hear it turned out great for you, Marisol!
Can I use my bread machine to do this and if yes, do I still need the bread to ‘rest’ for 12-18 hours when the bread machine can proof it?
We have not personally tried using a bread machine for this recipe but in general, in a bread maker machine, 12 to 18 hours of bread resting is equivalent to the dough cycle, which typically takes 2 to 3 hours.
this bread is delicious! the bread itself isn’t too sweet and the chocolate chips make it perfect for dessert. i don’t own a dutch oven but i successfully made this in a large glass dish with a lid :]
Happy that it was a success! Thank you so much for the review.
Making this right now. Would a 3.5 qt Dutch oven work?
Yes!
Just found your site. So excited to try some of your recipes. Do you think this will work with cup 4 cup gluten free flour?
Hi Danette! Unfortunately I don’t think this would work well with gluten-free flour. But let us know if you have any success with it!
All I have is a frying pan…when you say a dutch oven…do you mean a big pot??? I have one of those. It’s stainless steel and I’m worried about it sticking.
As long as your cookware is oven-safe and can withstand temperatures over 450 degrees Fahrenheit, you can use any covered metal pot for baking bread.
Great recipe! I made mine in a large, oven safe pot with a round baking sheet pan as a lid. I’ve done this trick for years and it will work if you don’t have a Dutch oven!
This recipe was great! I made it for Easter breakfast. I loved how it felt special but was so easy and fast to put together.
We definitely agree with you, Elizabeth! Happy you enjoyed the recipe!
Thank you for sharing this ,was so easy and yummy. I was a bit overzealous with the water. Should have added 3/4 of it and added more as I needed because the dough was a bit too sticky but it still came out well. Also totally agree with other commenter. Bake uncovered until its crispy enough for you. Thanks caitlin x
Glad you liked it, Humera!
Made in cast iron Dutch oven. Uncovered baked time reduced to 11 min and came out perfect. Easy recipe!! Thx!
You’re welcome, Stephanie! Glad it came out perfect!
Hi Caitlin. Can I let this bread dough rise in the fridge for 24 hours? I want to make the dough tonight and then bake it tomorrow after work.
Just let it sit overnight on the counter.
Excellent. Added the walnuts and used regular sugar (all I had). I also did the fast rise method so it was ready to bake in 1.5 hours. It is delicious! Just the right amount of sweet. Everyone loved it. It is nice to make something different 🙂
That’s awesome! Thank you for sharing and the 5-star review. 🙂
This bread was incredible!! I don’t have a Dutch oven so baked it in a tall-sided rectangular loaf pan. I used a second loaf pan on top as a makeshift lid and then removed it for the last part of the bake. The crust came out a bit too crusty, to the point where it was difficult to cut through the bottom of the loaf, so I think next time I will reduce the uncovered baking time to just 10-15 minutes in order to adapt it for my loaf pan.
I ate a slice as soon as it cooled and then immediately sliced and froze the rest – gotta pace myself so it lasts all week!
This was delicious! Definitely need to reduce the uncovered bake time in my oven, because it got a little too crispy, but it was still sooo good! We have a bakery in town that sells expensive, fancy dark chocolate/cherry bread at Christmas, and this bread reminds me so much of it, I can now make it year-round!
It’s definitely good to make year-round! Thanks, Sam! 🙂
I haven’t tried this recipe yet but I’m sure it will be stellar! I am wondering what else can be used to bake it in if you don’t have a cast iron dutch oven. No cast iron anything except a frying pan. thanks for your time.
A lidded ceramic dish also worked for me
I have about a 4 qt dutch oven. Could I use that for the bread or is it too small?
You might need to adjust the recipe. This would be a bit small.