Disclosure: This post may contain affiliate links. I may earn a small commission for my endorsement, recommendation, testimonial, and/or link to any products or services from this website.
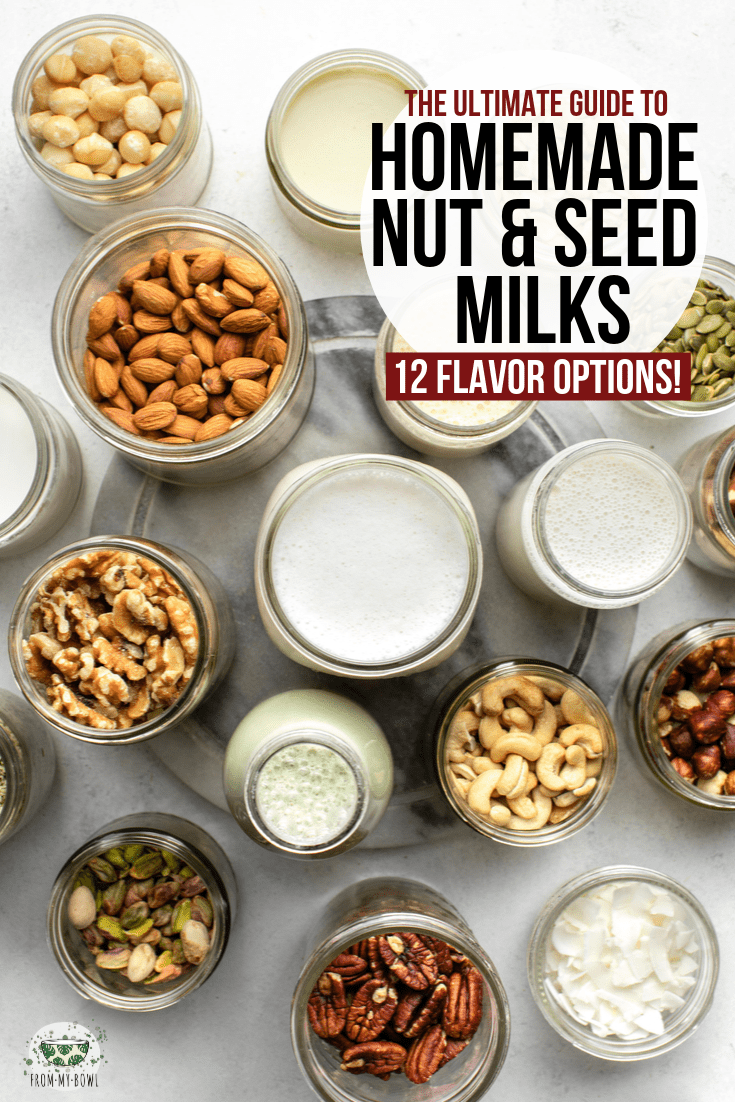
Make your own nut milk at home with this easy and comprehensive guide! Includes simple steps and a flavor review of 12 different nuts and seeds plus blender options.
Non-dairy milk is on the rise, and for good reason: it’s creamy, satisfying, and the perfect dairy replacement in just about any recipe. It’s also widely available in most grocery stores, which is a total win for the plant-based movement.
But wait! What if I told you that homemade nut milk is just as cost-effective and at least twice as delicious as store-bought? It’s a lot easier than you think…especially with this guide.
This blog post provides an in-depth review on how to make your own nut and seed milk at home. Looking for something specific? Check out these shortcuts instead:
- Necessary Equipment
- Soaking Nuts and Seeds
- Straining
- The Creaminess Scale
- Storage and Shelf Life
- Basic Recipe
- Printable Guide to Nut Milk
- Flavor Comparisons
How do I make non-dairy milk at home?
Quite simply by blending nuts, seeds, or another grain with water in a high-speed blender until smooth and creamy. You can also add in a pinch of salt, sweetener of choice, or any other spices/flavorings that your little heart desires.
Homemade nut milk tastes better because it’s fresh and simple. Store-bought nut milk typically contains other gums, thickeners, or additives (more on this later). It’s also flash-pasteurized to help extend its shelf life. Unfortunately, this process also takes away a lot of the nut milks flavor and gives it a bitter, almost soapy taste.
To make homemade nut or seed milk you will need:
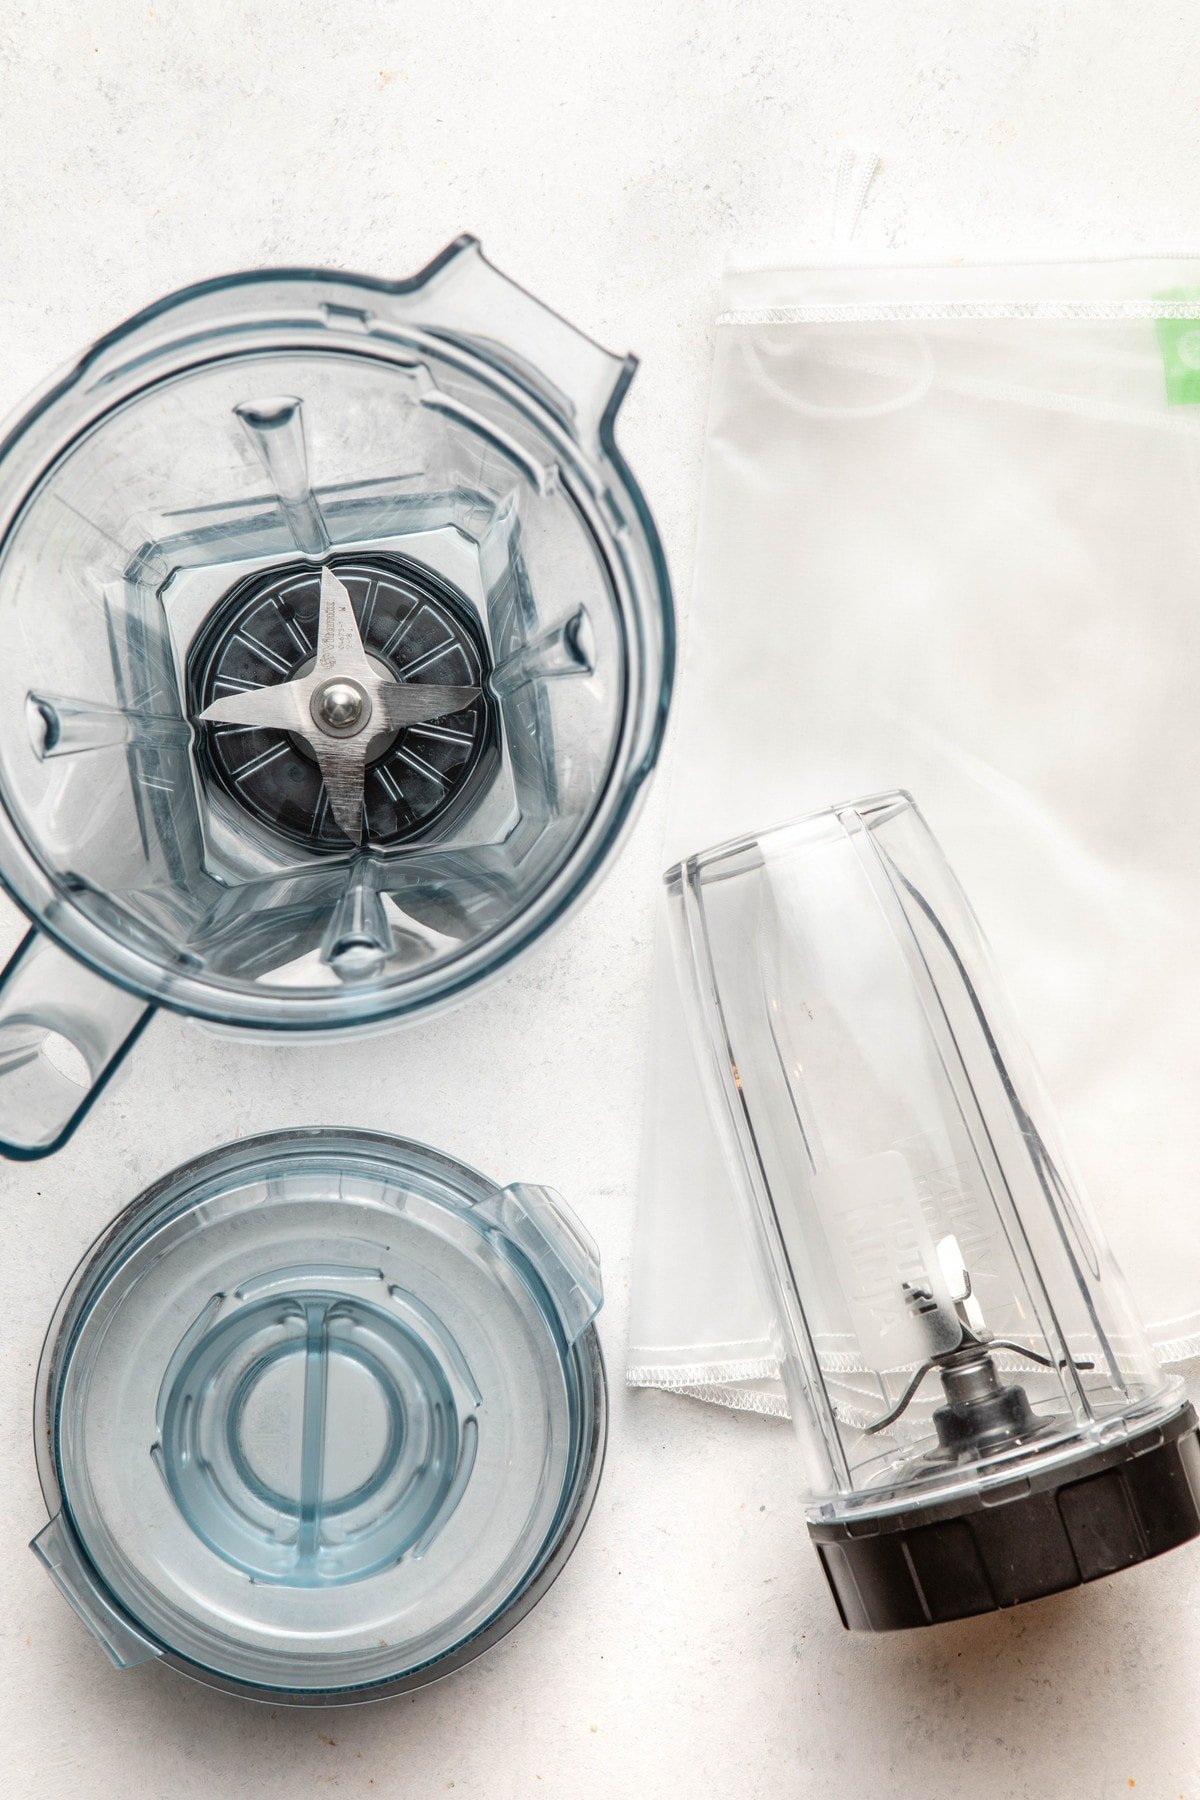
- A high-speed blender like a Vitamix or Blendtec,
- A fine mesh nut milk bag for straining,
- and a mason jar funnel + glass jars for storage (optional, but recommended)
If you don’t have a high-speed blender, you can also use a bullet-style blender to blend some varieties of nuts and seeds. These seem to work better than weaker upright blenders, based on their construction. You can also make homemade milk in any blender by blending 2 to 4 tablespoons of any nut/seed butter with 2 cups of filtered water for 60 seconds. This method can be quite expensive, but does work in a pinch.
In terms of nuts, we recommend purchasing unsalted, raw, and organic whenever possible. Conventional nuts are still ok, and dry-roasted nuts are better than nuts roasted in oil. Heating nuts and seeds takes away most of their nutritional benefits, and can also cause them to go rancid when they are roasted in low-quality oil.
You can, however, choose to toast or dry roast your own nuts at home if you’d like to add an extra flavor element to your milk. This works especially well with pecans, hazelnuts, and coconut!
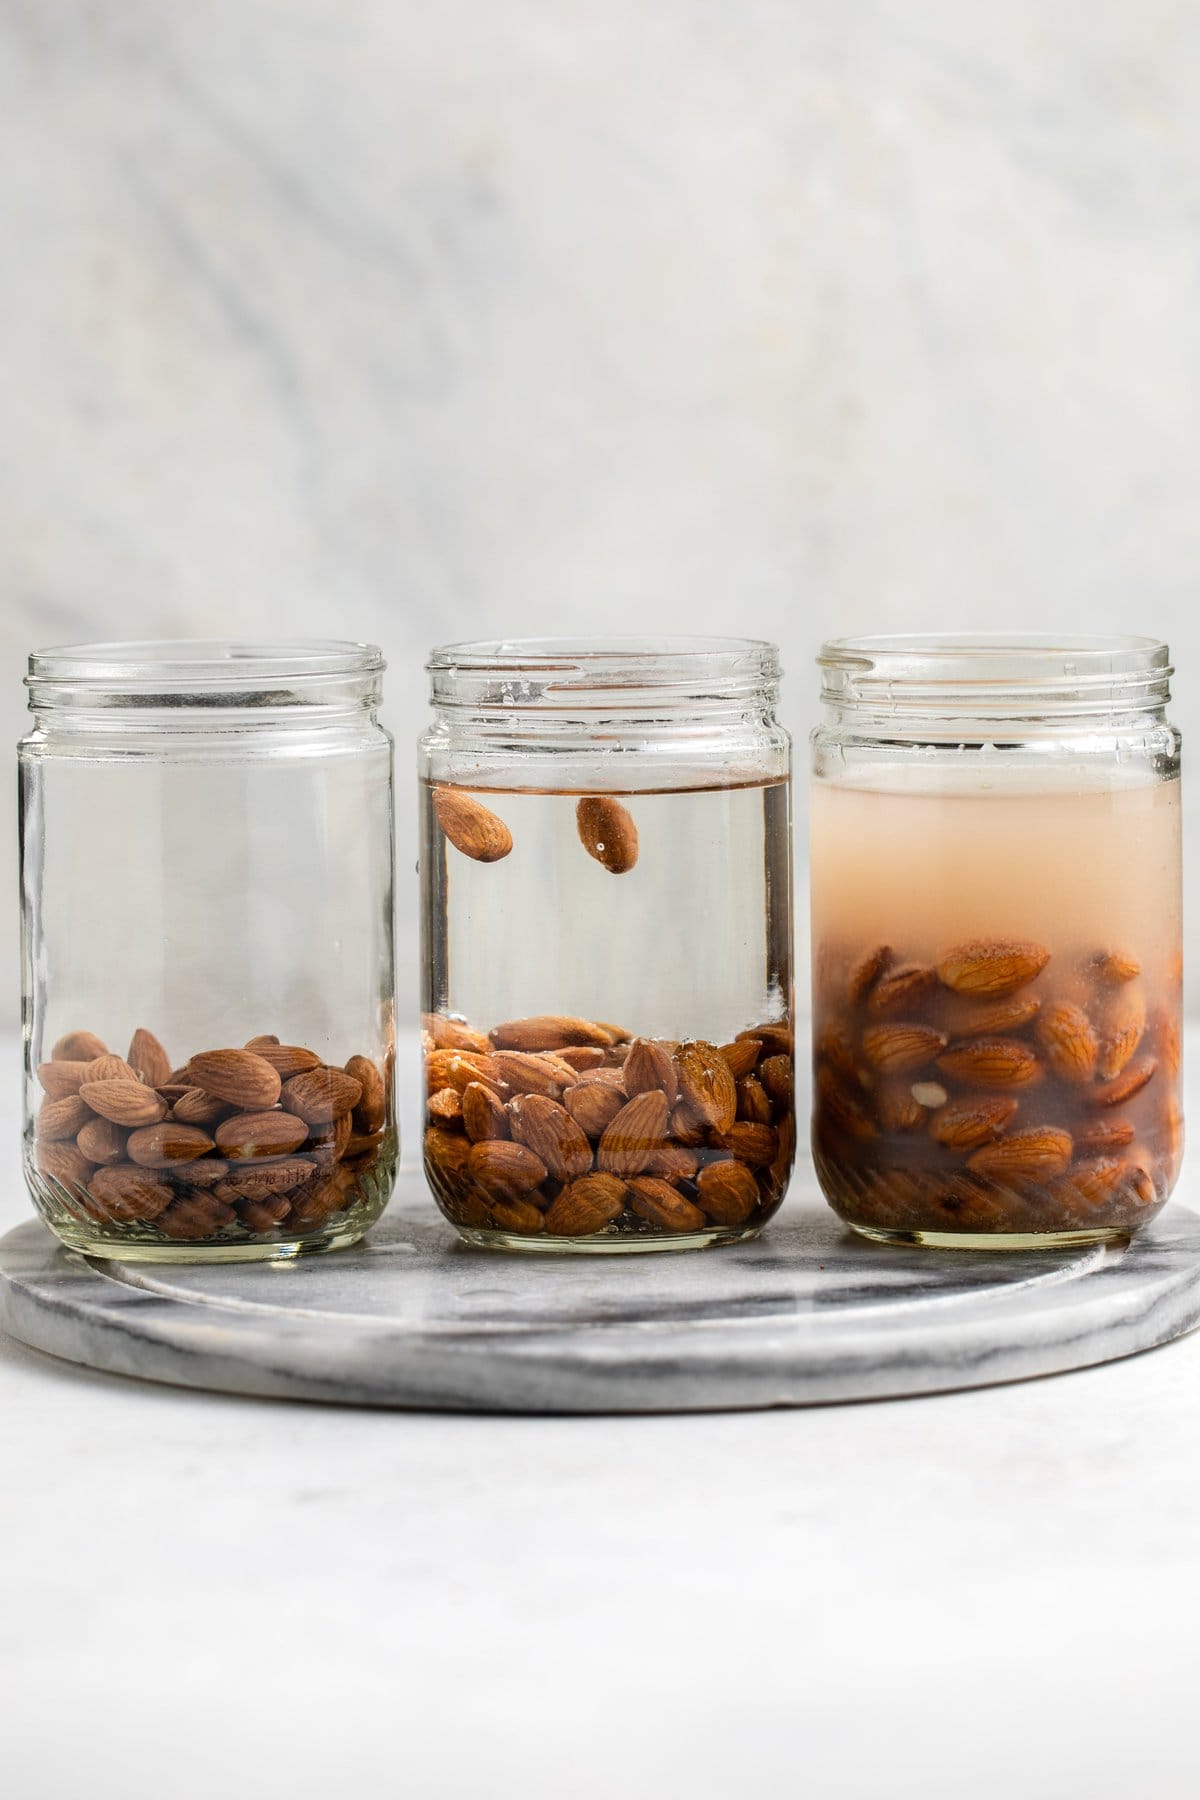
Soaking nuts, seeds, and grains helps to break down hard-to-digest compounds and can actually increase the bioavailability of certain vitamins. You can read more details on that in this review, if you’d like.
Soaking nuts and seeds can be beneficial, but isn’t necessary with a high-speed blender. I usually soak my nuts overnight in the fridge the day before I make nut milk. I’ve also totally forgotten to do this and used un-soaked nuts as well….and noticed no difference in flavor. So you do you!
If you do decide to soak your nuts, simply place them in a glass jar or bowl, cover them with double the water, and let sit in the fridge for 4 to 12 hours. Some nuts will release a “powdery” substance and cloud the water – this is normal! Just don’t forget to rinse your nuts well before adding them to the blender to make nut milk. The only ingredient I don’t recommend soaking is hemp hearts – they are already soft, and don’t need it.
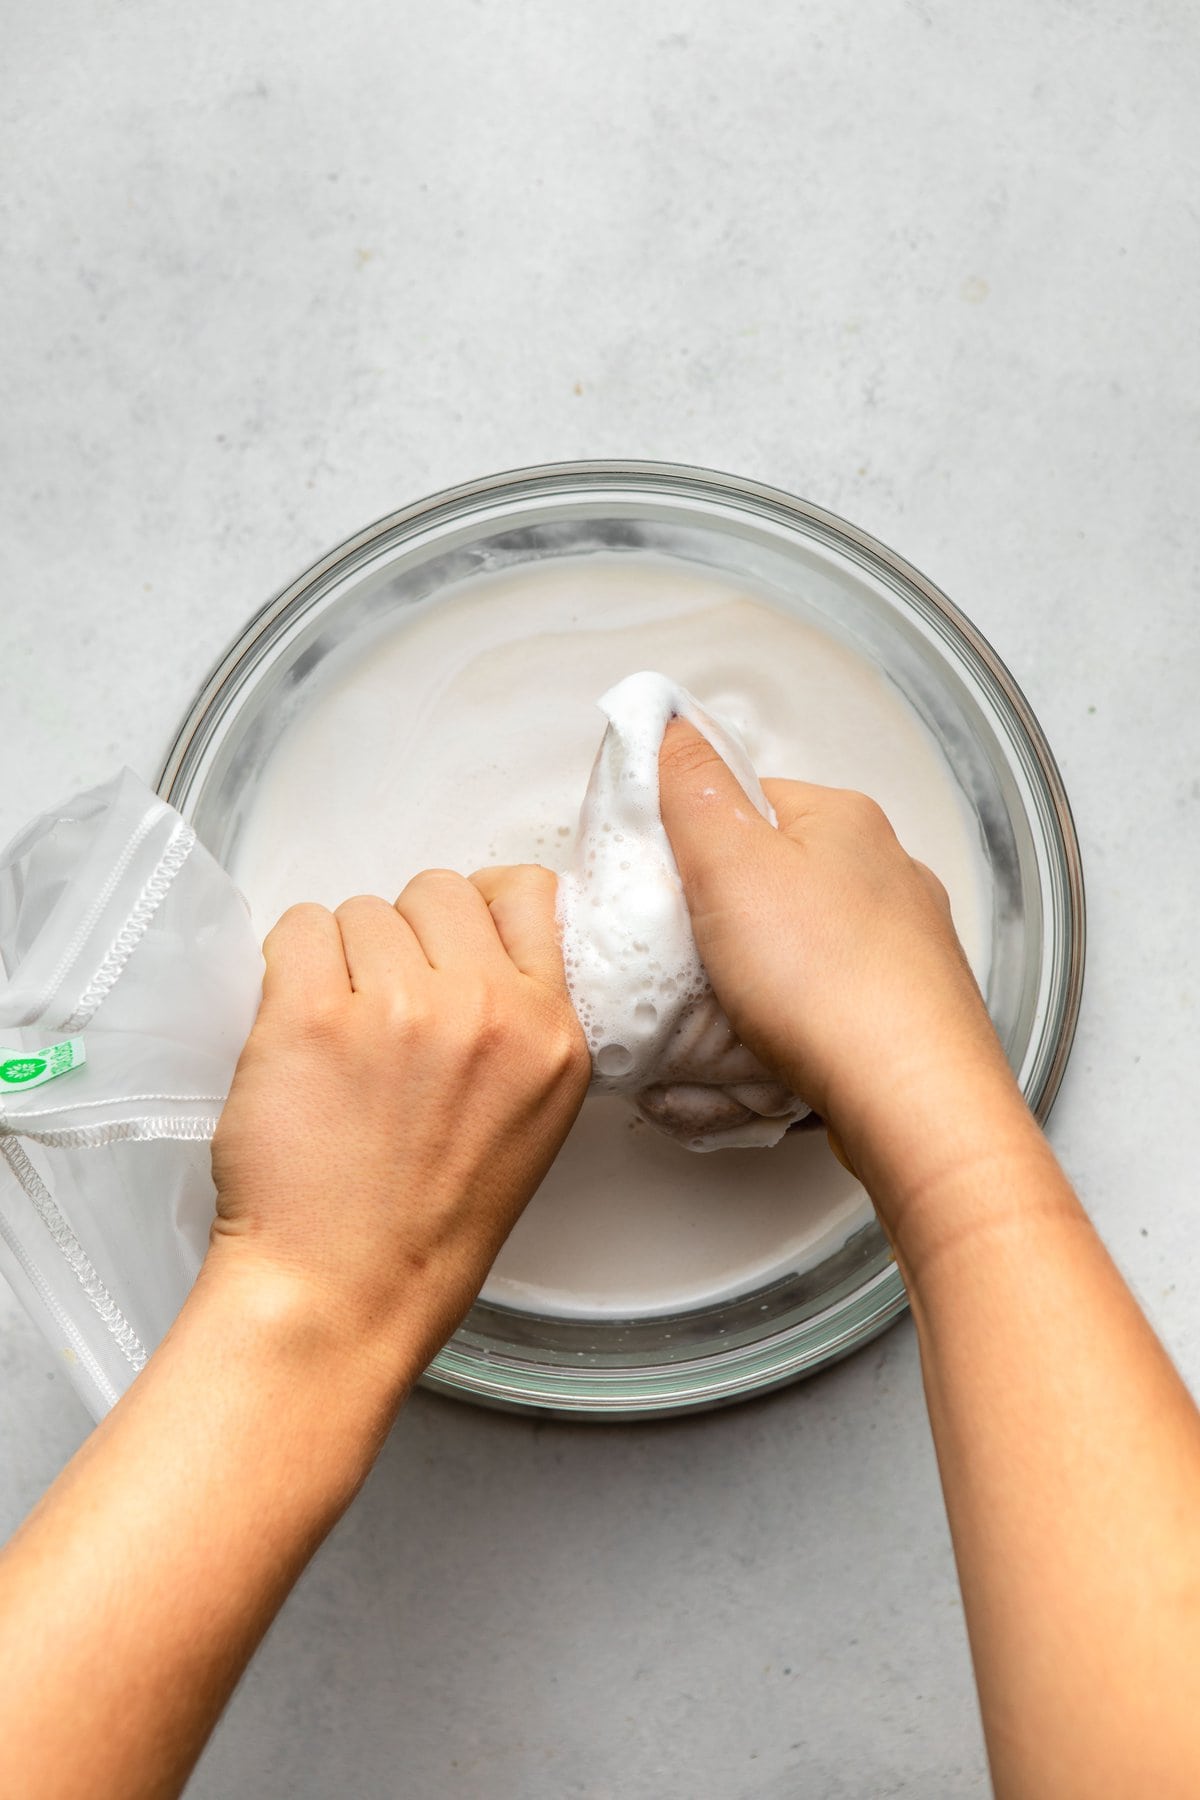
Straining nuts and seeds through a fine-mesh nut milk bag or cheesecloth helps to give your homemade nut milk that smooth, store-bought consistency that we all know and love. I recommend straining any nut with a tough outer “skin”, like almonds, hazelnuts, pistachios, brazil nuts, and walnuts. It the nut has a relatively soft exterior (pecans, macadamia nuts, peanuts) straining is more optional. These nuts leave a fine “pulp” that gives a thicker texture to the milk. I personally do not enjoy this, so I choose to strain it out.
You do not need to strain cashews, pumpkin seeds, and hemp hearts. These ingredients have a very soft consistency and dissolve into the nut milk entirely. All homemade nut milk will separate in the fridge, so it’s always best to give it a little shake before pouring. Un-strained nut milks tend to separate a little more than their strained varieties.
Not sure what to do with your leftover nut pulp? You can throw it out, compost it, mix it into oatmeal or smoothies, or make some Banana Nut Pulp Cookies!
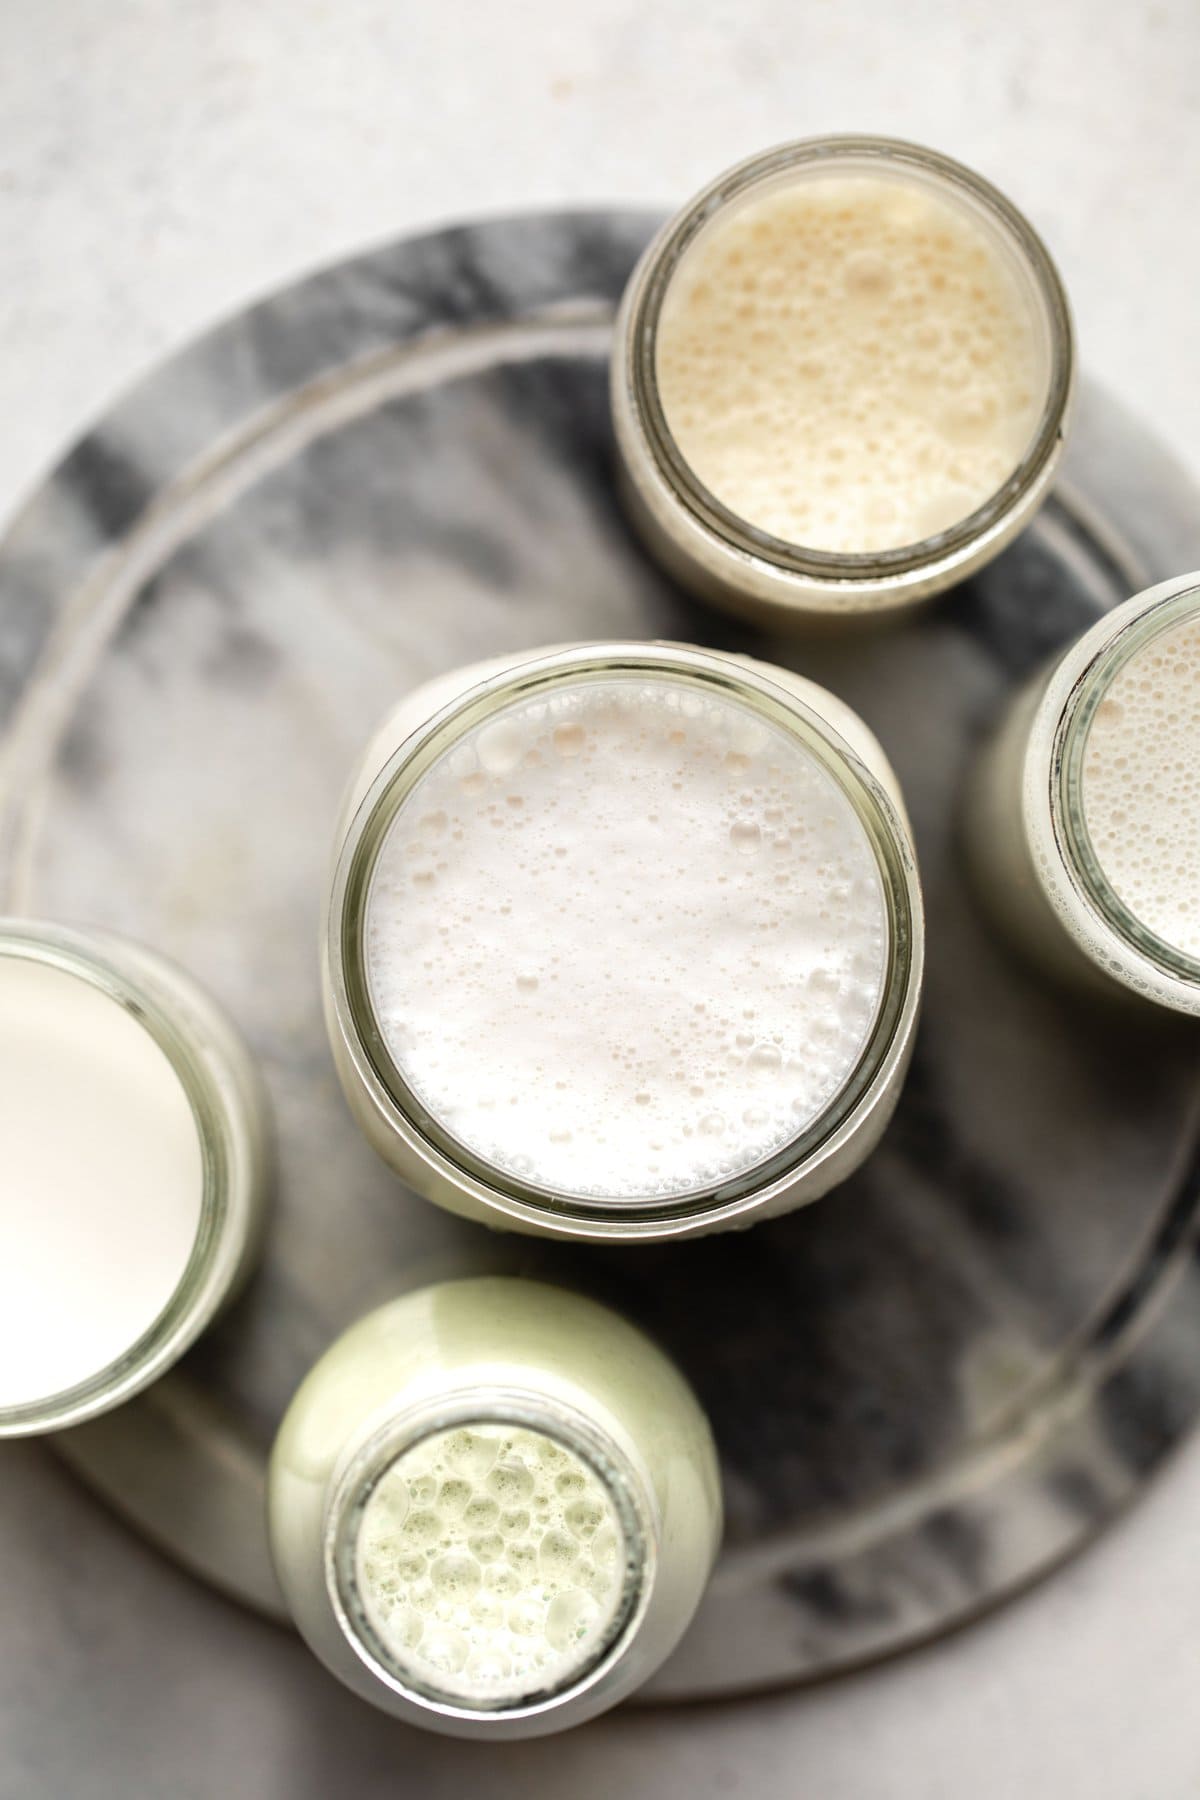
Store-bought non-dairy milk has a creamy and smooth mouth feel, but this is mostly because most non-dairy milks have added thickeners, such as guar gum, carrageenan, and gellan gum. There is some controversy as to whether these additives are actually good for us or not, but regardless – I much prefer my homemade, 2-to-3 ingredient nut milk!
Another reason why store-bought nut milks use thickeners is to use less nuts (and cut down on cost). That being said, you will have to use more nuts in your homemade nut milk to get the same creaminess and mouth feel as store-bought milk. I see a lot of online recipes recommending 1 cup of nuts to 4 cups of water, but I personally think that 1/2 cup of nuts to 4 cups of water mimics the same mouthfeel and creaminess of store-bought milk. It’s also a lot more cost-effective, too! You can make your homemade nut milk as creamy (or not) as you’d like; here’s a scale for reference:
- 1/4 cup nuts: (to 4 cups water) this ratio is the most similar to store-bought milk in terms of macronutrients, but has a thin consistency and slightly watery flavor
- 1/2 cup nuts: (to 4 cups water) this is my preferred ratio, and most similar to store-bought milk in terms of mouthfeel. The nut milk is still creamy and drinkable without being overly heavy and can be used in coffee, tea, and any recipe that calls for non-dairy milk.
- 1 cup nuts: (to 4 cups water) this ratio is commonly recommended in most online recipes. It does produce thick and creamy milk, but I personally find it to be a little too heavy for drinking straight out of the glass. It’s great to splash in coffee, tea, or smoothies though!
- 2 cups nuts: (to 4 cups water) this produces thick and creamy milk and would be an ideal substitute for heavy cream or coffee creamer. However, I would recommend cutting the base recipe in half (so 1 cup nuts to 2 cups water), otherwise you will probably have some leftovers that will spoil.
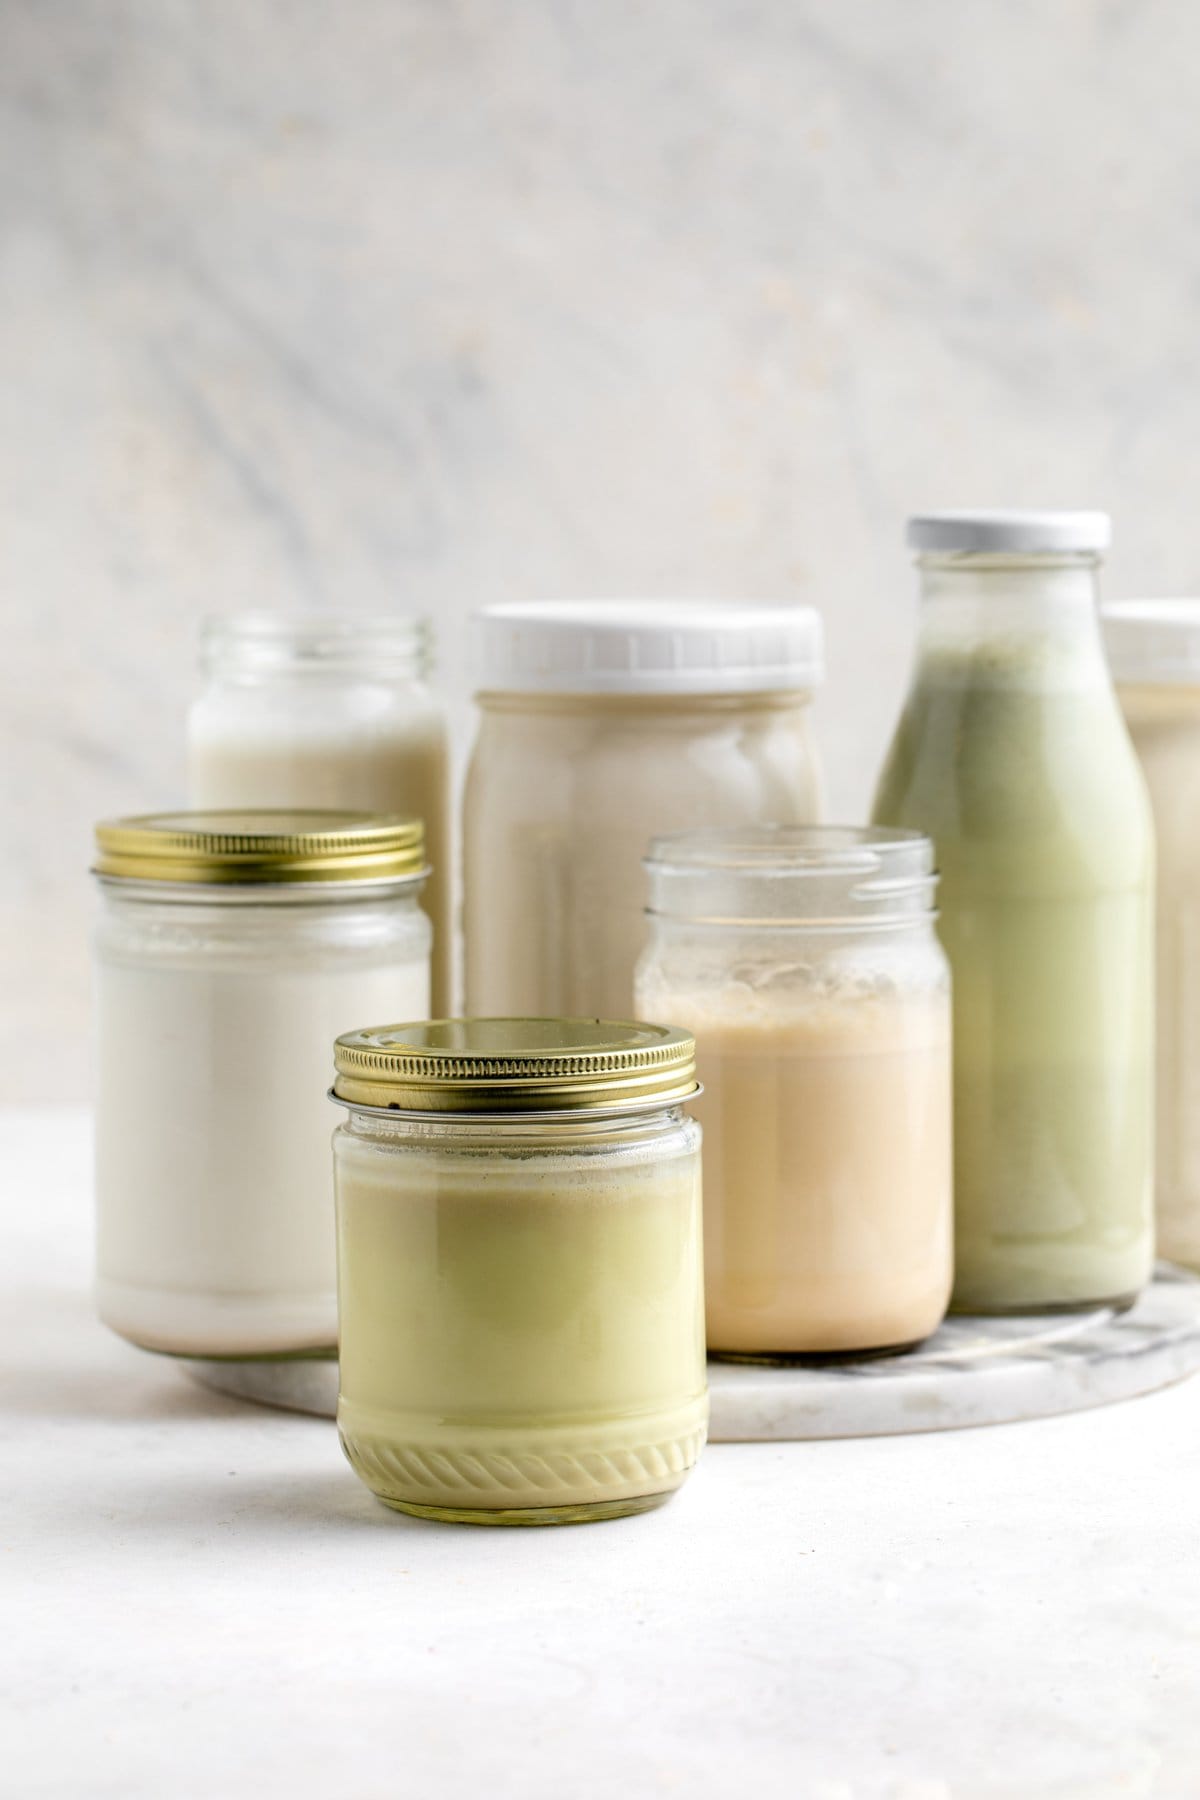
It’s best to store your nut milk in a clean glass jar with a sealable lid. If you do decide to use canning jars, I recommend purchasing some re-usable plastic lids, as the metal ones tend to rust.
Generally speaking, homemade non-dairy milk will keep in the fridge for 4 to 5 days minimum, as long as you only soak your nuts for 12 hours or less and blend for no more than 2 minutes total. If you don’t use very much of it, cut the base recipe (below) in half to make only 2 cups at a time. If you wind up with a surplus of milk you can freeze it in ice cube trays to use in smoothies, or thaw and use in any other recipe.
Want an easy, printable guide to making nut milk?
Click here to sign up to our email list and get your FREE copy!
PrintHomemade Nut Milk
Make your own nut milk at home with these super simple and easy steps! This recipe will work for any nut or seed listed above or in the nut milk guide.
- Prep Time: 5 Minutes
- Cook Time: 0 Minutes
- Total Time: 5 minutes
- Yield: 4 cups 1x
- Category: Drink
- Method: Blender
- Cuisine: American
Ingredients
- 1/2+ cup nuts or seeds, soaked* if desired
- 4 cups filtered water
- Pinch of salt
- Optional add-ins: maple syrup, medjool dates, cinnamon, vanilla extract, or any other sweeter/spice to taste
Instructions
- Add the nuts, water, and a pinch of salt to the base of a high-speed blender with any additional add-ins. Blend on high speed for 90 seconds, or until creamy and frothy.
- Place a fine mesh nut milk bag over a large glass bowl and pour the blended mixture into it. Grasp the bag with one hand and slide it from the top of the bag to the bottom to create a small “ball”. Slowly twist the bag to release any additional liquid. Compost the nut pulp, save it for another recipe, or simply discard it.
- Pour the nut milk into glass jars, seal, and store in the fridge for 4 to 5 days. Extra nut milk can also be frozen in ice cube trays and used in smoothies, or re-thawed and used in other recipes.
Notes
- Creaminess: 1/2 cup of nuts will create a creamy, enjoyable milk, but you can use up to 2 cups of nuts if you’d like your milk to be creamier (refer to the creaminess scale in this post / the nut milk guide)
- Soaking: nuts/seeds can be soaked for 4 to12 hours before blending, if you so desire. If you do soak your nuts, drain and rinse them well before blending.
- Straining: for the smoothest texture we recommend straining all milks except for cashew milk, pumpkin seed milk, and hemp milk. However, if you don’t mind some extra fiber in your milk, straining is not necessary.
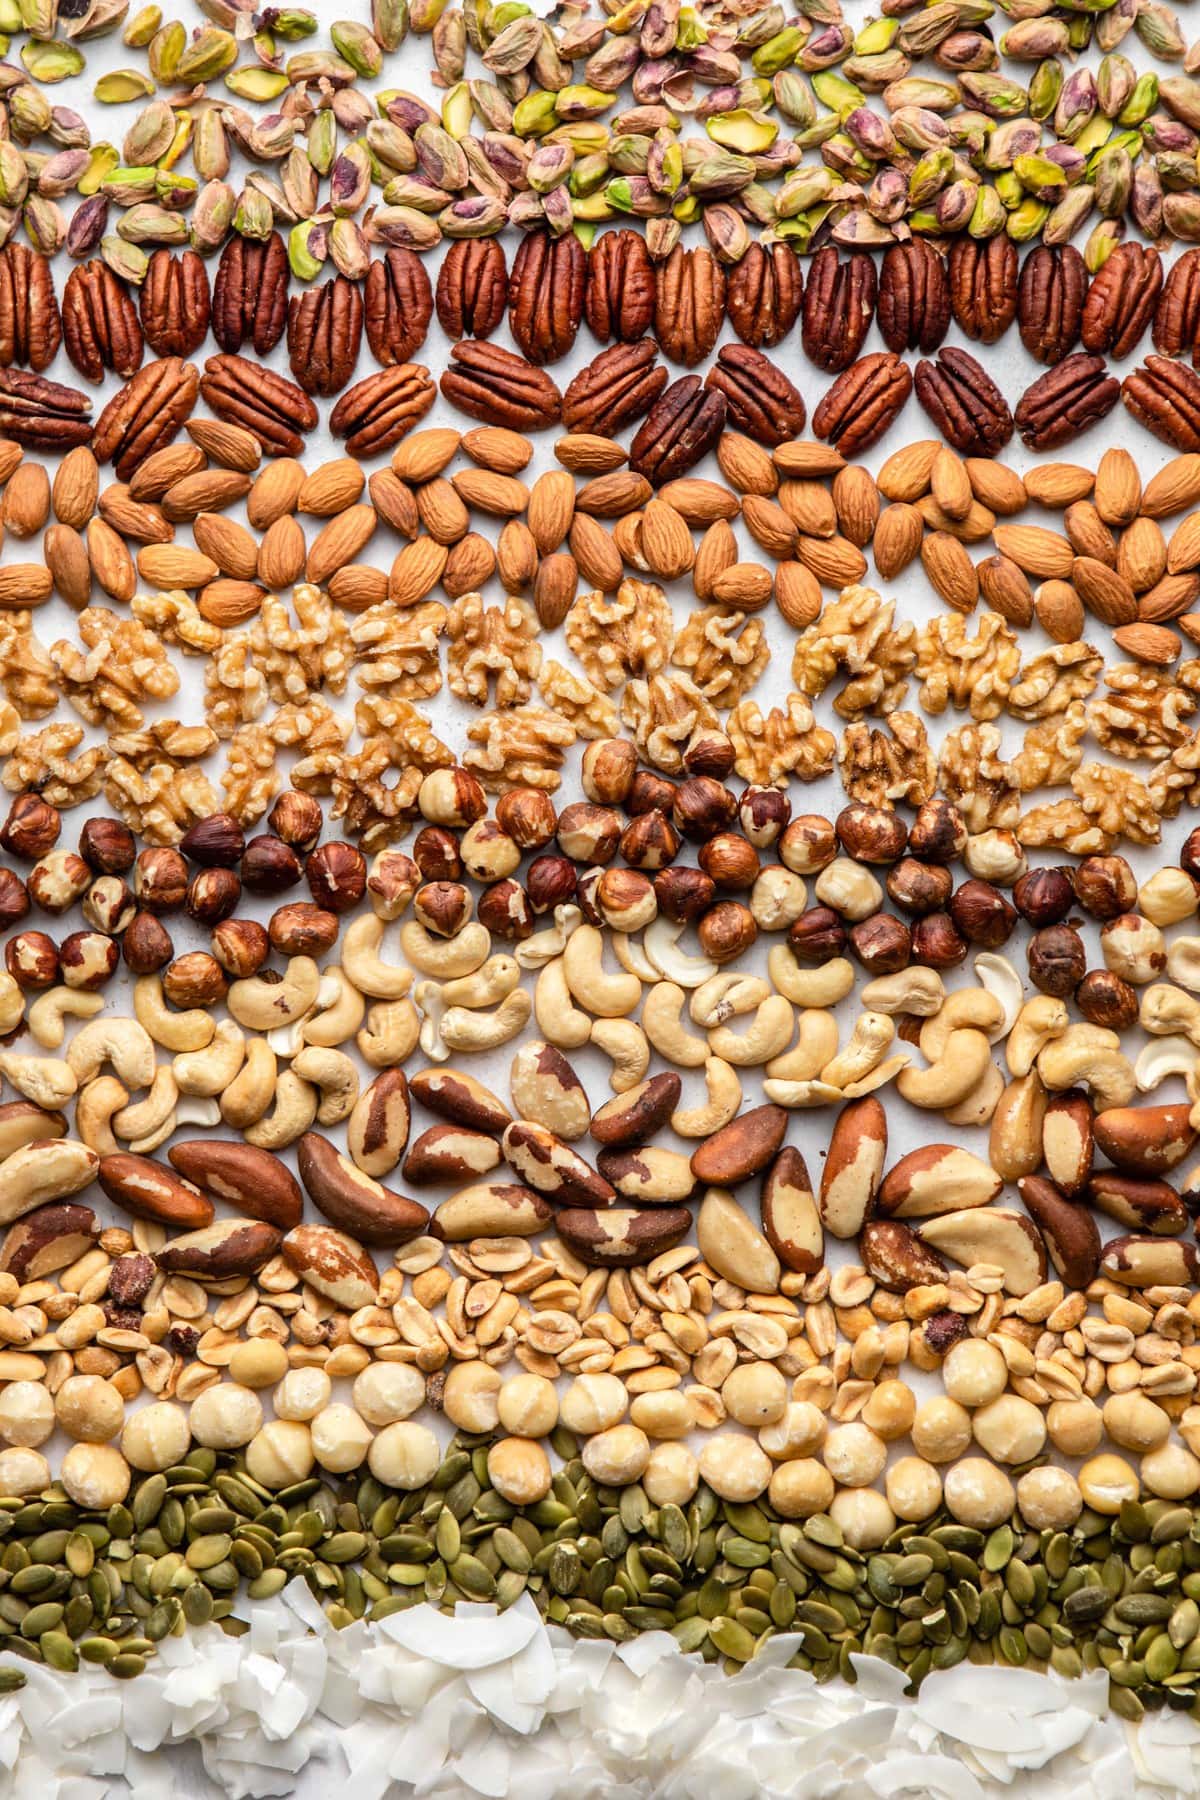
Not sure which nut or seed you want to “milk”? Don’t worry, we tried 12 different contenders and took notes on the process, creaminess, and flavor. So read on, pick your favorite nut and get to blending! Also, feel free to mix and match your nuts and find a nut (or seed) milk blend that most speaks to you 🙂
The Common Contenders:
These nut milks are the most common flavors found in grocery stores and have the most neutral flavors – making them perfect for a wide variety of applications!

Almonds
- Blender(s): high-speed only (77g per 1/2 cup)
- Straining: yes; high pulp
- Creaminess/Consistency: 4/4; has a thick, full, and creamy consistency
- Flavor Notes: has a satisfying almond flavor, very different from store-bought milk – in a good way. Could use in any drinking, baking, or cooking situation. Sometimes we like to soak our almonds for ~24 hours to bring out an “almond extract” flavor that’s great in sweet applications. Note: some people choose to stay away from almond milk because almonds are a high-water crop; read more here.
Cashews
- Blender(s): high-speed or bullet blender, if soaked (75g per 1/2 cup)
- Straining: not necessary
- Creaminess/Consistency: 4/4; has a thick, full, and creamy consistency
- Flavor Notes: pretty neutral tasting with a subtly sweet and nutty flavor. Could use in any drinking, baking, or cooking situation. You can also use roasted cashews for a fun, deeper flavor twist!
Walnuts
- Blender(s): high-speed only (56g per 1/2 cup)
- Straining: yes; low pulp
- Creaminess/Consistency: 3/4 rich and creamy, but not as full of a mouthfeel
- Flavor Notes: has a satisfying, almost buttery flavor. Slight bitter undertones, which is typical of walnuts in general. Could be used in most cooking applications, but would be especially good in baked goods and smoothies. May not work with all coffee and tea flavors.
These nut milks have a distinct flavor, but that’s not a bad thing 😉 While they’re not as versatile as the common contenders, they’re just as yummy and useful in specific applications.
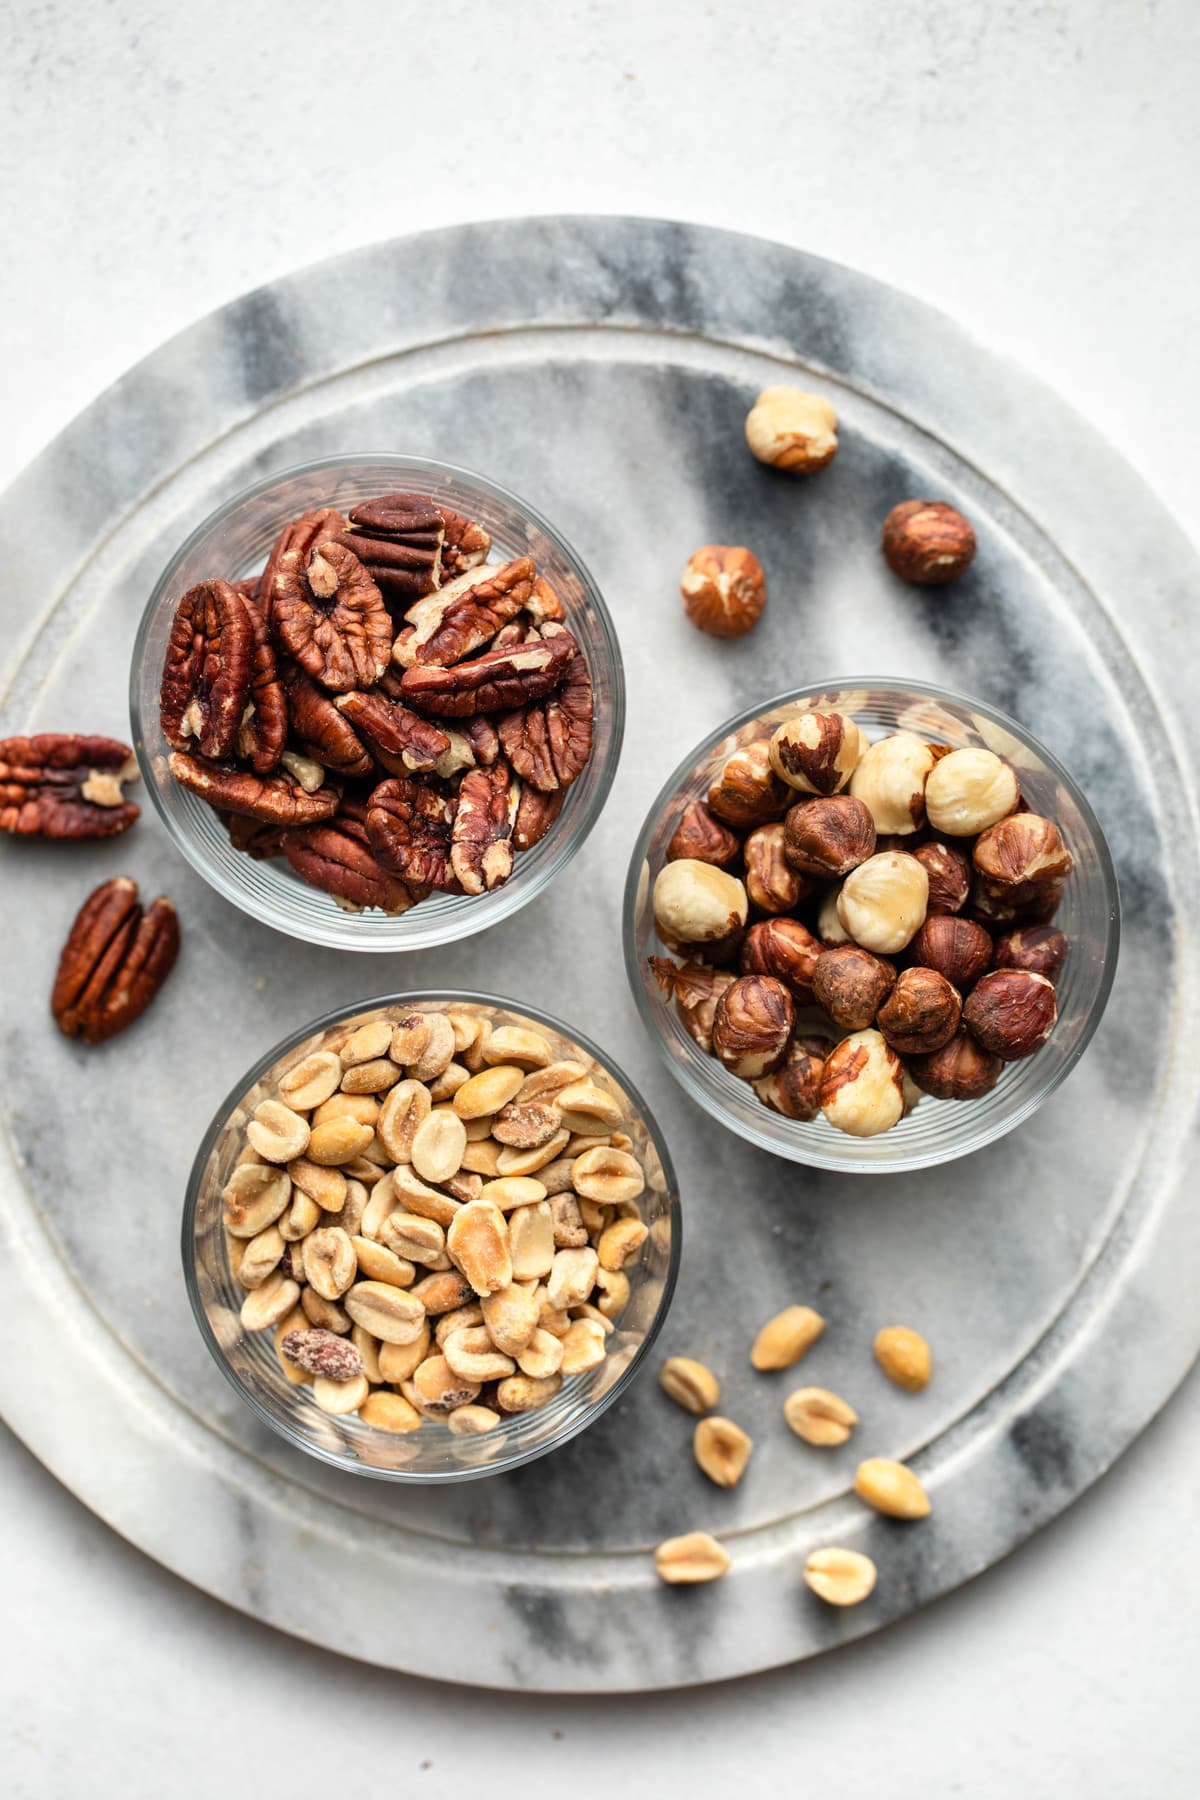
Pecans
- Blender(s): high-speed only (67g per 1/2 cup)
- Straining: recommended; minimal pulp
- Creaminess/Consistency: 3/4 rich and creamy, but not as full of a mouthfeel
- Flavor Notes: has a buttery taste like walnut milk but without the slight bitterness. The creamy, nutty flavor is very satisfying and has subtle undertones reminiscent of toasted oats and/or pretzels. Would be great in coffee and most teas, hot chocolate, and most baked goods.
Peanuts
- Blender(s): high-speed only (75g per 1/2 cup)
- Straining: yes; low pulp
- Creaminess/Consistency: 2/4 creamy, but felt a little lacking
- Flavor Notes: this essentially tastes like liquefied peanut butter; it’s still satisfying, but probably feels less creamy because we are used to eating plain, natural peanut butter which is obviously more thick. This is a great, budget-friendly milk option and would be great in oatmeal, smoothies, hot chocolate, and some baked goods. Just be sure to purchase dry roasted, salt-free peanuts.
Hazelnuts
- Blender(s): high-speed only (73g per 1/2 cup)
- Straining: yes; medium pulp
- Creaminess/Consistency: 3/4 rich and creamy, but not as full of a mouthfeel
- Flavor Notes: hazelnuts are commonly paired with chocolate and sweeter desserts, so this naturally tasted a little sweeter and chocolate-y to us. Although there is a strong hazelnut flavor, this is a very versatile milk and compliments most sweet flavors (especially chocolate) as well as some savory (think fall/winter squash and hearty herbs like rosemary and thyme). Would be great in coffee, smoothies, and most teas.
(Pricey) Treats:
While all of these nut milks are absolutely delicious, the nuts themselves are on the more expensive side, and/or require a little extra work in the kitchen.
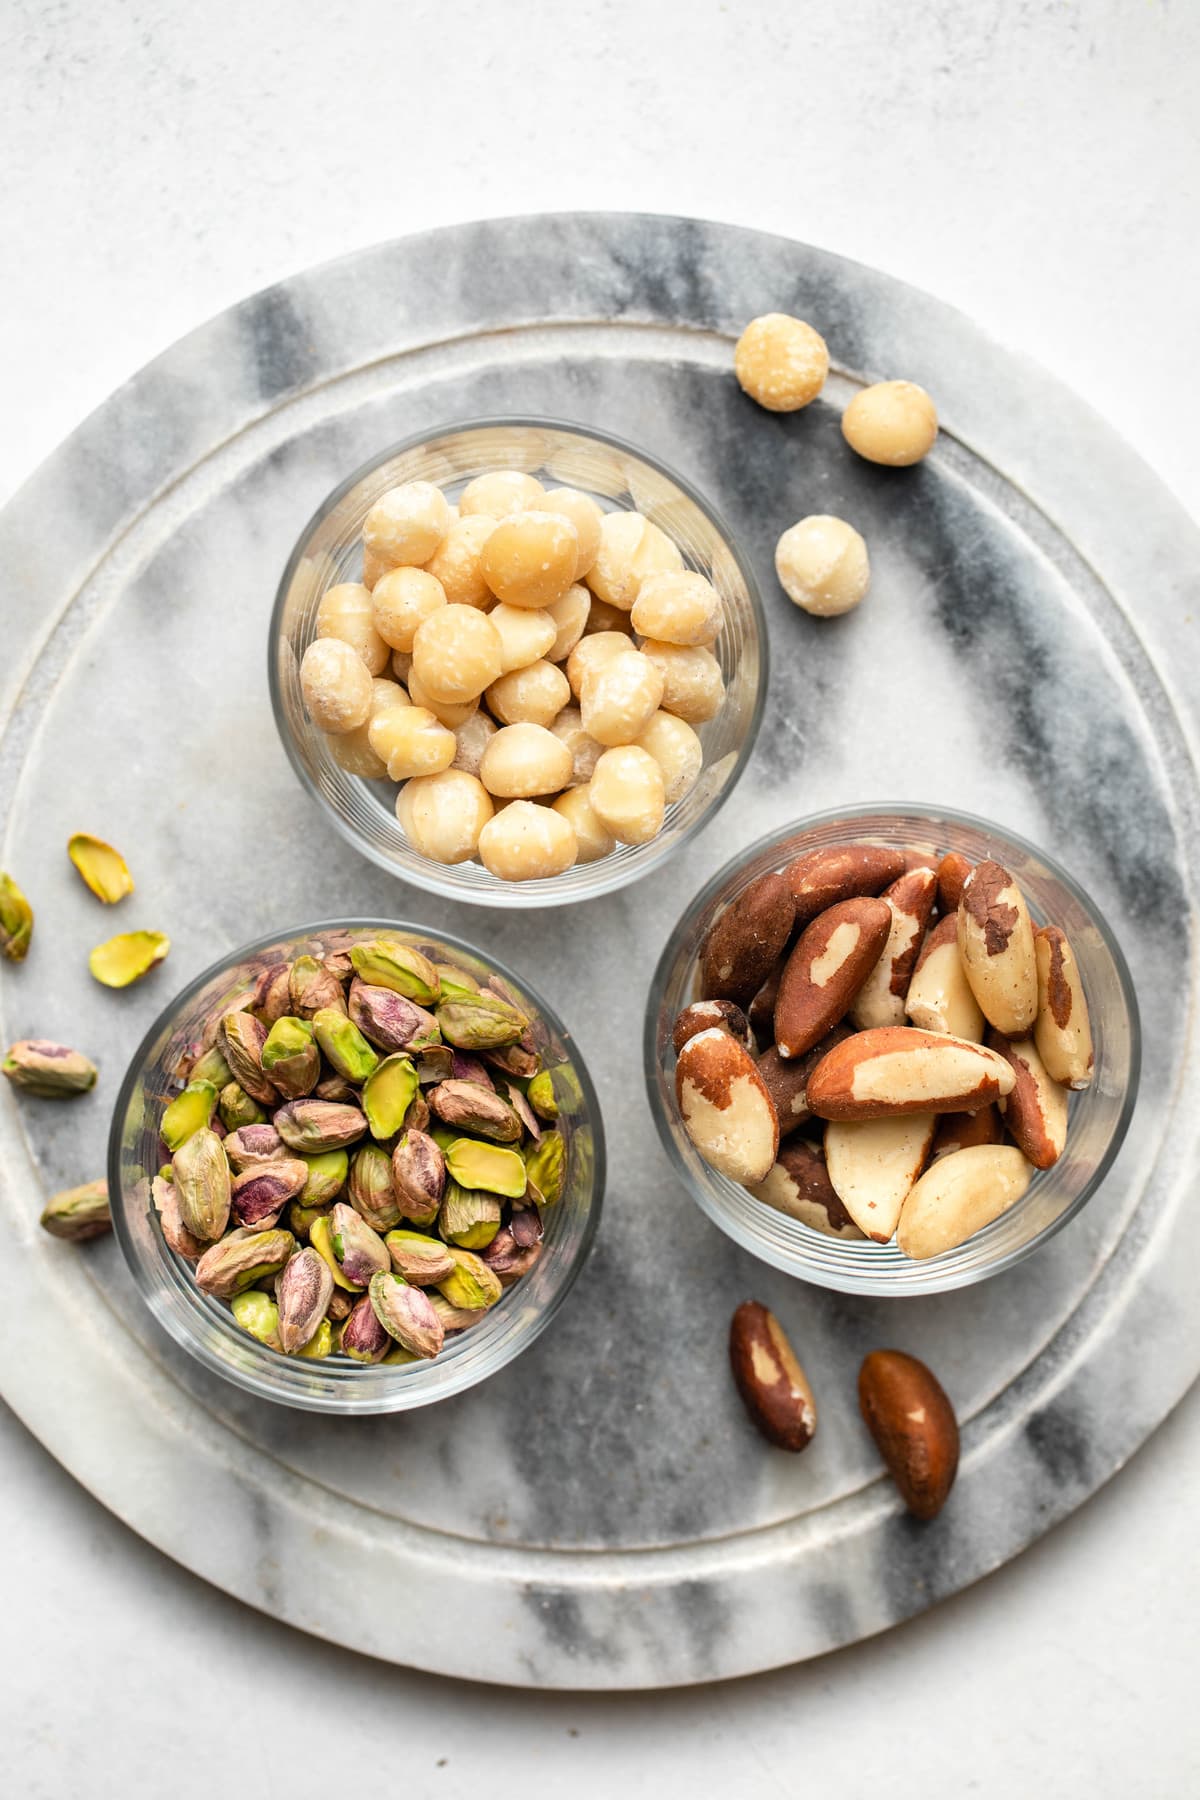
Pistachios
- Blender(s): high-speed only (63g per 1/2 cup)
- Straining: yes; low pulp
- Creaminess/Consistency: 3/4 rich and creamy, but not as full of a mouthfeel
- Flavor Notes: strong and distinct pistachio flavor, would pair especially well with citrus or rose-infused baked goods, smoothies, or teas. This milk is delightfully satisfying, but would be more of an occasional treat for us. Pistachios can be quite expensive, plus it tastes a long time to individually shell each nut.
Brazil Nuts
- Blender(s): high-speed only (76g per 1/2 cup)
- Straining: yes; low pulp
- Creaminess/Consistency: 4/4; has a thick, full, and creamy consistency
- Flavor Notes: this nut milk felt very indulgent and satisfying, but had an eerily similar taste of toasted oats, which we found surprising. This would be great in a wide variety of applications – coffee, tea, baked goods, and most savory applications. Just don’t drink too much at once, because it can lead to selenium poisoning.
Macadamia Nuts
- Blender(s): high-speed only (73g per 1/2 cup)
- Straining: recommended; minimal pulp
- Creaminess/Consistency: 4/4; has a thick, full, and creamy consistency
- Flavor Notes: this nut milk has a buttery flavor with crisp undertones; sort of a cross between pecans and cashews. There is a subtle sweetness to it, and it would work especially well when paired with tropical fruit or warming spices (think golden milk). That being said, it would still be great in coffee, tea, and baked goods.
Nut-Free Options:
Nut allergy? Not a problem 🙂 You can still make your own non-dairy milk at home using Hemp Hearts, Pumpkin Seeds, or Shredded Coconut!

Hemp Hearts
- Blender(s): high-speed or bullet blender (no soaking for either); (78g per 1/2 cup)
- Straining: not necessary
- Creaminess/Consistency: 3/4 rich and creamy, but not as full of a mouthfeel
- Flavor Notes: this creamy “nut” milk is our go-to for allergy-friendly drinking, cooking, and baking. Hemp Hearts have a relatively neutral taste and creamy texture, but do have a slightly earthy undertone, especially in the aftertaste. This milk is great because you can make it in any blender, but does settle quickly and requires a good shake before serving.
Pumpkin Seeds
- Blender(s): high-speed or bullet blender, if soaked (71g per 1/2 cup)
- Straining: not necessary
- Creaminess/Consistency: 3/4 rich and creamy, but not as full of a mouthfeel
- Flavor Notes: this milk has a distinct green hue, which may be off-putting for some people. However, it’s still a great nut-free option and works well in coffee, tea, and baked goods. It does has a slightly metallic taste when consumed plain, but this fades when mixed with other beverages. Plus, it’s only because pumpkin seeds are a good source of manganese, zinc, and iron! Note: you must use pepitas for this milk, which are not the same as pumpkin seeds found in traditional pie pumpkins and fall/winter squash.
Coconut
- Blender(s): high-speed only (27g per 1/2 cup)
- Straining: yes; low pulp
- Creaminess/Consistency: 2/4 creamy, but felt a little lacking
- Flavor Notes: this is a nice option with a distinct coconut taste and subtle undertones, but we would probably stick to canned coconut milk if we are looking for a rich and creamy mouthfeel. We would recommend using twice the volume of coconut as other nuts for a creamier milk, or blending some coconut with a different nut for more depth of flavor. You can also toast the coconut before blending for a deeper flavor!


Thank you so much for this post. It is highly informative. I make a nut milk with almonds, walnuts, pumpkin seeds, pecans and dates It’s delish but I can’t use it in my coffee (it separates) and it gritty. I have a stainer that came with my milk machine but i’m gonna try the stainer and the cheesecloth you suggested. Thanks so much!!
You’re so welcome, Yola!
Hi Caitlin.
This is a great resource.
I have been looking for a powdered nut milk so I can make a premix dirty chai coffee but not wanting to use dairy or soy.
I believe if I were to make one from cashews I could grind the nuts to powder and stir the. Into my hot coffee….. do you think it might work without needing to roast the cashews?
yes you definitely don’t need to roast the cashews!
Hey there,
My homemade nut milk journey has me asking about the skins on almonds…should they be removed- ie blanched & slipped off prior to blending (labour-intensive!)? I have a
vitamix and so figure the nut milk bag will take care of the skin remnants but I have heard the skins may be harmful? any thoughts?
Good question, Mary. You can make nut milk with the almond skins on, and it’s generally safe to consume. Blending almonds with the skins should not pose any harm, and your Vitamix should be able to handle them. The nut milk bag will help strain out any larger particles if you prefer a smoother texture.
Removing the skins is labor-intensive and not necessary, but it can result in a slightly lighter color for the milk and a smoother texture. The skins contain some nutrients and fiber, so leaving them on can be a nutritious choice.
Ultimately, it’s a matter of personal preference whether you choose to remove the almond skins or leave them on when making nut milk.