Disclosure: This post may contain affiliate links. I may earn a small commission for my endorsement, recommendation, testimonial, and/or link to any products or services from this website.
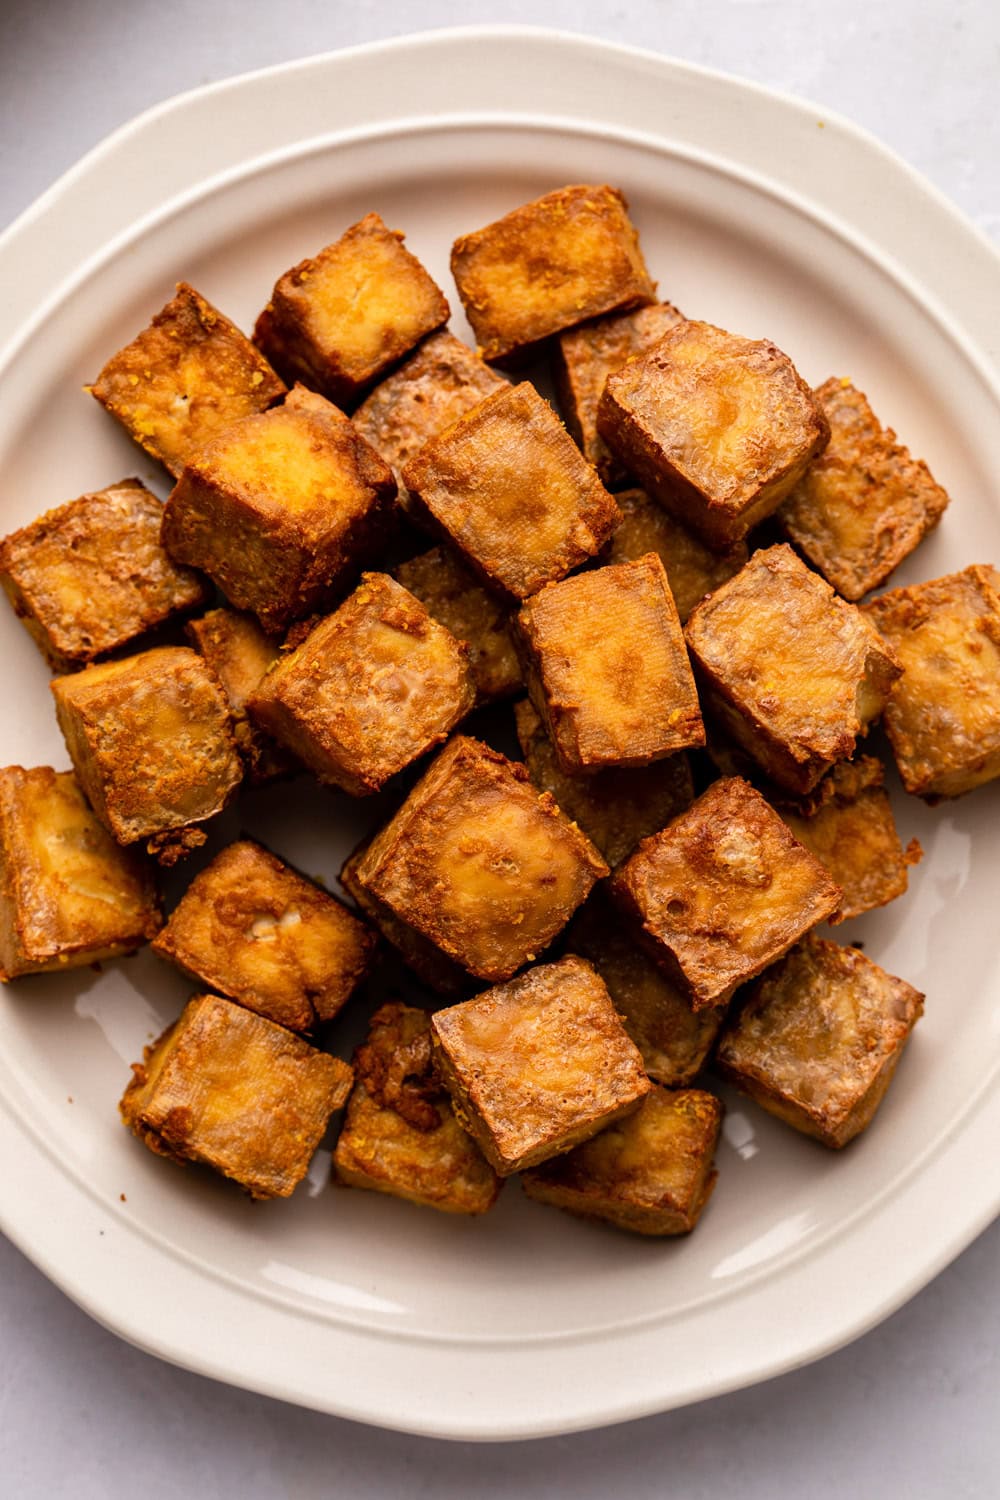
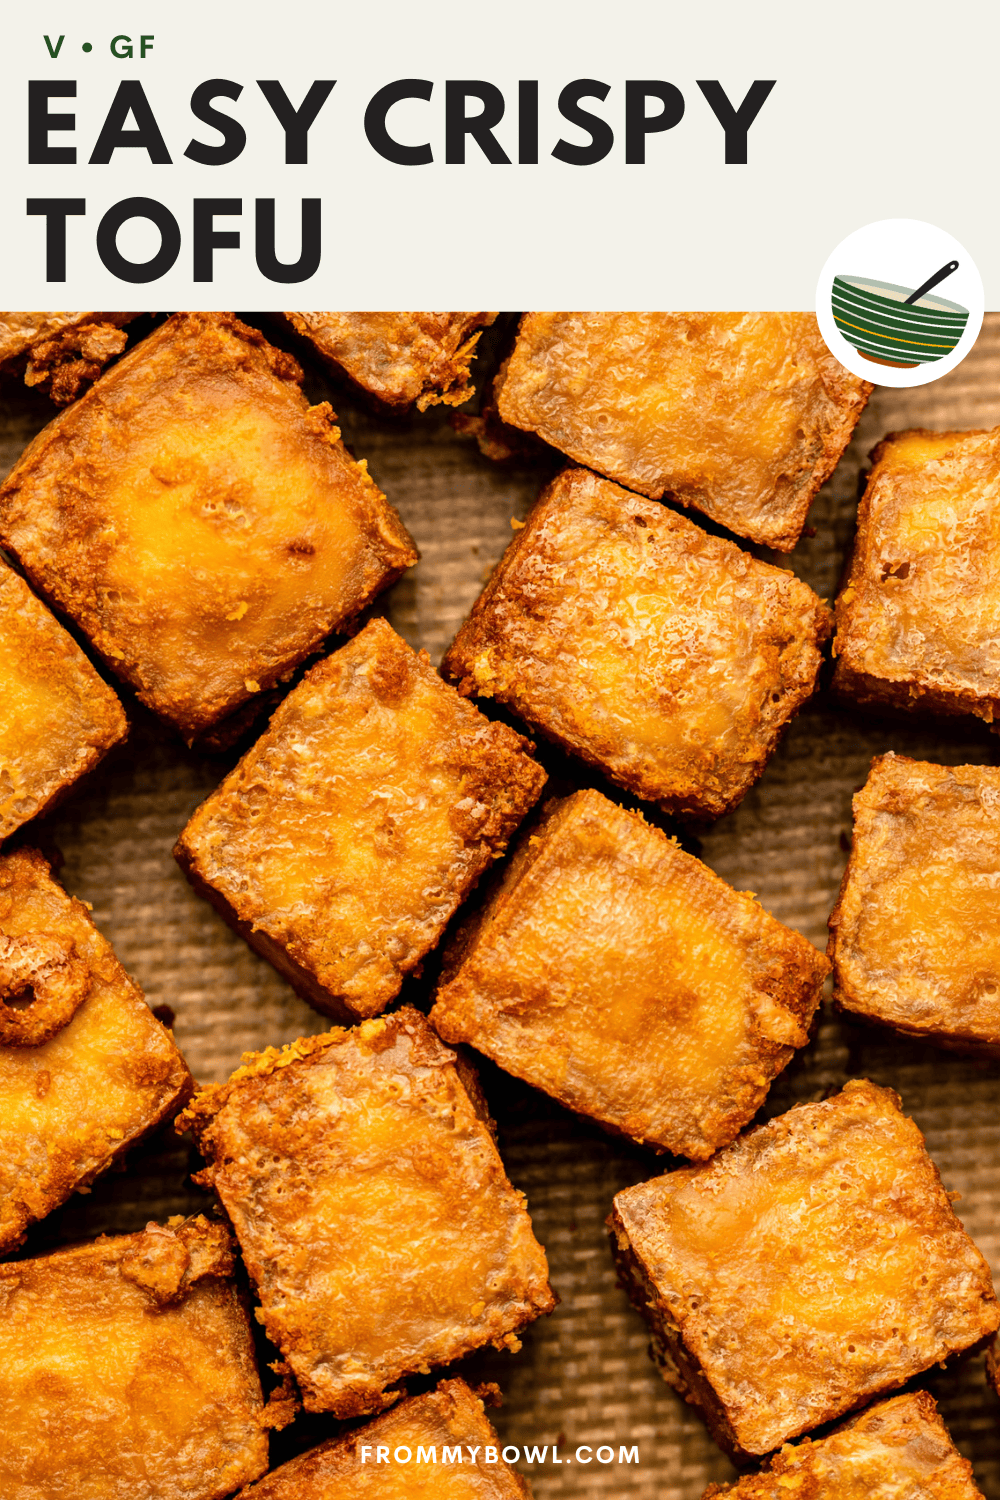
Learn how to make the best Crispy Tofu with only 3 ingredients! With crisp edges and a tender, meaty center, it’s a savory and umami-packed plant protein that goes with pretty much anything. Vegan and Gluten-Free, Oil-Free Option.
This Crispy Baked Tofu Recipe will forever change how you feel about tofu. It’s crispy on the outside, soft on the inside, and packed with mouthwatering umami flavors. Make it with or without oil—it’s delicious either way! One try, and it’ll become a regular staple in your kitchen – it’s probably the recipe I make the most in my own home.
Table of Contents
Tofu That Doesn’t Suck
As a vegetarian since birth, I’ve eaten more than my fair share of tofu. These 30+ Amazing Vegan Tofu Recipes barely scratch the surface of my lifelong obsession, but I know not everyone is a fan. A lot of tofu haters think it’s bland, mushy, or tastes like cardboard—but those are the people who haven’t had it prepared the right way.
I’ve cooked, marinated, prepped, and seasoned tofu countless different ways, and the method in my 3-Ingredient Crispy Tofu Recipe is my absolute favorite. Plus it’s the easiest, so that’s a win-win! The crisp-on-the-outside, soft-on-the-inside texture will change. your. life.
This is a super basic recipe, and all you need to do is press the tofu in advance, coat it in a light layer of tamari and nutritional yeast, and bake it in the oven. You can make the tofu extra crispy by tossing it in oil, but it isn’t totally necessary.
These simple steps and 3 easy ingredients give you life-changing tofu you can top on a colorful, fully loaded nourish bowl, toss in a tasty sauce and serve over rice, fold into a comforting curry, and so much more. Honestly, these crispy nuggets go well with almost everything!
Ingredients for Crispy Tofu
Technically, the best, easiest, and crispiest tofu can be made with 3 simple ingredients. Oil is optional, so feel free to leave it out if you want.
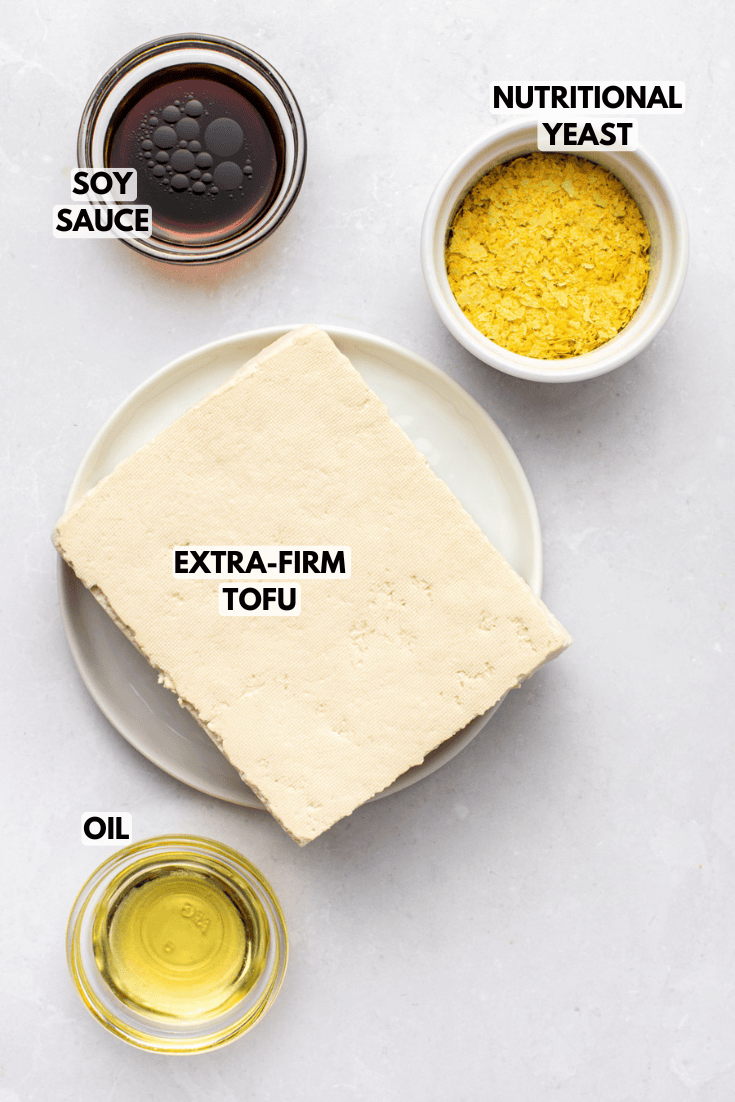
- Extra Firm Tofu: the ultimate tofu for that amazing crispy yet tender texture. New to the tofu aisle? My Guide to Tofu breaks down all the different types! You can substitute firm tofu here if that’s what’s available, but stay away from super firm tofu, as it can easily become too dry or dense.
- Tamari or Soy Sauce: the tofu cubes absorb the tamari (or soy sauce) to help them taste a little less bland.
- Oil: you can make this recipe with or without oil. The tofu gets crispy in the oven either way, so it’s all about personal preference. I like using olive oil or avocado oil, but any high-heat oil works.
- Nutritional Yeast: coating the tofu cubes in at least 2 tablespoons (or 4 tablespoons for the oil version) of these golden flakes helps to (1) absorb any extra liquid for a nice, crispy crust, and (2) add a ton of umami and depth of flavor. Honestly, the more “nooch” you toss in there, the merrier!
How to Make Crispy Tofu Without Oil
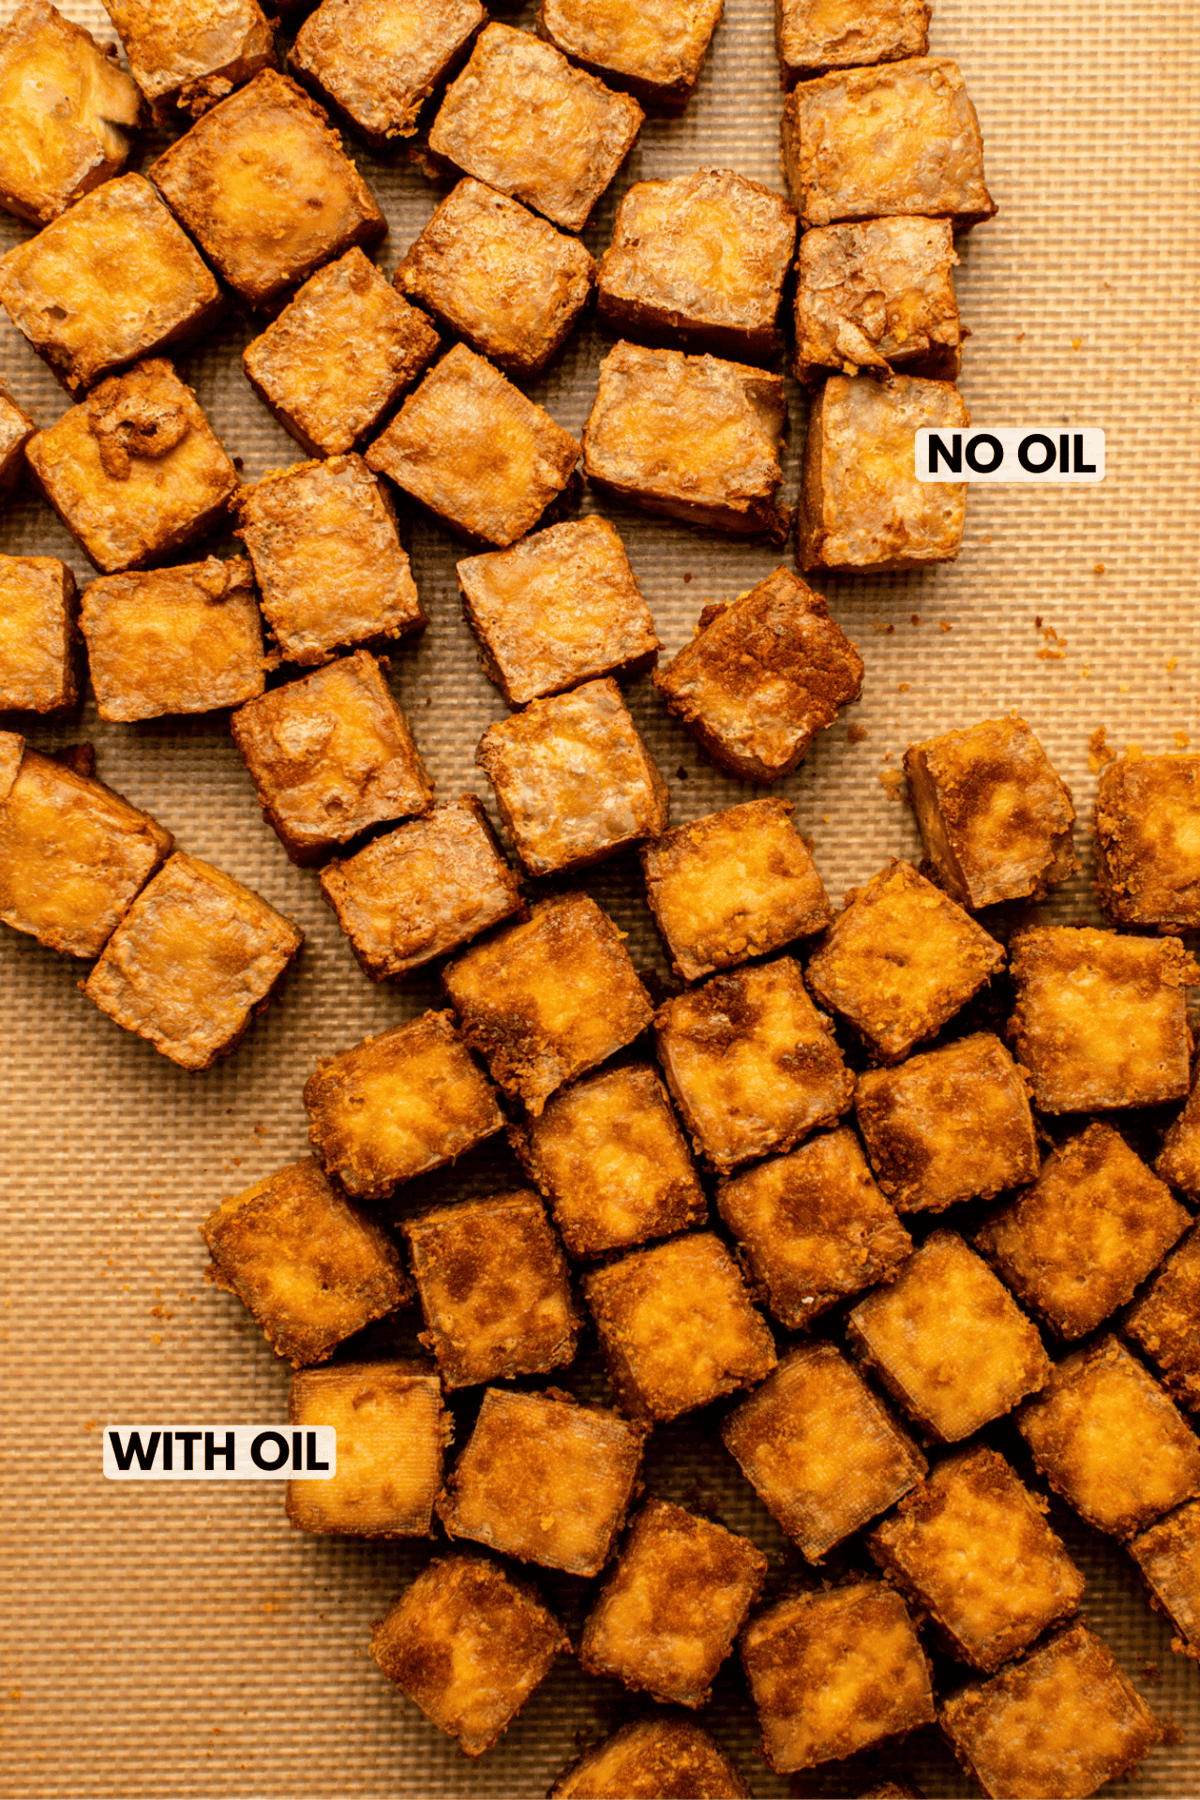
You can make delicious crispy tofu with NO oil as long as you use a silicone baking mat or a nonstick baking sheet. This is my go-to way to prepare my crispy tofu; the outside has more of a dry and crispy texture (not like a breading), and the inside is still nice and tender.
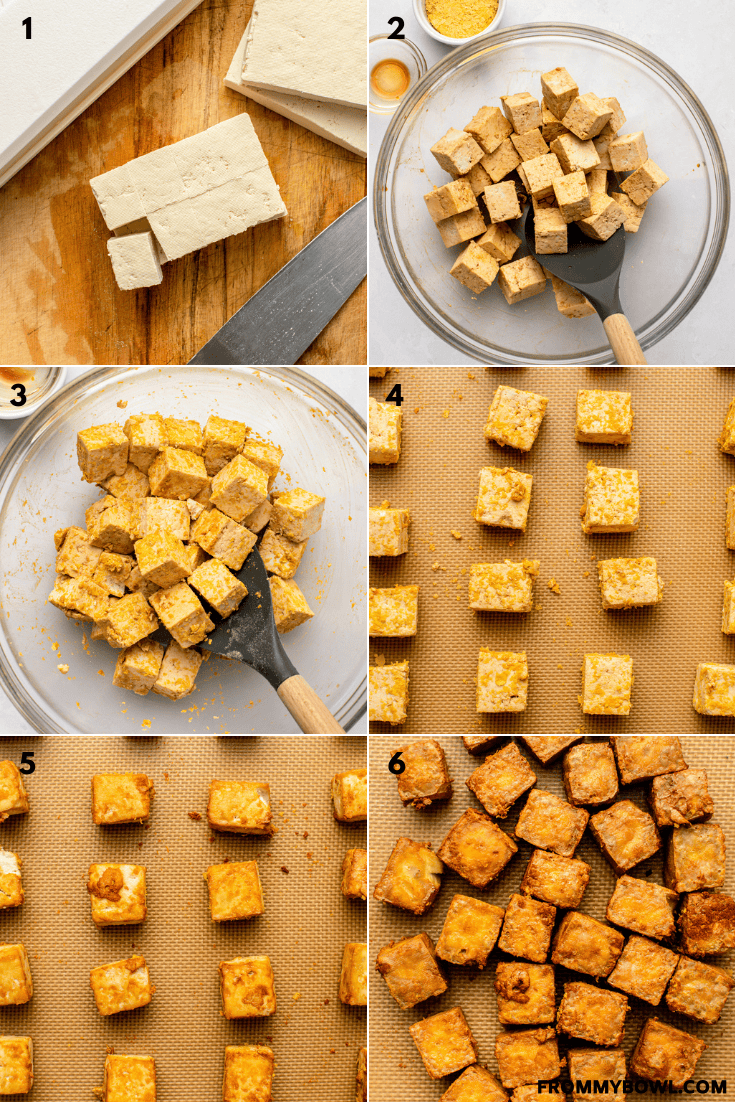
- Drain the liquid from the tofu, then press the block in a tofu press for 10 minutes.
- Cube the tofu into 16 even cubes. Place them in a large bowl.
- Drizzle the tamari over the tofu and toss to coat. Sprinkle 2 tablespoons of nutritional yeast over the tofu and toss again.
- Bake the tofu as normal. The cubes will be lighter than the version made with oil, but will still be crispy.
- Serve warm and enjoy!
How to Make Crispy Tofu (With Oil)
You can also make this recipe with oil if you prefer your tofu to have more of a crisp, breaded texture! This variation of the recipe makes an outer layer that’s still crispy, but has more of a lightly battered texture (without the deep frying, of course). If you are cooking your tofu with oil, you’ll need to add a little more nutritional yeast or cornstarch to absorb the extra wet ingredients.
- Repeat steps 1 and 2 above. Line your baking sheet with a silicone baking mat.
- Drizzle the tamari and oil over top and toss to coat. Sprinkle 4 tablespoons of nutritional yeast over the tofu and mix again to coat.
- Bake the tofu for 20 minutes, then flip the cubes. Continue baking until the tofu is crispy.
- Serve warm and enjoy!
Caitlin’s Cooking Tips
- How to press tofu without a tofu press: Wrap the block of tofu in a clean kitchen towel, transfer it to a plate, and place a heavy skillet or a few cookbooks on top. Set it aside to drain for 20 to 30 minutes. I also like to lightly press the tofu cubes with the dish towel if I have extra time/patience.
- Oil vs. no oil: You get a great crunch either way! Oil-free crispy tofu has crisp edges that are a little drier, whereas the tofu made with oil has a slightly more “breaded” texture.
- A silicone baking mat is a must for the oil-free version. The tofu won’t get as crispy without it.
- Want a spongier, chewier texture? The secret is to freeze the tofu. Freeze the block while it’s still in the package, then thaw it overnight in the refrigerator and press out the extra liquid as normal. Continue with the recipe, then enjoy your extra chewy, crispy tofu!
Serving Suggestions
These crispy, golden cubes taste so delicious that I usually can’t resist eating them straight off the baking sheet. I love dipping them in a sauce for a quick snack! And when I’m not snacking, I’ll use the cubes as a bowl topper, fold them into a curry or stir fry, or add them to any meal that could use a protein boost.
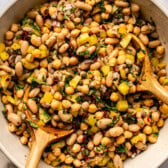
I always whip up a batch of crispy tofu right before making these Vermicelli Noodle Bowls or these Black Rice Bowls for lunch. They add a great crunchy texture next to the refreshing vegetables and soft rice or noodles.
When I want a simple but flavorful dinner, I’ll toss the nuggets in a homemade sauce and serve them over rice. The orange sauce from my Crispy Orange Tofu is one of my favorites, but the teriyaki sauce from my Teriyaki Tofu is a close second.
If you’re looking for more ways to use crispy tofu cubes, you’ll also love these Vietnamese-Inspired Rice Bowls, this Thai Red Curry Noodle Soup, and this Garlic Green Bean Stir Fry!
Or, if you want more crispy tofu recipes, you’ll also love these Dill Pickle Tofu Bites, this Rosemary Garlic Tofu, and this Baked Sweet Chili Tofu.
How to Store Baked Tofu
Wait for the cooked tofu to cool completely before packing it into an airtight container. It will keep for up to 5 days in the fridge.
The cubes also freeze well for about 3 months. To prevent them from sticking together, freeze them in a single layer on a baking sheet first, then transfer them to a freezer-safe bag. They reheat well from frozen, so there’s no need to thaw the leftovers ahead of time.
To revive the texture, I recommend reheating the leftover tofu in a toaster oven or air fryer at 375ºF for 8 to 10 minutes or until the edges are crispy again.
Substitutions and Variations
- Gluten-Free Option: Use gluten-free tamari or soy sauce to keep this recipe gluten-free. Coconut aminos also work, but it tastes sweeter, so I personally would not use it.
- Lower-Sodium Option: If you’d rather skip the tamari or soy sauce, toss the tofu with 1 tablespoon of diluted vegetable broth or water instead. I’d still recommend adding a pinch of salt, though!
- Nutritional Yeast Substitute: You can replace the nutritional yeast with 1 or 2 tablespoons of miso paste or tahini (mixed with the tamari), an extra splash of tamari/soy sauce, sesame oil, or other herbs and spices.
- More Seasoning Options: Feel free to combine the nutritional yeast with more seasonings, like smoked paprika, garlic powder, black pepper, cumin, or toasted sesame seeds.
Recipe FAQs
Sure. Lay the seasoned tofu in an even layer in the air fryer basket and air fry at 400ºF for 20 to 30 minutes, shaking the basket halfway through.
Nope. The tofu is ready to bake as soon as it’s tossed in the tamari and seasonings.
You don’t need to; however, cornstarch can be used as a substitute for the nutritional yeast. I’d recommend tossing the tofu in 1 tablespoon each of oil and tamari/soy sauce, then sprinkling 4 tablespoons of cornstarch on top and mixing again.
Enjoy! If you make this recipe and decide to share it on Facebook or Instagram, don’t forget to tag me @FromMyBowl + #FromMyBowl! I would also love it if you could leave a comment below with a recipe rating! Thank you for the support 😊

The EASIEST Crispy Tofu Recipe
Ingredients
- 1 14 ounce block Extra Firm Tofu
- 1 tbsp Tamari
- 2-4 tbsp Nutritional Yeast plus more to taste
- 1 tbsp oil optional, see notes
Instructions
- Prep: Preheat the oven to 420F and line a baking sheet with a silicone mat.
- Press the Tofu: Drain the liquid from the tofu and use a tofu press, or “press” the extra liquid out by wrapping it in a clean dish towel. Try to get it as dry as possible! If using a press, I like to let it sit for at least 10 minutes.
- Cube the Tofu: Cut the tofu into even cubes; I like to cut the block in half lengthwise, then cut each rectangle into 16 even cubes. (Note: I like to lightly press the cubes with the dish towel if I have extra time/patience)
- Season: Add the tofu to a large bowl and drizzle the tamari and oil (if using) on top. Use a spatula to mix well; I find that pressing the spatula into the sides of the bowl to toss the tofu (rather than trying to cut through it) results in less broken cubes. Sprinkle 2 tablespoons of nutritional yeast over the tofu, or 4 if you used oil. Mix again and add more nutritional yeast or additional seasonings to taste, if desired.
- Bake: Place the tofu on the prepared baking sheet, spreading them out so each cube has some space around it. Bake on the top rack of the oven for 20 minutes, then carefully flip the cubes. Bake for another 15 to 20 minutes, depending on how crispy you like your tofu. The tofu will also get slightly crispier as it cools.
- Serve & Store: Serve warm. Store any leftovers in an airtight container in the refrigerator for up to 5 days. This tofu is best reheated in a toaster oven or air fryer if you’d like it to get crispy again!
Recipe Notes
- Gluten-Free: Use gluten-free tamari or soy sauce to keep this recipe gluten-free. You can also use coconut aminos, but I find it has a slightly sweet taste to it so personally I would not use it.
- Nutritional Yeast: Nutritional yeast adds a rich umami flavor to this baked tofu, but you can also substitute it with the same amount of cornstarch or arrowroot powder for a similar crispy texture
- Extra Seasonings: If you would like to add extra dry spices to your tofu, sprinkle them in with the nutritional yeast in step 4. Some of my go-tos include garlic powder, smoked paprika, black pepper, or sesame seeds. ”Tamari may be substituted for Liquid Aminos or Soy Sauce (not GF). I do not recommend Coconut Aminos as I find it to be too sweet.
- I strongly recommend using a silicone baking mat for the oil-free version of this recipe; otherwise, your tofu will not become as crispy.


This was quick, easy, delicious and nutritious. Thank you.
Glad you enjoyed it, Amy!
I absolutely adore this recipe! It’s the perfect tofu base that can be added to any dish. I’ve prepared it numerous times and it never disappoints. Whether I’m adding it to a Caesar salad, tossing it in marinara, or Vegas Bomb
simply enjoying it on its own as a side with a smoothie after a workout, it always hits the spot. To enhance the flavor, I usually mix in a tablespoon of rice vinegar along with the soy sauce for a delightful touch of sourness.
I have made crispy quite often and this is the best. It was very easy to make. I added a few extra spices and my husband and I both loved it. Thank you.
So happy you loved it, Erika!
I LOVE this recipe. Such a great base of tofu to add to anything. I’ve made it countless times. I love putting it in Caesar salad or tossing it in marinara, or sometimes just eating it plain as a side with a smoothie after a workout. I usually add a tbs of rice vinegar with the soy sauce for some nice sourness.
So happy you love it, Zep!
Thank you Caitlin for sharing this recipe with me. I love it. My sister who is extra picky and a meat and potatoes girl loved this crispy tofu. And my niece, vegetarian, said this is her favorite dish of tofu! Thank you!
You are so welcome, Grace! Glad you all loved the recipe.
This recipe hits and it never quits! Also, when I refrigerate it, I find it tastes exactly like roasted chicken… except not disgusting (because it’s not an animal) just the nice flavor of a costco chicken lol. Yay!!
Yay! Glad you love it, Melosh!
Will definitely make these again. Out of curiosity, why do you suggest non-GF sauce? Does it affect taste or texture?
Hi Kayla, I personally suggest using tamari (which is gluten-free) because it has a more complex flavor profile. You can also make the recipe with soy sauce (which contains gluten) if you prefer or have access to that instead.
I have been trying toske crispy tonight for decades! Stumbled on your recipe and…success!!! OMG! THANK YOU! I can’t tell you how many times I’ve tried frying it to get crispy and all I ended up with was soggy tofu and a disgusting oily mess to have to clean up. Or a complicated marinating version which of ourselves made my tofu WETand impossible to get dry/crunchy! I used the tbls of soya sauce/tamari but didn’t taste it at all so next time I will coat with nutritional yeast and add seasonings like garlic powder, smoked paprika etc and as soon as it comes out of the oven I’ll add salt to give it some flavour. Anyway, AWESOME, SIMPLE AND IT WORKED! Thank you!! Finally! Tofu like I’ve wanted for decades!!!
You are so welcome, Mandy! It’s great that you found this recipe and loved it!
Oh so good! Just as good as the crispy tofu served in the Mystical Burrito Bowl at Pure Kitchen restaurant in Ottawa. I had this last night and today went looking for a recipe to make it myself. Luckily I found your recipe made without oil and only 3 ingredients! Thank you.
Glad you found the recipe. Thank You, Carolyn!
Added these to stir-fried (oil-free) vegetables. Perfect texture. I cut my cubes smaller so it only took about 25 minutes total cook time. I will likely add additional seasoning if I plan to each the tofu on its own. After trying many recipes for crispy tofu I’m happy to have one that is simple and really works without unusual ingredients. Thank you!
You’re so welcome, Jean! Glad you found this recipe.
Can this be done in an air fryer instead of oven?
Yes!
This was the first time eating Tofu, I wish it had more spices on it. All I could taste and smell was the yeast. They were easy to make and super crispy.
Thank you for the feedback, Maureen.
I agree with all the other comments: this was by far the crispiest tofu I’ve ever made! Tasty and easy! My new go-to tofu recipe! Thank you!!
Glad we all agree! ♥
Absolutely delicious. When I sampled it at flip after 20 minutes it was so good. 10 minutes later, the texture wasn’t as good and alot of the flavour was gone. Perhaps because I have a convection oven. Next time I’ll just do 20 minutes. I had some as a snack with avocado, lemon and more nutritional yeast 😋
This is the easiest and yummiest tofu! And I discovered it’s even tastier cold. I’m going to make this every week. Thanks, Caitin!
Yay! Thank you, Holly.
How would you recommend reheating leftovers?
To heat up leftover crispy tofu, you can use either the microwave or the oven.
To reheat in the microwave, place the leftover tofu in a microwave-safe dish and cover it with a damp paper towel. Microwave for 30 seconds to 1 minute, or until heated through. Be careful not to overheat the tofu, as it may become rubbery or tough.
To reheat in the oven, preheat the oven to 350F. Place the leftover tofu on a baking sheet and bake for 10-15 minutes, or until heated through. The tofu may not be as crispy as when it was first made, but it will still be delicious.
Note: If the tofu has been in the fridge for more than a few days, it’s a good idea to check for any signs of spoilage before reheating and consuming it.
My family loved this tofu. My VERY picky 3 year old was snatching them from the sheet pan. She turns down most foods that we offer her. I added Mrs. Dash chipotle seasoning. My son and bf said it tasted like chicken. I tried it with an Asian chili sauce and it was delicious. CRUNCHY I just need to adjust the temp with my stupid oven. I only needed to cook for 20 minutes and even that was pushing it. It’s not your instructions I just have a horrible kitchen stove. Thank you so much 😊
Glad it still worked out and the whole fam liked it, Danielle!
I tried this easy way to cook tofu and turned out really amazing. I highly recommend it.
Glad you loved it, Kalina!
Yum best tofu ever seriously
Wow! Thank you, Julie!
Can it be air fried?
Absolutely. You can air fry these on 400 and shake every 10 minutes until the desired texture/crispiness is reached.
So how is the recipe effected by using firm tofu instead of extra firm
The extra firm tofu has less water content which means it crisps up more easily, though you can still use firm tofu and press it well 🙂
Is there an alternative to the yeast? When tested for food allergies, this was one of my big affectors. Thanks for the alternatives though, I am new to all this so am excited to try new things.
Chickpea flour.
What can I use instead of soy sauce/tamari etc? I don’t have any of the stuff you recommended to use instead.
If you don’t have soy sauce or tamari, you can use a substitute such as liquid aminos, or even salt to add some flavor to the tofu. Keep in mind that the taste may be slightly different than the original recipe.