Disclosure: This post may contain affiliate links. I may earn a small commission for my endorsement, recommendation, testimonial, and/or link to any products or services from this website.
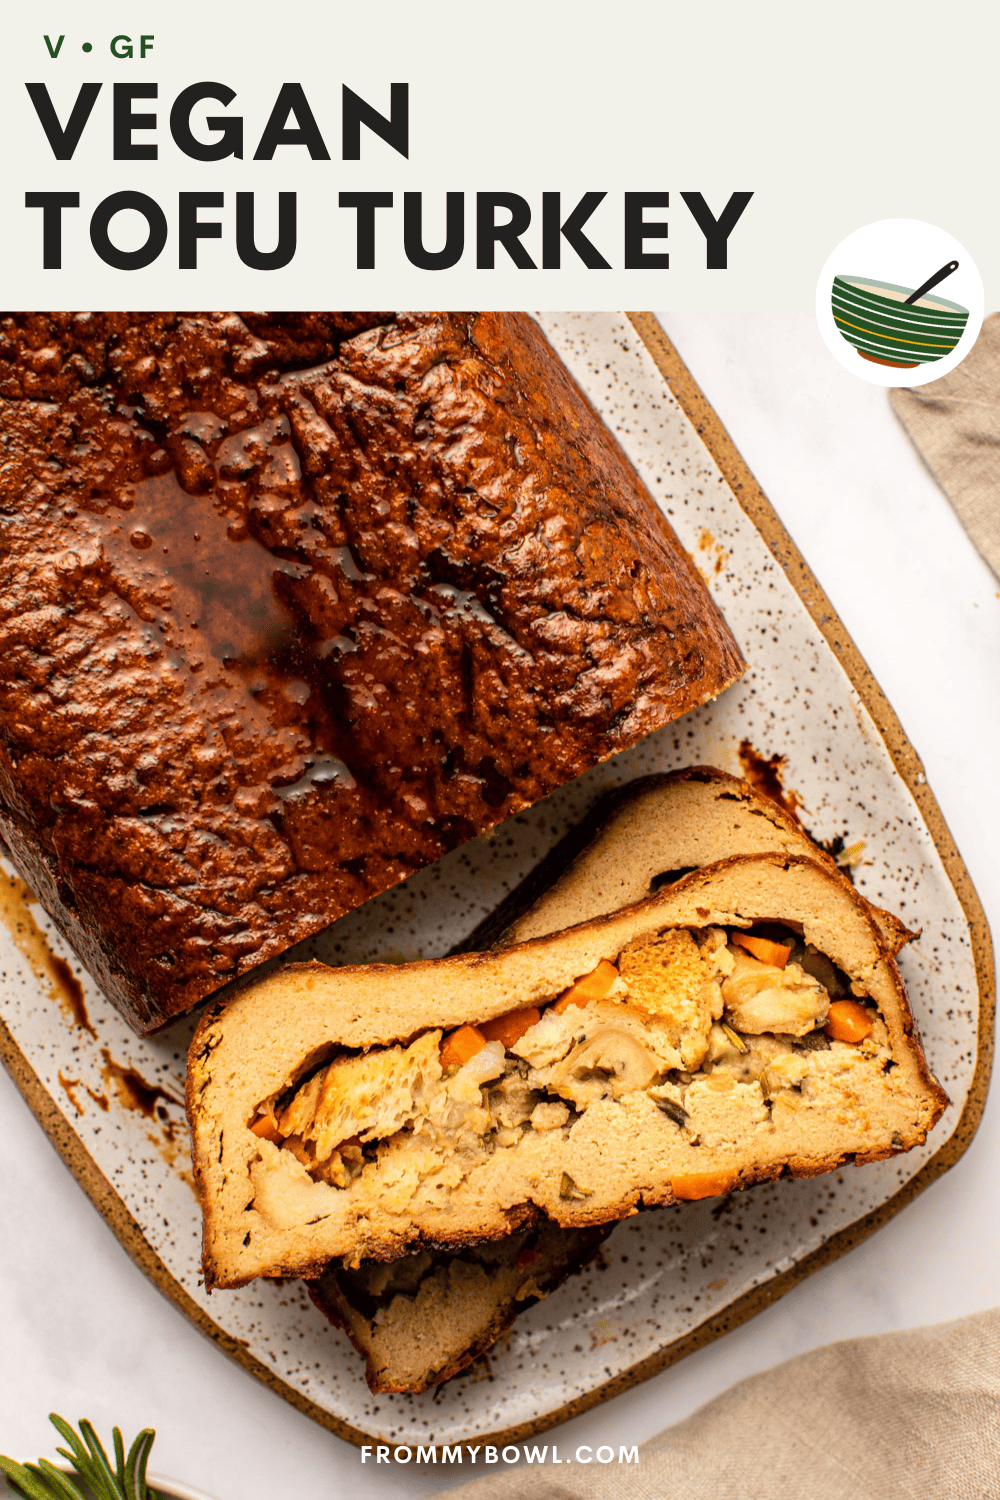
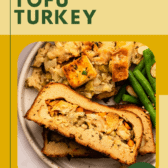
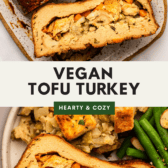
This Tofu Turkey is the best vegan and gluten-free holiday roast! It’s hearty, cozy, and full of juicy flavor. All you need is 10 plant-based ingredients.
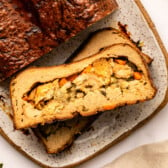
This post is sponsored by Nasoya. This Tofu Turkey makes the perfect centerpiece at any holiday dinner. It’s made with an outer “meaty” portion that has a browned crust and chewy bite, and is stuffed with a cozy, savory stuffing filling. You won’t believe it’s made without seitan and just 10 affordable ingredients.
Table of Contents
A Homemade Holiday Roast
Not everyone has access to the store-bought holiday roasts, which is why I wanted to make this homemade tofu turkey. Not only is it entirely vegan and gluten-free (no seitan!), but it’s also made with easily accessible ingredients, many of which you may already have on hand. And if you’re wondering if this recipe is really worth the effort, don’t worry! The prep only takes about 15 minutes, with the oven doing the remainder of the work for you. It’s the perfect plant-based main to share with friends and family at holiday get-togethers and is so delicious alongside all of the beloved holiday sides (think Butternut Squash Soup, Sweet Potato Casserole, Green Bean Casserole, and Cranberry Sauce!).
Ingredients for Tofu Turkey
As promised, this recipe is made with just 10 simple ingredients. Here are the 4 main components:

- Nasoya Extra-Firm Tofu: is simply the best, in my opinion. Nasoya’s Extra-Firm Tofu has the ideal consistency for making vegan meat replacements and will give this tofu turkey just the right amount of hearty texture. Plus, it’s vegan-friendly, organic, and non-gmo. Click here to find Nasoya in grocery stores near you.
- Chickpea flour: helps bring more density and “meaty” texture. It also acts as a binder (no eggs needed!) and helps to keep everything together and uniform.
- “Turkey” flavor: Made with a mixture of tamari, tomato paste, garlic, poultry seasoning (yes, this is naturally vegan!), vegan chicken-flavoured Bouillon, neutral oil, and a baste of balsamic vinegar. This brings all the tasty holiday “turkey” flavor, no animal-based ingredients necessary.
- Stuffing: Anything goes here – you can use a traditional stuffing like this Stovetop Stuffing or this Vegan Mushroom Stuffing, Fall Roasted Vegetables, or make it stuffing-free! If you do choose not to stuff the “turkey,” simply transfer all of the tofu mixture into the loaf pan and bake it for a slighter shorter second bake – it will cook faster than if it was stuffed.
How to Make Tofu Turkey
- Place the room temperature tofu in a mesh, nut milk bag, cheese cloth, or clean kitchen towel and squeeze as much liquid as possible out of the tofu.
- Blend the pressed tofu, tamari, garlic, tomato paste, oil, poultry seasoning, and chicken-flavored bouillon in a food processor until fully combined. Add the chickpea flour and process again until a thick, uniform mixture forms.
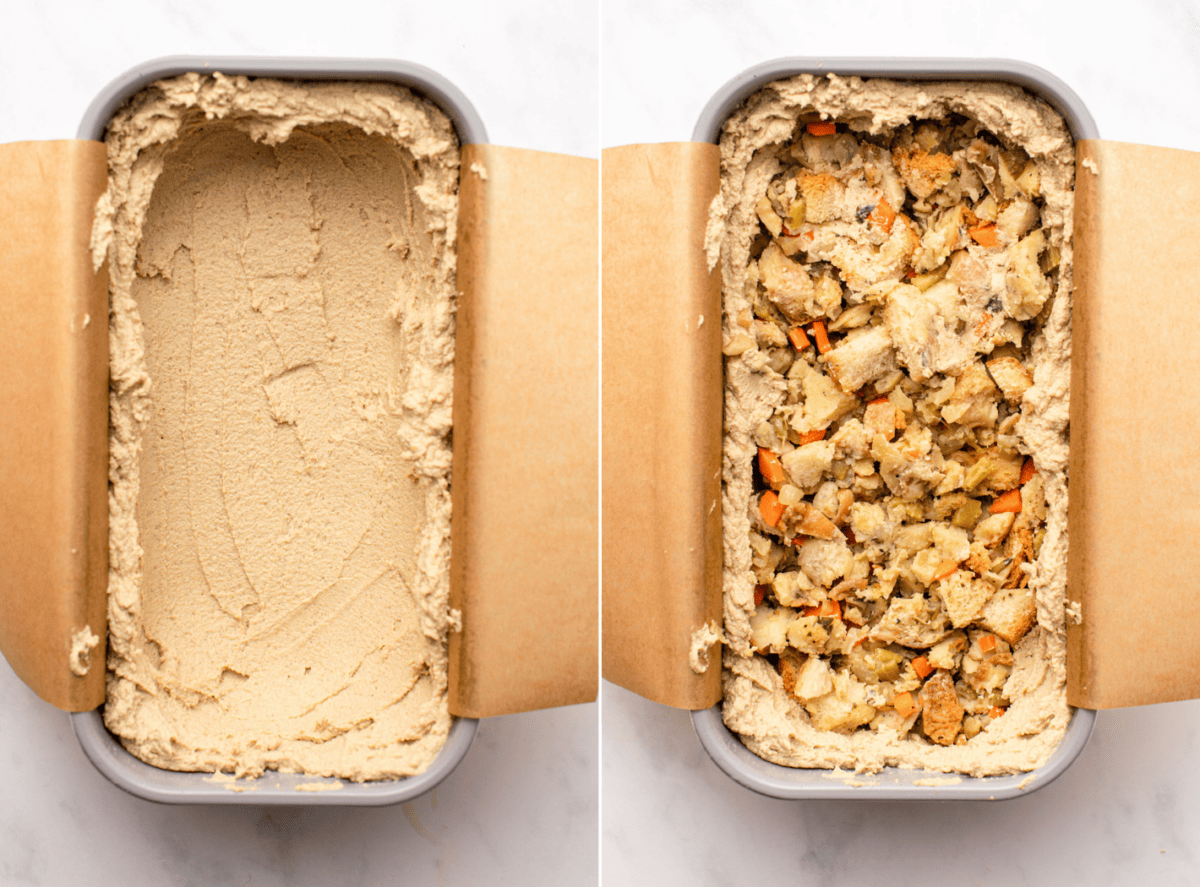
- Transfer 2/3 of the mixture to a loaf pan. Press the tofu mixture up the sides of the loaf pan to form a hollow center. Fill the center of the well with stuffing, then cover with remaining tofu mixture.
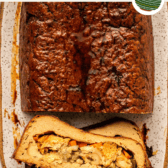
- Spread the top of the tofu turkey smooth, then bake for 30 minutes.
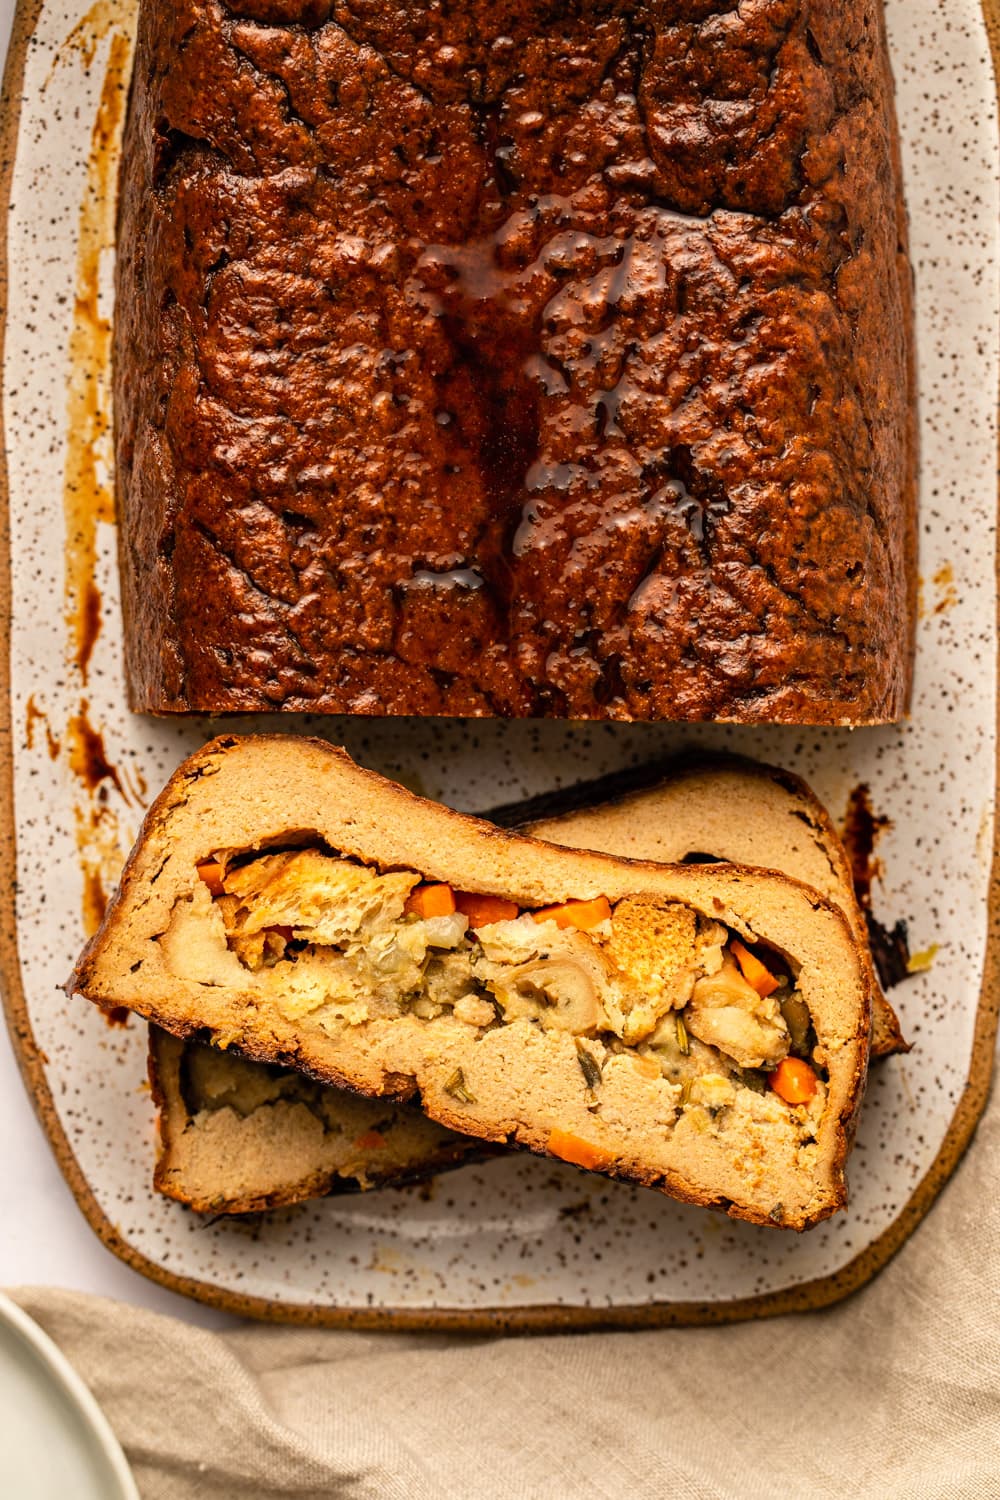
- Remove the tofu turkey from the oven, flip onto a parchment-lined baking sheet, brush the turkey in balsamic, then bake for another 30-35 minutes, or until browned and firm to the touch.
- Let set for 5 minutes, then slice and serve while warm, or as desired.
Caitlin’s Cooking Tips
- Make sure the tofu is as dry as possible. This will ensure the texture of the turkey is firm and chewy. For reference, I was able to squeeze just over 1 cup of liquid out of my tofu.
- Use a slightly damp spatula to spread the “batter.” To help spread the tofu mixture evenly across the top of the stuffed tofu turkey and seal the top to the sides, I find it easiest to slightly dampen the spatula with water or a bit of oil. This helps prevent sticking and makes the whole process quick and painless.
- Brown the crust with a quick spray of oil. After basting the entire surface in balsamic vinegar, you can also give the tofu turkey a quick spray of a neutral tasting cooking oil. This helps to caramelize and brown the crust even more!
Serving Suggestions
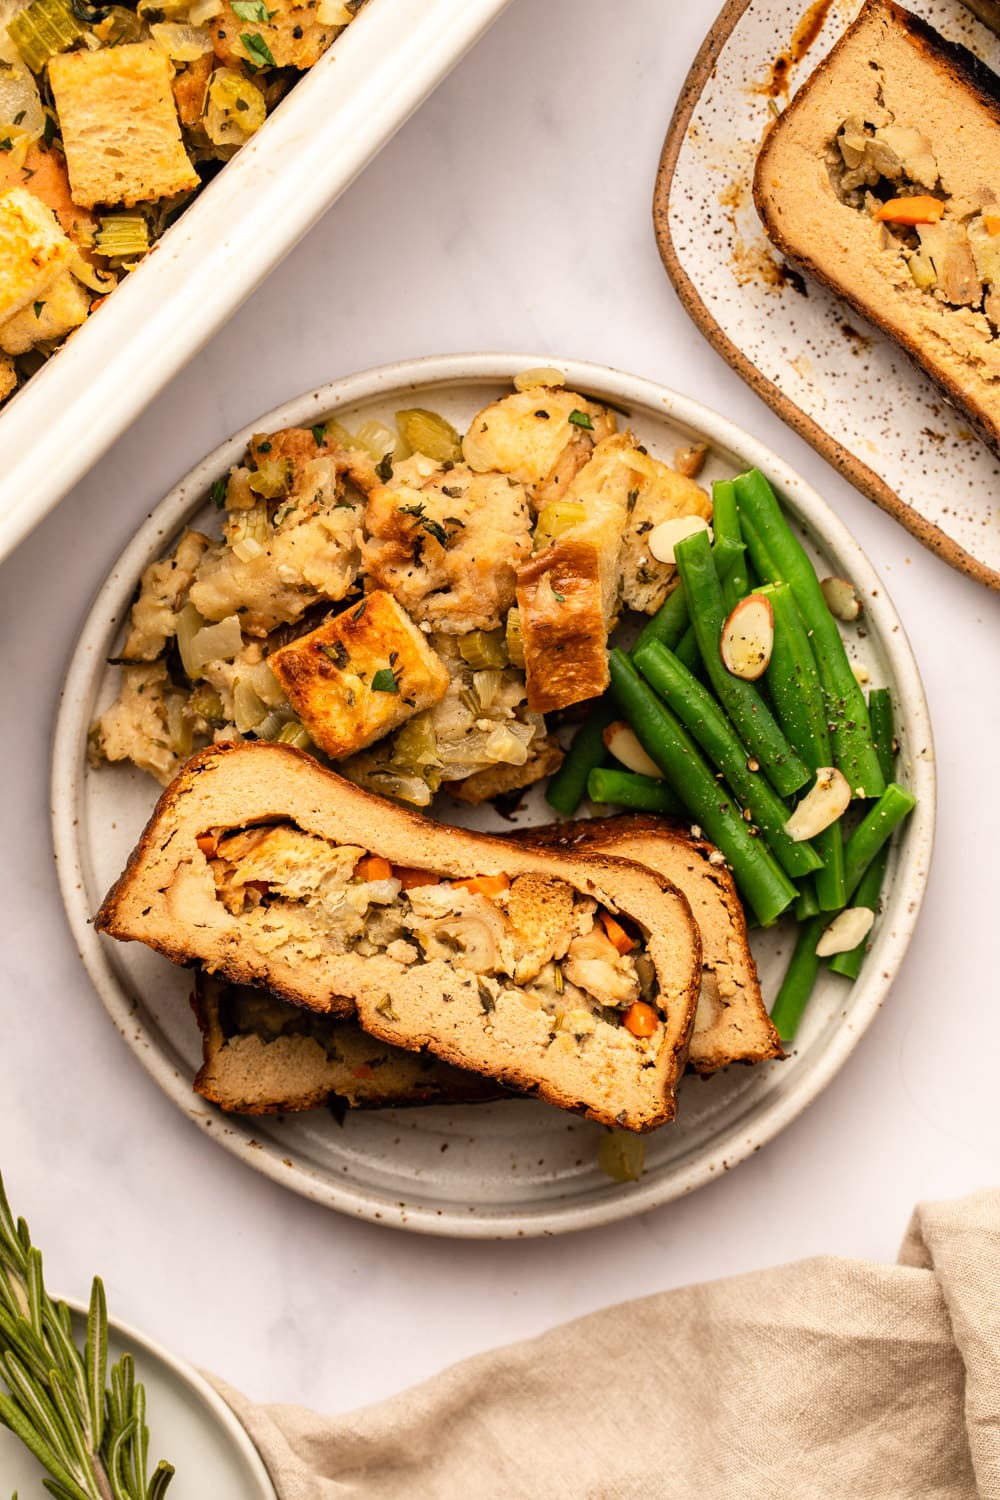
This tofu turkey is the ultimate holiday main for the plant-based eaters at any gathering and pairs perfectly with my favorite Tahini Gravy or Vegan Mushroom Gravy. Serve it alongside a generous helping of your favorite side dishes like Mushroom Stuffing, Roasted Honeynut Squash, Stovetop Candied Sweet Potatoes, and more.
If you’re looking for more vegan Thanksgiving main ideas, you’ll also love this Stuffed Acorn Squash, this Vegan Shepherd’s Pie, and these Vegan Stuffed Shells! Or, browse all of my favorite holiday recipes in this Vegan & Gluten-Free Thanksgiving Guide.
How to Store Tofu Turkey
This holiday roast is best served fresh, but leftovers can be stored in an airtight container in the fridge for up to 5 days. I haven’t tried freezing it, but if you do and experience good results, leave a comment below to let everyone know!
Leftovers will reheat best in individual slices in the microwave, or covered in a 350F oven until warmed through, about 15 minutes.
Recipe FAQs
Yes, it’s gluten-free! Unlike many store-bought roasts that are made with vital wheat gluten or “seitan turkey,” this vegan holiday roast gets it’s heartiness from a combination of tofu and chickpea flour, both of which are naturally gluten-free.
I wouldn’t recommend it. The vegan tofu turkey will stick to the foil and make it difficult to remove for the second bake. Please use parchment paper for best results.
When photographing this recipe, I used my Easy Vegan Stovetop Stuffing, but it’ll work with any stuffing recipe of choice.
This is likely a result of the tofu not squeezing enough liquid out of the tofu. To ensure as much liquid as possible is removed, cut each block of tofu in half before squeezing and squeeze each block one at a time. Additionally, make sure to purchase extra-firm tofu. If both of these things were done, pop it back in the oven and cook in 5-10 minutes increments until done in the center.
I have not personally tested it, but a few readers have shared success. Follow the recipe instructions through step 4, then cover the unbaked tofu turkey tightly with plastic wrap or aluminum foil. Refrigerate overnight, then bake as usual.
Enjoy! If you make this recipe and decide to share it on Facebook or Instagram, don’t forget to tag me @FromMyBowl + #FromMyBowl! I would also love it if you could leave a comment below with a recipe rating! Thank you for the support 😊
Tofu “Turkey”
Ingredients
- 2 14- ounce packages Nasoya Extra-Firm Tofu*
- 1/4 cup low-sodium tamari or soy sauce
- 3-5 cloves of garlic minced
- 2 tablespoons tomato paste
- 2 tablespoons avocado oil or other neutral oil
- 1 tablespoon + 1 teaspoon poultry seasoning
- 1 teaspoon vegan chicken-flavored bouillon
- 1 cup chickpea flour
- 1 1/2-2 cups of prepared stuffing*
- 1 tablespoon balsamic vinegar
Instructions
- Prep: Preheat the oven to 375F and line a 8×4 inch loaf pan with parchment paper (or nonstick cooking spray).
- “Press” the Tofu: Cut each block of tofu in half. Working with one piece of tofu at a time, place the “block” in a fine mesh bag, or in the center of a clean kitchen towel. Use your hands to vigorously squeeze as much liquid as possible out of the tofu – it’s okay if you crush it, as it will be blended later. Repeat with the remaining blocks of tofu; I was able to squeeze just over 1 cup (240 ml) of liquid out of my tofu.
- Make the “Turkey”: Add the pressed tofu to a food processor along with the tamari, garlic, tomato paste, oil, poultry seasoning, and chicken-flavored bouillon. Blend for a full 60 seconds, pausing about halfway to scrape the sides of the food processor. Once the wet mixture has fully combined, add the chickpea flour to the mix and process for an additional 45-60 seconds, until a thick and uniform mixture forms.
- Fill the Mould: Transfer 2/3 of the tofu mixture to the loaf pan; I find it easiest to evenly spread the mixture across the bottom of the pan first, then to use a spatula to press/scoop the base layer up the sides of the loaf, to create a well. There should be at least 1″ of “batter” on all sides of the pan above the base – this forms a well for the stuffing. Once you have your well, add the stuffing to the center of the mould and press it firmly down.
- Cover & Bake: Cover the stuffing with the remaining tofu mixture – it’s best to drop it in 1-2 tablespoon sized “dollops”, so it covers more surface area. Then, take a clean and slightly damp spatula and carefully spread the mixture evenly, sealing the top with the sides of the tofu mixture. If the spatula starts to stick, clean it off again. The top doesn’t have to be perfectly smooth, but there should be no stuffing peeking through. Once sealed, place the pan in the middle baking rack for 30 minutes.
- Flip, Baste, & Bake: Remove the “turkey” from the oven and reduce the temperature to 350F. Flip the pan onto a parchment-lined baking sheet. Use a pastry brush to lightly cover the top and sides of the “turkey” in balsamic vinegar. Return to the middle rack of the oven and bake for an additional 30-35 minutes, until the exterior has browned and the “turkey” feels firm to the touch.
- Set, Slice, & Serve: Remove from the oven and let sit for at least 5 minutes to set before slicing. Serve as desired; leftovers will keep in the fridge for up to 5 days.
Recipe Notes
- Tofu: it helps to leave the tofu on the counter to come to room temperature before pressing, as it won’t feel too cold on your hands. If you cut the tofu ahead of time, it will also naturally release more liquid, making your pressing job easier later!
- Stuffing: you can put anything in the center of your “turkey”, be it traditional stuffing or pre-cooked, roasted vegetables. Alternatively, you can choose not to stuff the “turkey” — if you do this, simply transfer all of the tofu mixture into the loaf pan. Keep an eye on the “turkey” for the second bake time, as it will cook faster than if it was stuffed.


My husband and I made this recipe for our Thanksgiving vegan meal today. We do not use any oils so we left it out and it turned out wonderfully. We made vegan stuffing which we put some of it in the tofu roast.
Thank you for this wonderful recipe. We will definitely be making it again!
Thanks Lori!
A family favorite, now a Holiday tradition. Thank you!
You’re so welcome!
I made this for 100 people and they are asking for the recipe.
Great recipe and great directions
Thanks
Wow! Thank you for making it and so happy everyone loved it, Paulette! ♥
Caitlin or any other followers – I was sitting here thinking about making this and wondered if just the tofu / chickpea mixture would make tasty “cutlets” instead of a roast. Have you or anyone else tried it out and do you have tips? I might give it a shot… will update if I do.
Absolutely, if you decide to try making cutlets with the tofu-chickpea mixture, it would be an experimental adventure. Since I don’t have specific feedback on that variation, your experience and any adjustments you make would be valuable for others who might want to try it as well. Don’t hesitate to share your findings, tips, and thoughts after giving it a shot. Happy cooking!
Made this last year and definitely doing to make this year!! It’s so perfect and delicious.
Thank you so much! Glad you enjoy it, Alex!
Can you use all purpose or ww flour instead of chickpea, I can’t get chickpea flour where I am.
You can substitute all-purpose or whole wheat flour for chickpea flour in the Tofu Turkey recipe. However, keep in mind that chickpea flour (also known as besan or gram flour) has a unique taste and texture, so the substitution may slightly alter the flavor and consistency of the dish.
Hi calitlin! This looks INCREDIBLE! It would be the perfect main for my vegan thanksgiving feast this year!! Quick question – I’m tragically allergic to soy, do you think I’ll get the same results if I use “chickpea tofu” (like tofu made of chickpeas no soy) ?? Or is there another sub??? Thank you so much!!!
My kid is allergic to chickpeas, peas, peanuts and lentils… is there something else we could use? Would almond flour work?
Hi Nicole! Unfortunately I do not think that would work in this recipe as chickpea flour has very unique properties.
Hi! Could I substitute chickpea tofu and coconut aminos? Unfortunately I have a soy allergy!
Hi Alice, you can substitute chickpea tofu and coconut aminos in the recipe to make it suitable for a soy allergy. Here’s how you can modify the recipe:
2 14-ounce packages Chickpea Tofu (instead of Nasoya Extra-Firm Tofu)
1/4 cup (60 ml) coconut aminos (instead of low-sodium tamari)
For the rest of the recipe, you can keep the other ingredients as they are.
Hi Caitlin, I want to make this voor Christmas, but how much stuffing shall I make? I do want to make It with stuffing. Kind regards Anita
I’d make a full recipes worth if you want extra on the side as well (which I personally like to have). I have a great mushroom stuffing recipe on the blog! https://frommybowl.com/the-best-vegan-mushroom-stuffing/
Really good, surprisingly easy. I didn’t stuff it.
Glad you liked it, Gigi!
I made this for the first time the other day, but I need to tweak my approach. I made it without stuffing in the middle and I could not get it to cook all the way through. It was very soft in the middle. Should I press more water out of the tofu? I have a tofu press that I use regularly. Or can I add something to make it more dry, like nutritional yeast? Or just back it longer?
Did you cut each block of tofu in half before squeezing the liquid out with the fine mesh bag? I would try that if you haven’t already. And be sure to use extra firm tofu if you can. If it’s still soft in the middle, you can pop it back in the oven in 5-10 minute increments until cooked through 🙂
This is so yummy that I have family members asking me to make them one now! Thank you so much!
That’s awesome! Thank you, Courtney!
So excited to try this for Thanksgiving!
Two questions: Does the recipe call for chicken flavored bouillon or actually bouillon concentrate? Also, do you think it will work with filling it with mashed potatoes?
This recipe calls for chicken flavoured bouillon like a bouillon cube or paste. I’d be concerned about the moisture content of the mashed potatoes being to high to allow the centre to cook through properly, though feel free to try it out! I’d love to hear how it goes 🙂
Hello! Is there a good substitute for the chickpea flour? I am on a low FODMAP diet and I can’t handle the chickpeas 🙁
I cannot recommend any other flours as I have only tested this with chickpea flour, however you can try another gf flour without chickpea flour, or another bean flour like lentil flour if you can tolerate it. I would love to hear how it goes if you try it!
Excited to try this recipe for Thanksgiving this year as one of my kids was recently diagnosed as gluten intolerant. I am curious if it is possible to prep the loaf the night before and then bake it the day of serving?
Hi Adra, this should keep well overnight before baking as long as it’s kept in the fridge. Let me know if you try it!
FYI I did prep the loaf the night before Thanksgiving, wrapped the top with foil, and left it in the fridge overnight. I baked it per the recipe instructions the next day. It turned out AMAZING!! My family raved about it and said I’m on the hook to make it every Thanksgiving 🙂 It is so much better than the store bought roasts and very easy to make. I stuffed it with this wild rice stuffing recipe and it paired perfectly: https://detoxinista.com/wild-rice-mushroom-stuffing-vegan-gluten-free/
Hi Caitlin- my entire family loved every recipe you have! this one being very special, a yearly favorite. I have a question this year. Have you ever tried Hi Protein Tofu? Do you think it would work?
I’m so glad it’s a go-to! I think high protein tofu would work great! You might not need to press it though as it tends to be drier
Made this for Canadian Thanksgiving and it was delicious! It seemed like a daunting recipe at first glance but came together super easily. I made a very simple bread stuffing to go with it. The taste and texture were great – I followed the recipe as written. Thanks for sharing!
Thanks for making it for Thanksgiving, Kerri. Glad you liked it!
Have made this for four holidays now and I LOVE it!!! It is easy and delicious. I make my own gluten free stuffing which is also easy. I have put the stuffing inside the roast and tried it without. I like it both ways.
Thanks, Nadine! So glad to hear you loved it. 🙂
This is amazing and so easy to make! Thank you for creating and sharing this. Every roast that is commercially available contains wheat and I just can’t eat them. Thank you for making this a simple and pretty inexpensive recipe. I made it for Thanksgiving and Christmas 2020, which I ate alone LOL But it’s great for leftovers!
Awesome! Thanks for leaving a review, Hope 🙂
The best roast for the holidays! Even my non-vegan family members grabbed a slice and loved it!
Thank you so much for the review, Hope! I love to hear that 🙂
Made this for Thanksgiving this year – amazing!!! Had many non-veg family members comment on how delightful it was, will definitely be making again and enjoying the leftovers for the rest of the week 🙂 I followed another commenters regimen of cooking it one day in advance for 40 mins and then 20 mins the day of, turned out great. Make it, you won’t be disappointed!
Awesome, thank you Hannah!